Guide 7 of 8
Publish your page and receive online orders
The public page allows customers to view the menu and order from their browser, without installing the app.
The screenshots show the French interface; the layout and features are the same in every language.
Documentation navigation
Chapter 1
Configure and publish the page
The restaurateur chooses the public address of his page, its appearance and the links used to measure the origin of visits.
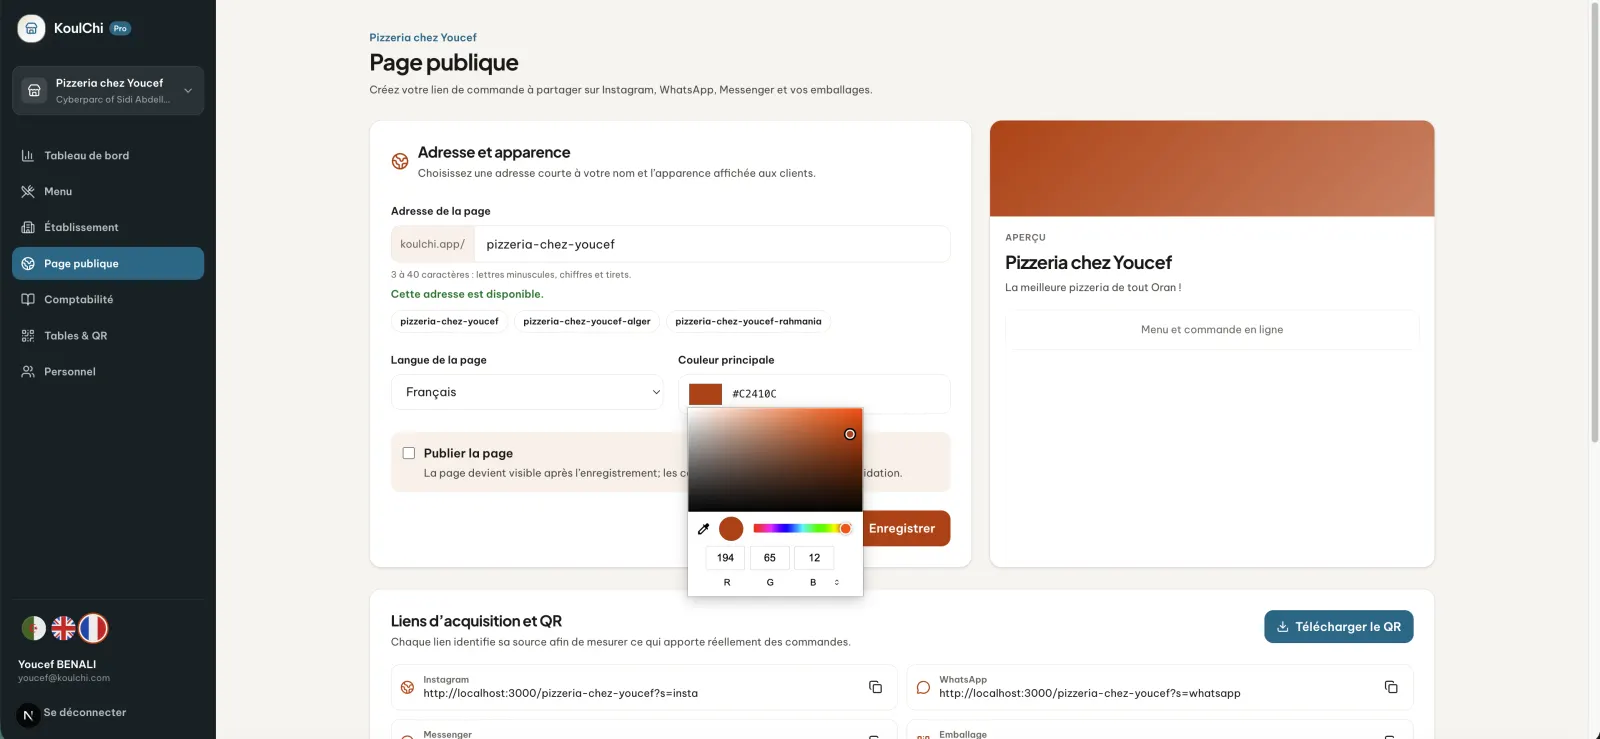
Step 1
Choose the page address
In “Public Page”, set a short and recognizable identifier. Associating the name of the restaurant with its city or neighborhood can make sharing easier.
In practice. Choose an address easy to dictate and publish. “pizzeria-chez-youcef-oran” associates the brand with the city; if several establishments exist in the same city, a district like “es-senia” makes it possible to distinguish them without excessively lengthening the link.
Open full-size image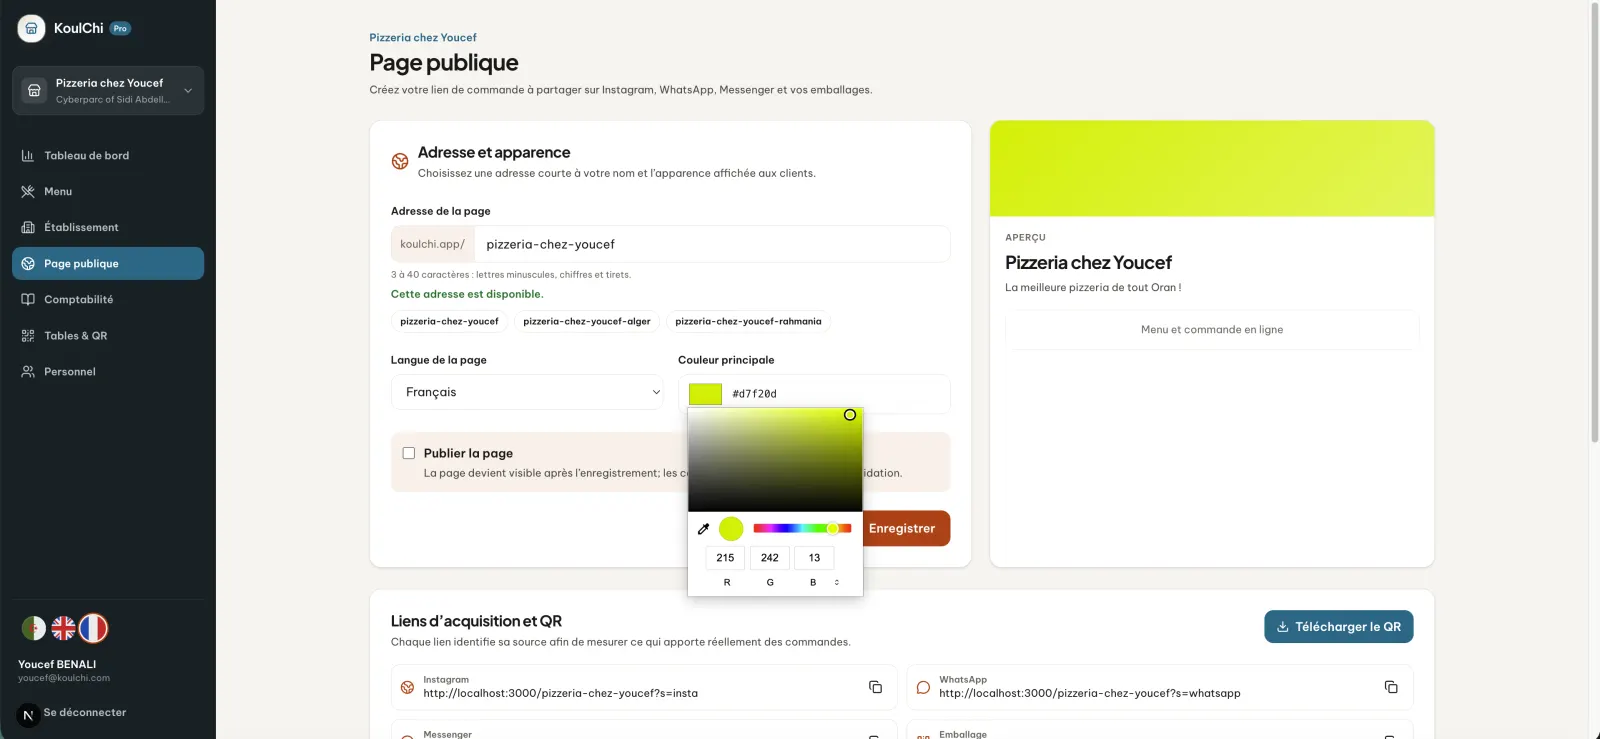
Step 2
customise then publish
Choose a colour with enough contrast, enable publishing and save. The page becomes accessible after validation of its public address.
In practice. The colour should represent your identity while maintaining sufficient contrast on buttons and text. Avoid shades that are too light: a readable page remains more comfortable, especially for people who have difficulty distinguishing certain colours.
Open full-size image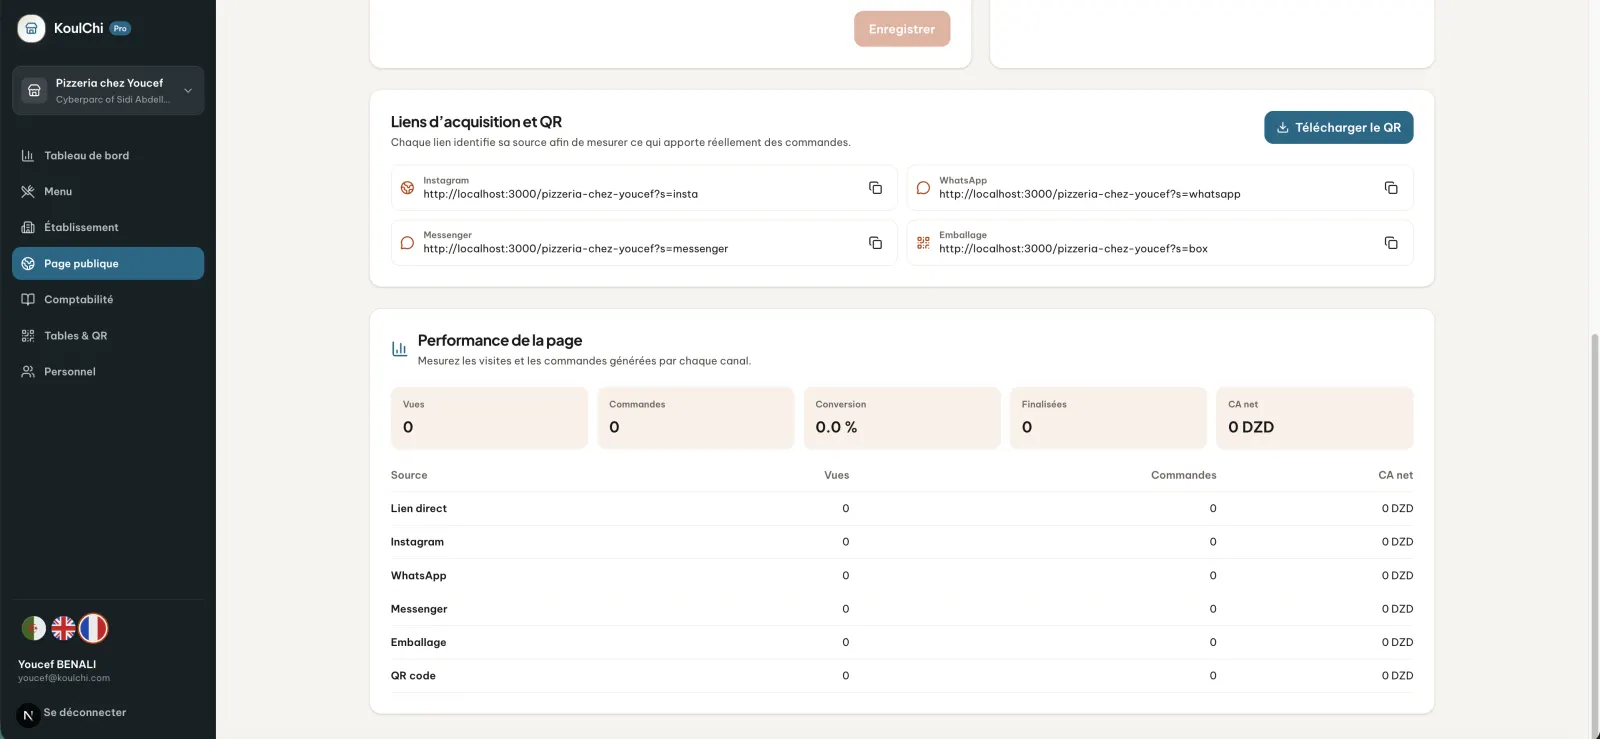
Step 3
Prepare sharing links
Copy the main link or a variation identifying the channel it came from. Also download the QR code of the page for your printed materials.
In practice. Link variations allow you to distinguish a visit coming from Instagram, Facebook or another channel and adapt your communication. The page's QR code can also be printed on packaging, posters and business cards.
Open full-size image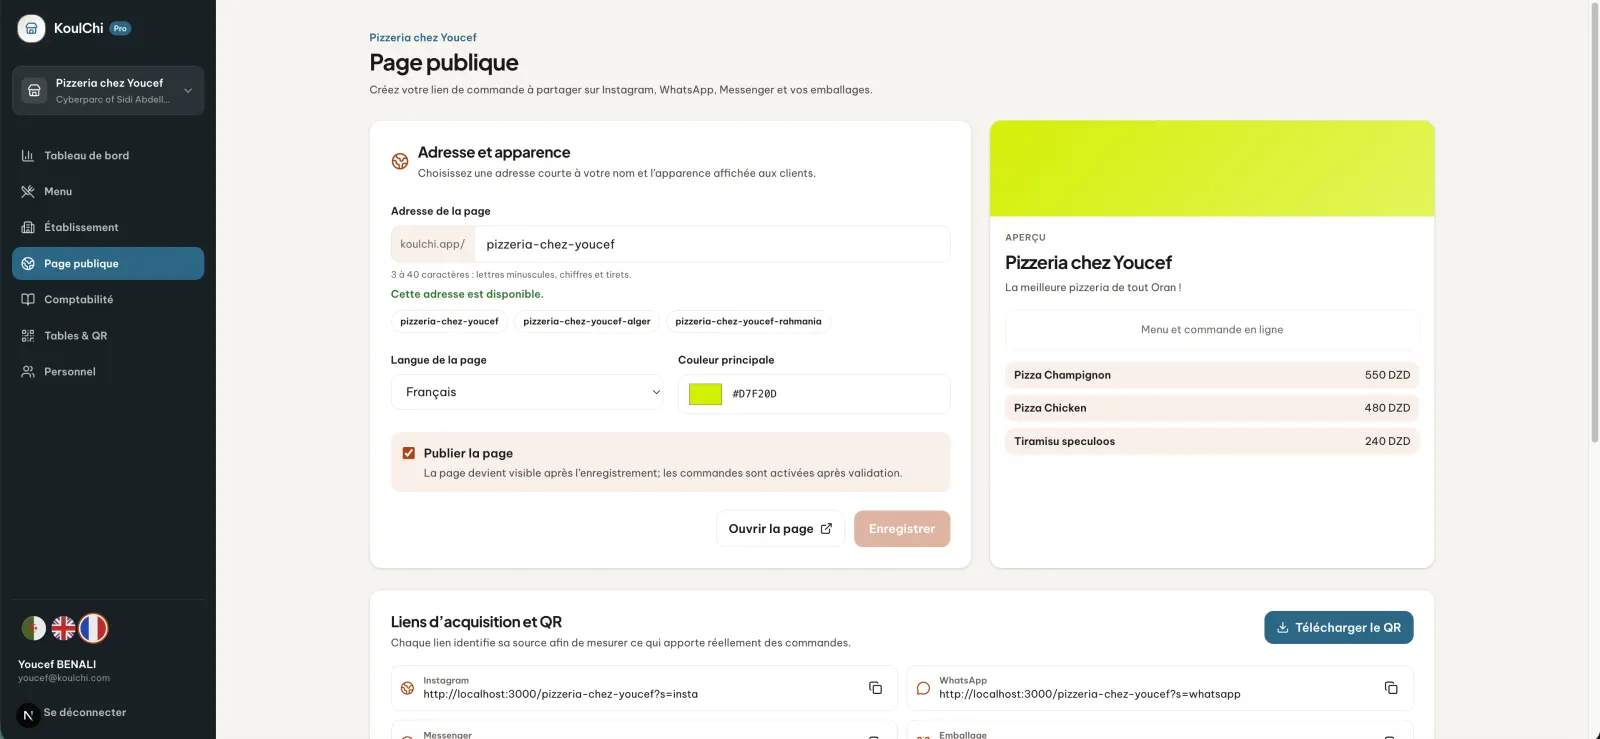
Step 4
Open validated page
When the publication is validated, use “Open page” to control the result visible to customers.
Open full-size image
Chapter 2
Order from a browser
The public page includes the identity, information and catalogue configured by the restaurant.
Step 5
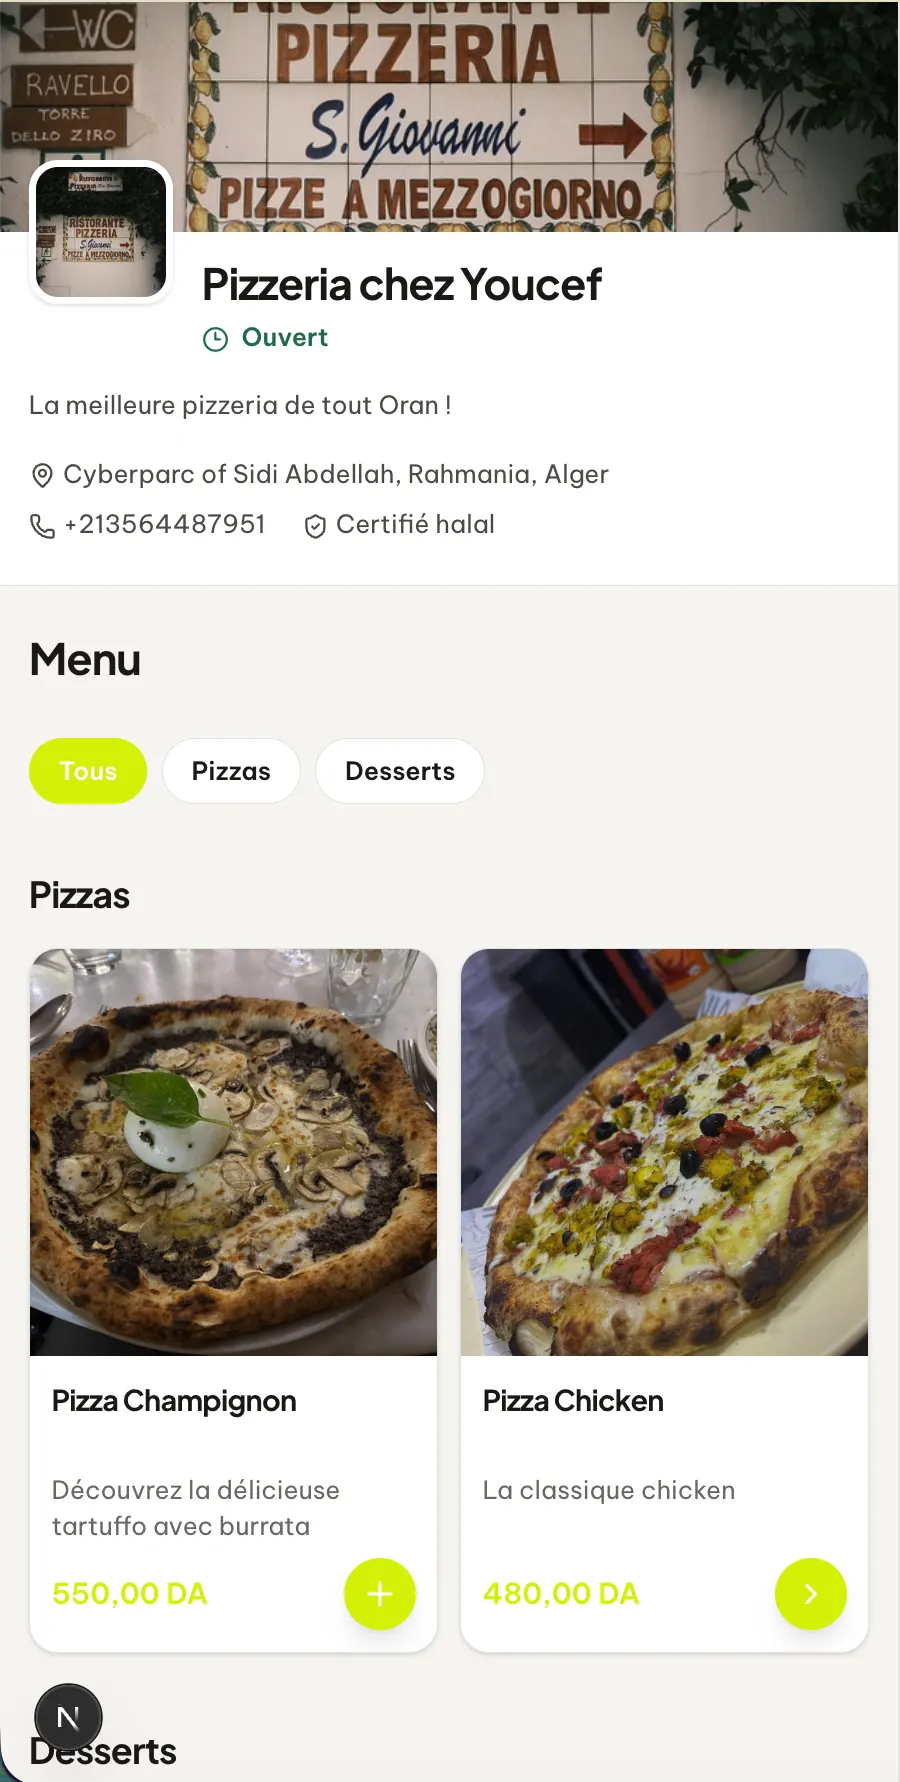
Discover the restaurant page
The customer consults the photo, information, categories and menu from the shared link or a QR code.
In practice. This same page opens after a table scan, a counter scan or a click on the link published in your social networks. It thus transforms each physical or social support into direct access point to the menu.
Open full-size image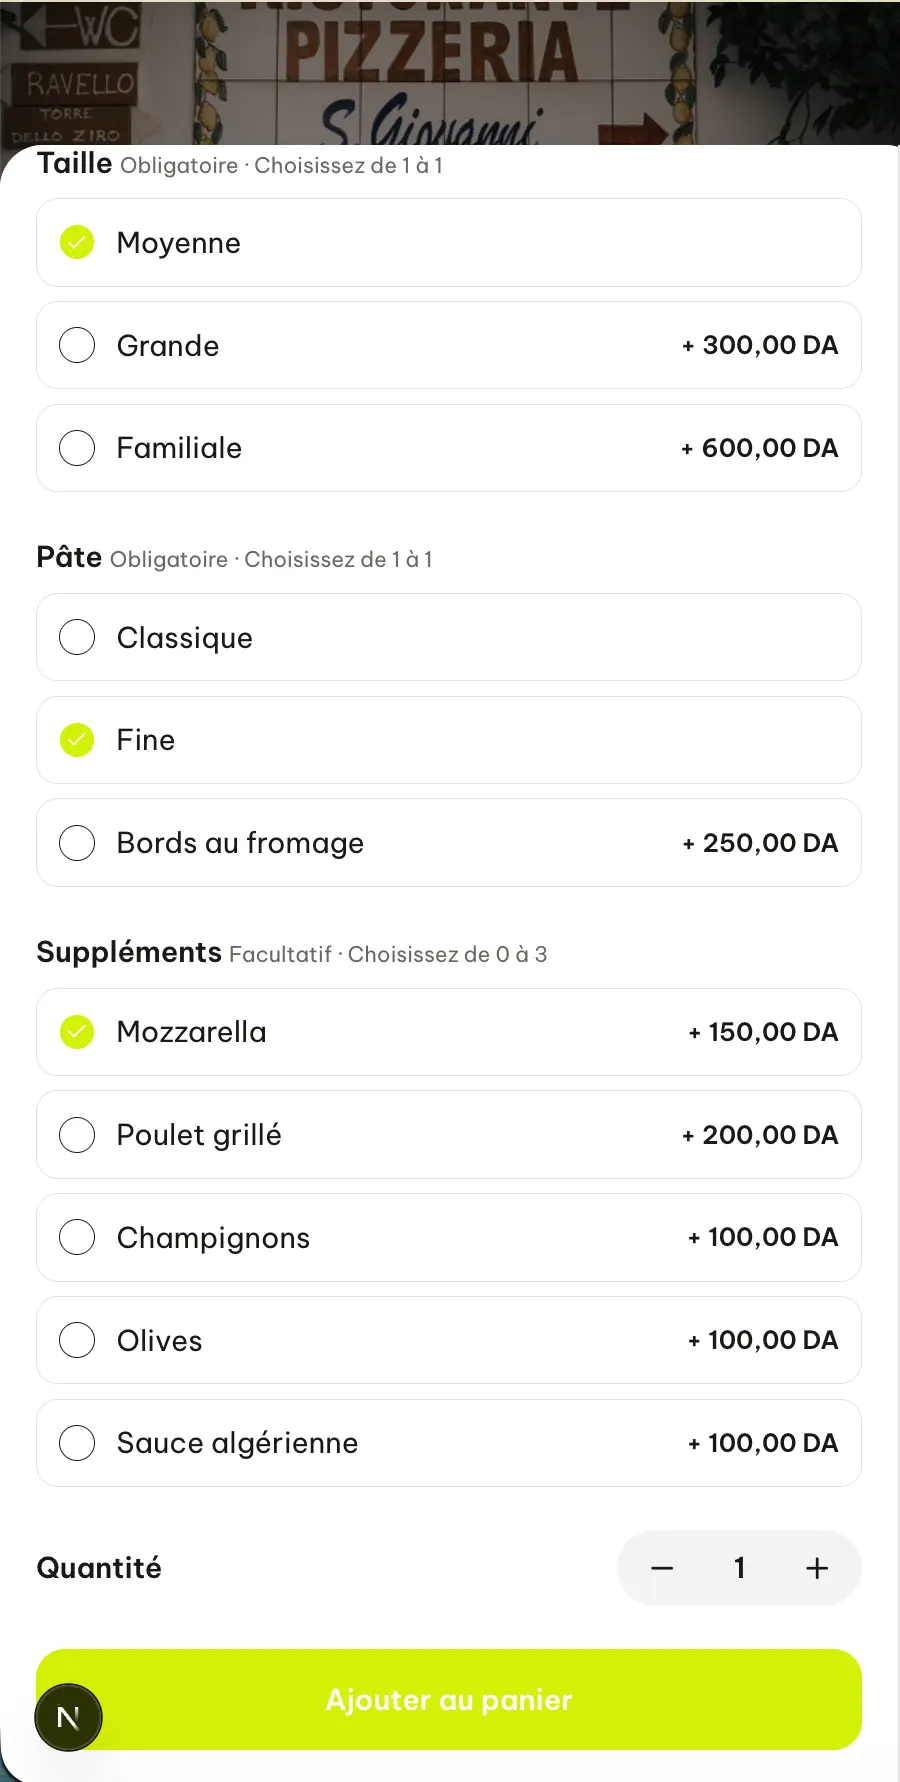
Step 6
customise a product
He chooses the product then selects the options and supplements configured by the restaurant.
Open full-size image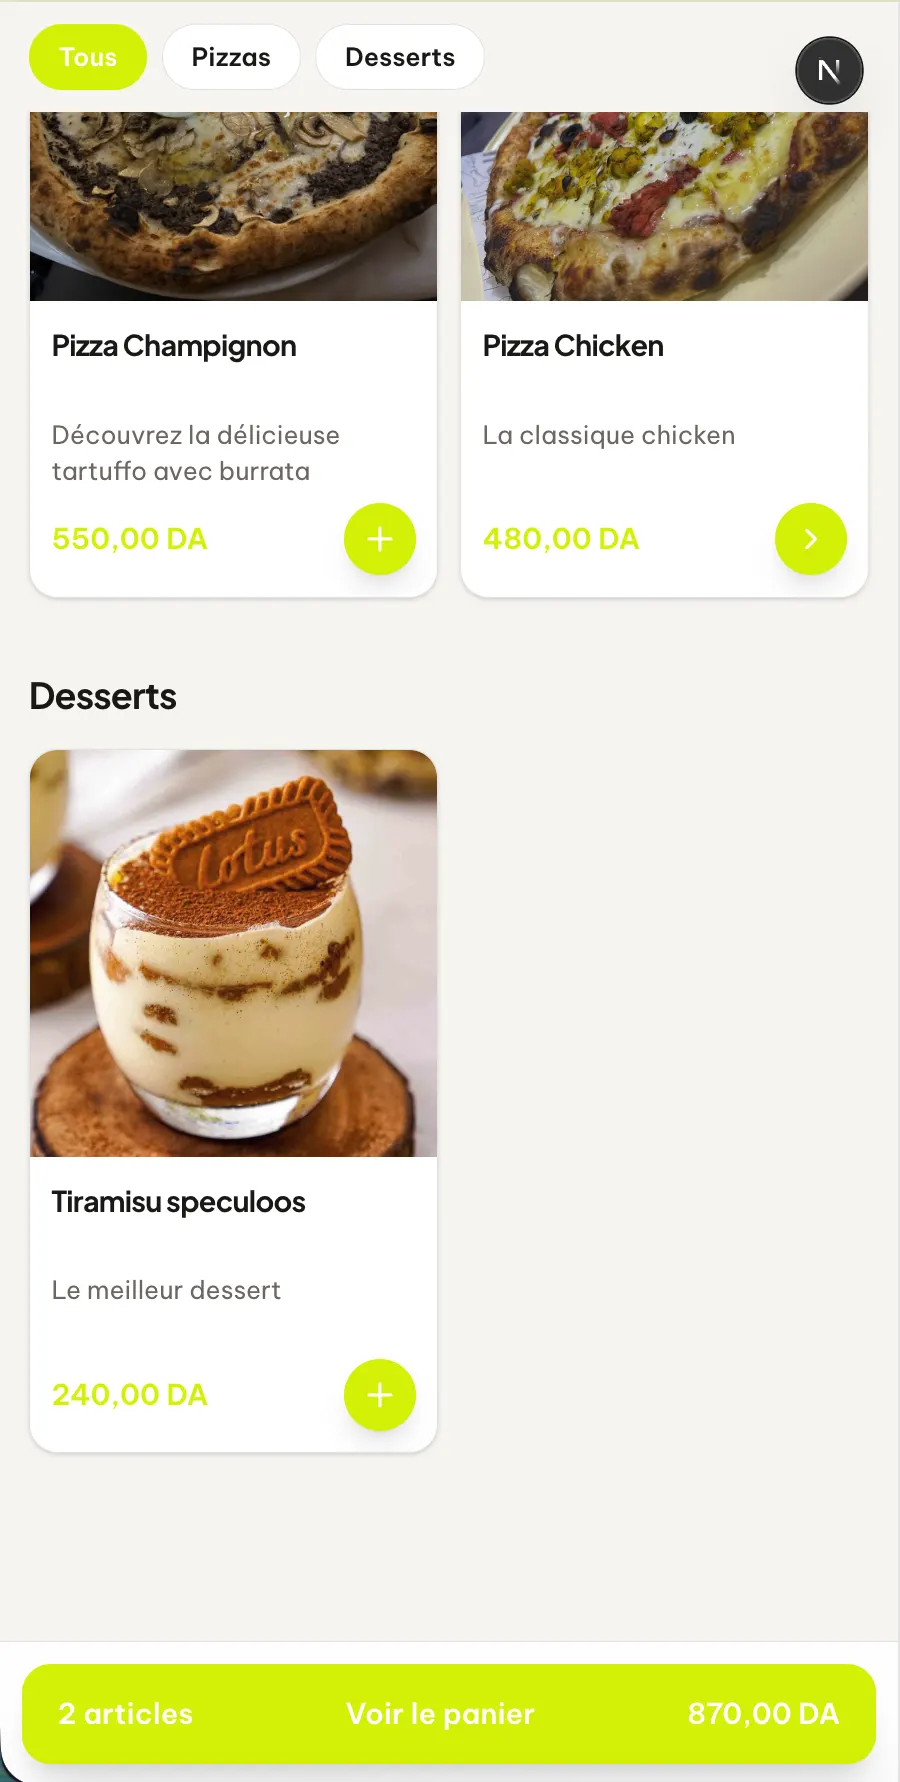
Step 7
Add multiple items
He completes his basket with other products, then opens the summary.
Open full-size image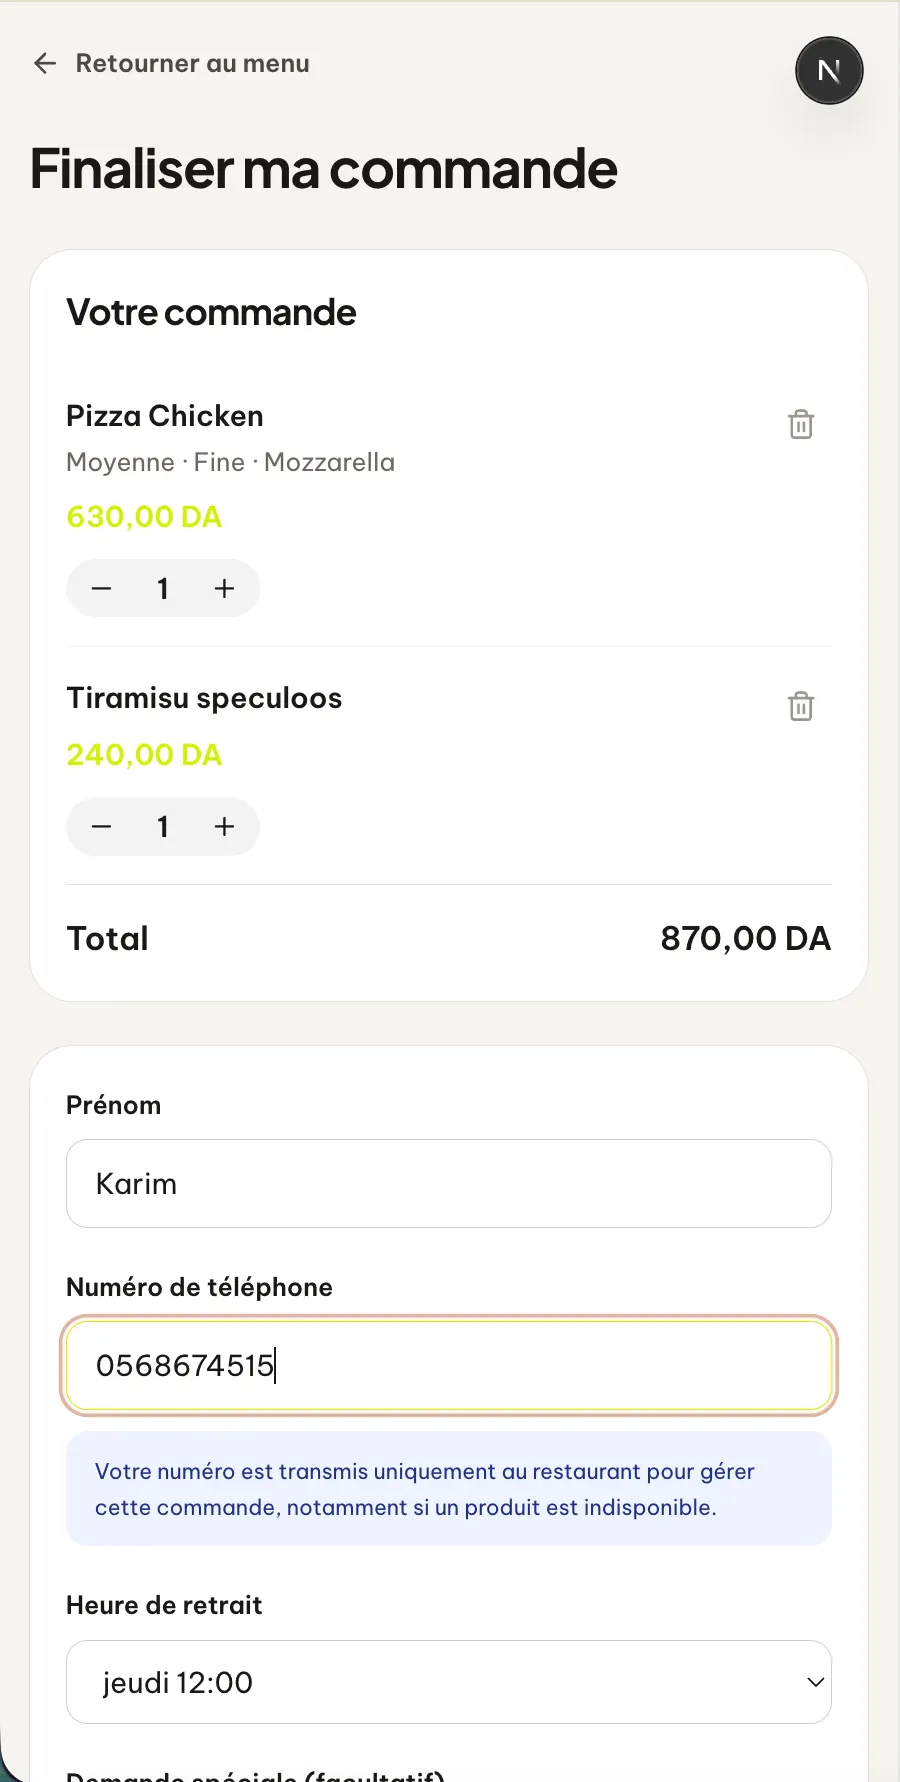
Step 8
Enter pickup details
In the basket, the customer indicates their first name, telephone number and desired time before continuing.
Open full-size image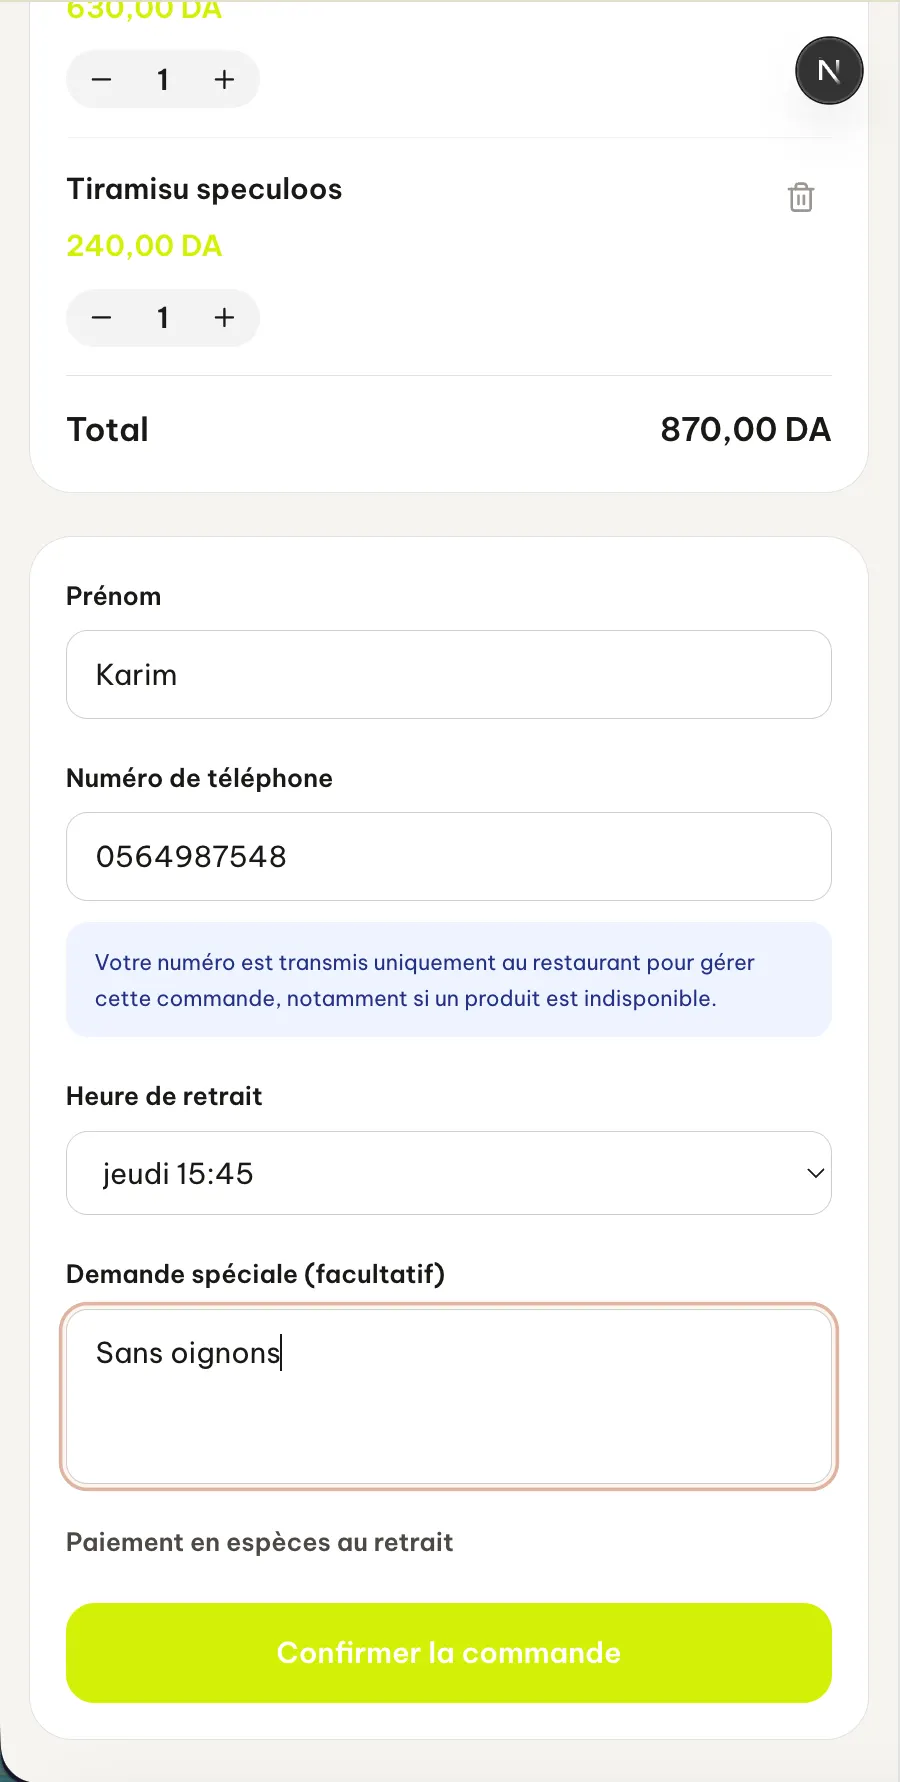
Step 9
Confirm order
The customer optionally adds a note for the kitchen, checks the schedule and confirms the order without creating an account.
In practice. The course remains accessible without downloading and without creating an account. An occasional customer can choose their pickup time, send an instruction such as “no onions” and quickly confirm from their browser.
Open full-size image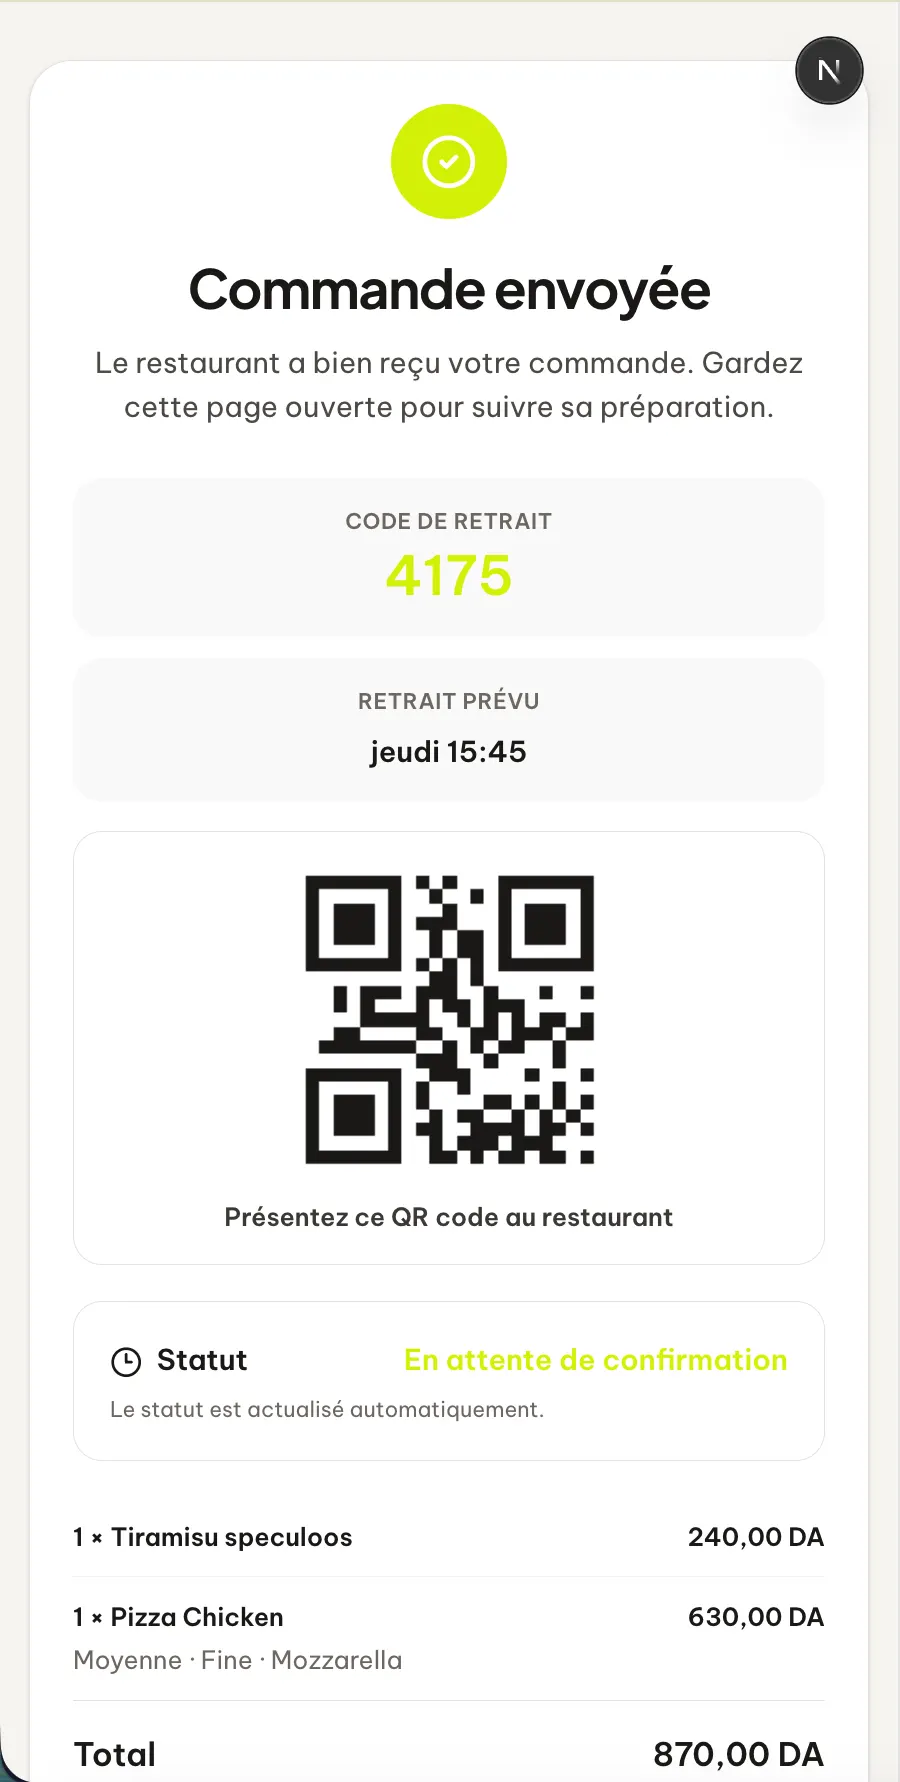
Step 10
Track order
The tracking page displays the reference, the pickup QR code and the current status of the order.
Open full-size image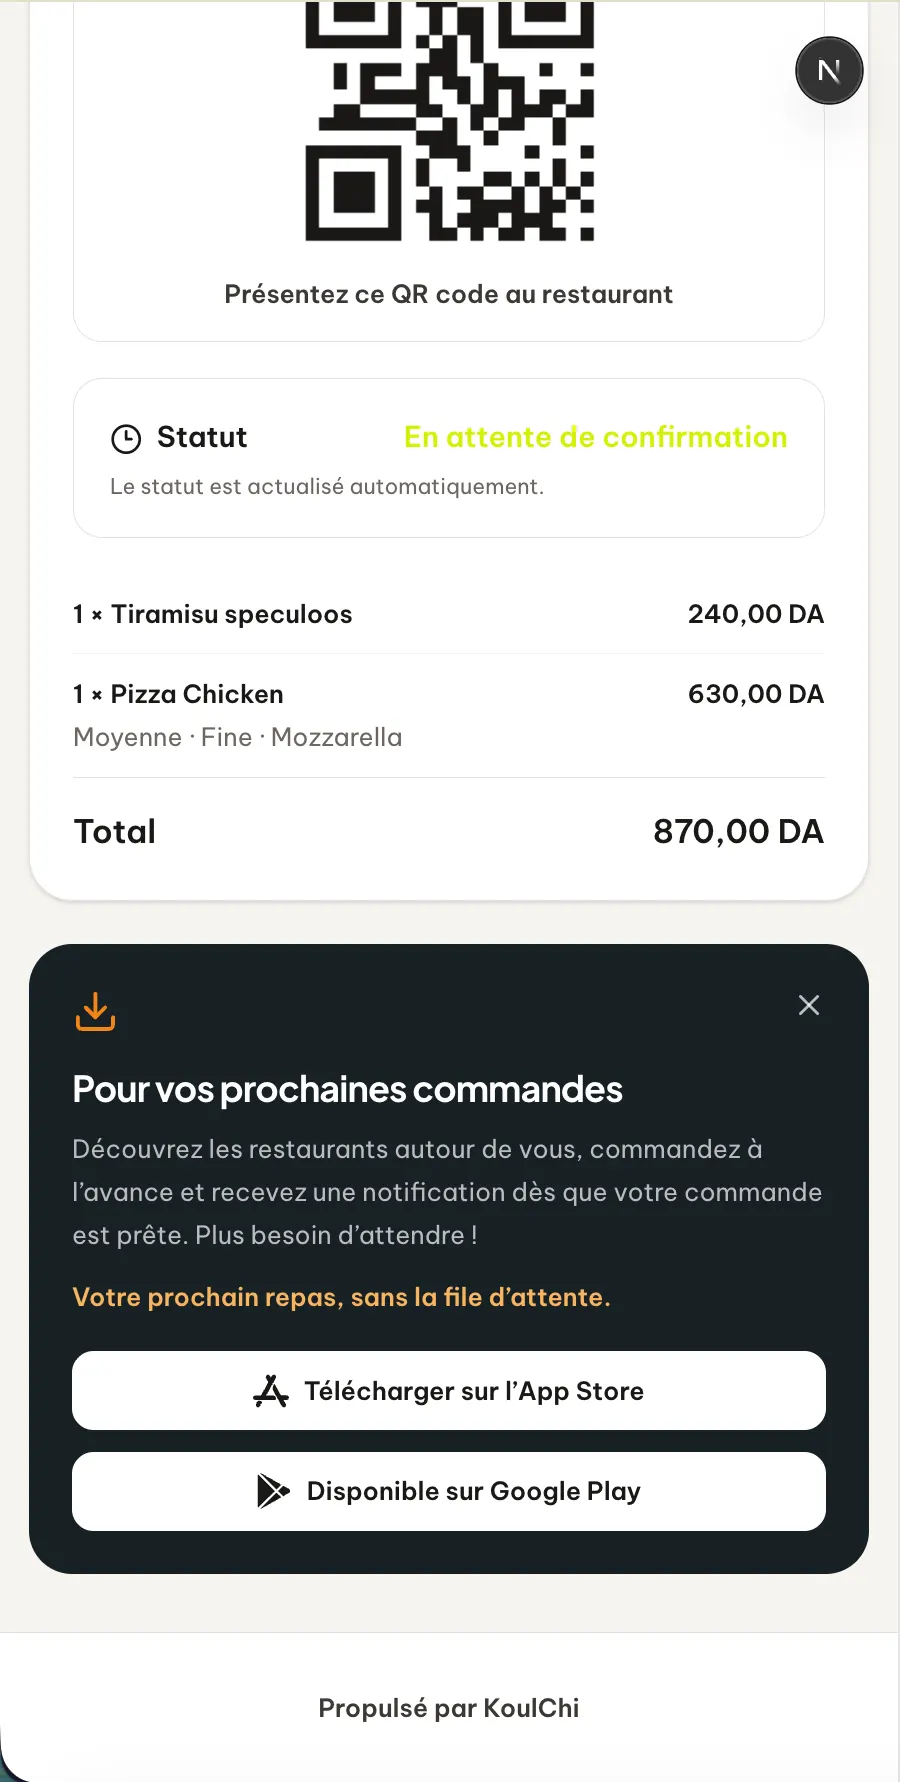
Step 11
Find the KoulChi application
An invitation allows the customer to download the KoulChi application if they wish to find a complete mobile experience.
Open full-size image
Chapter 3
Process the order on the restaurant side
The web order joins the same KoulChi Pro flow as the other channels and its status changes are reflected on the customer page.
Step 12
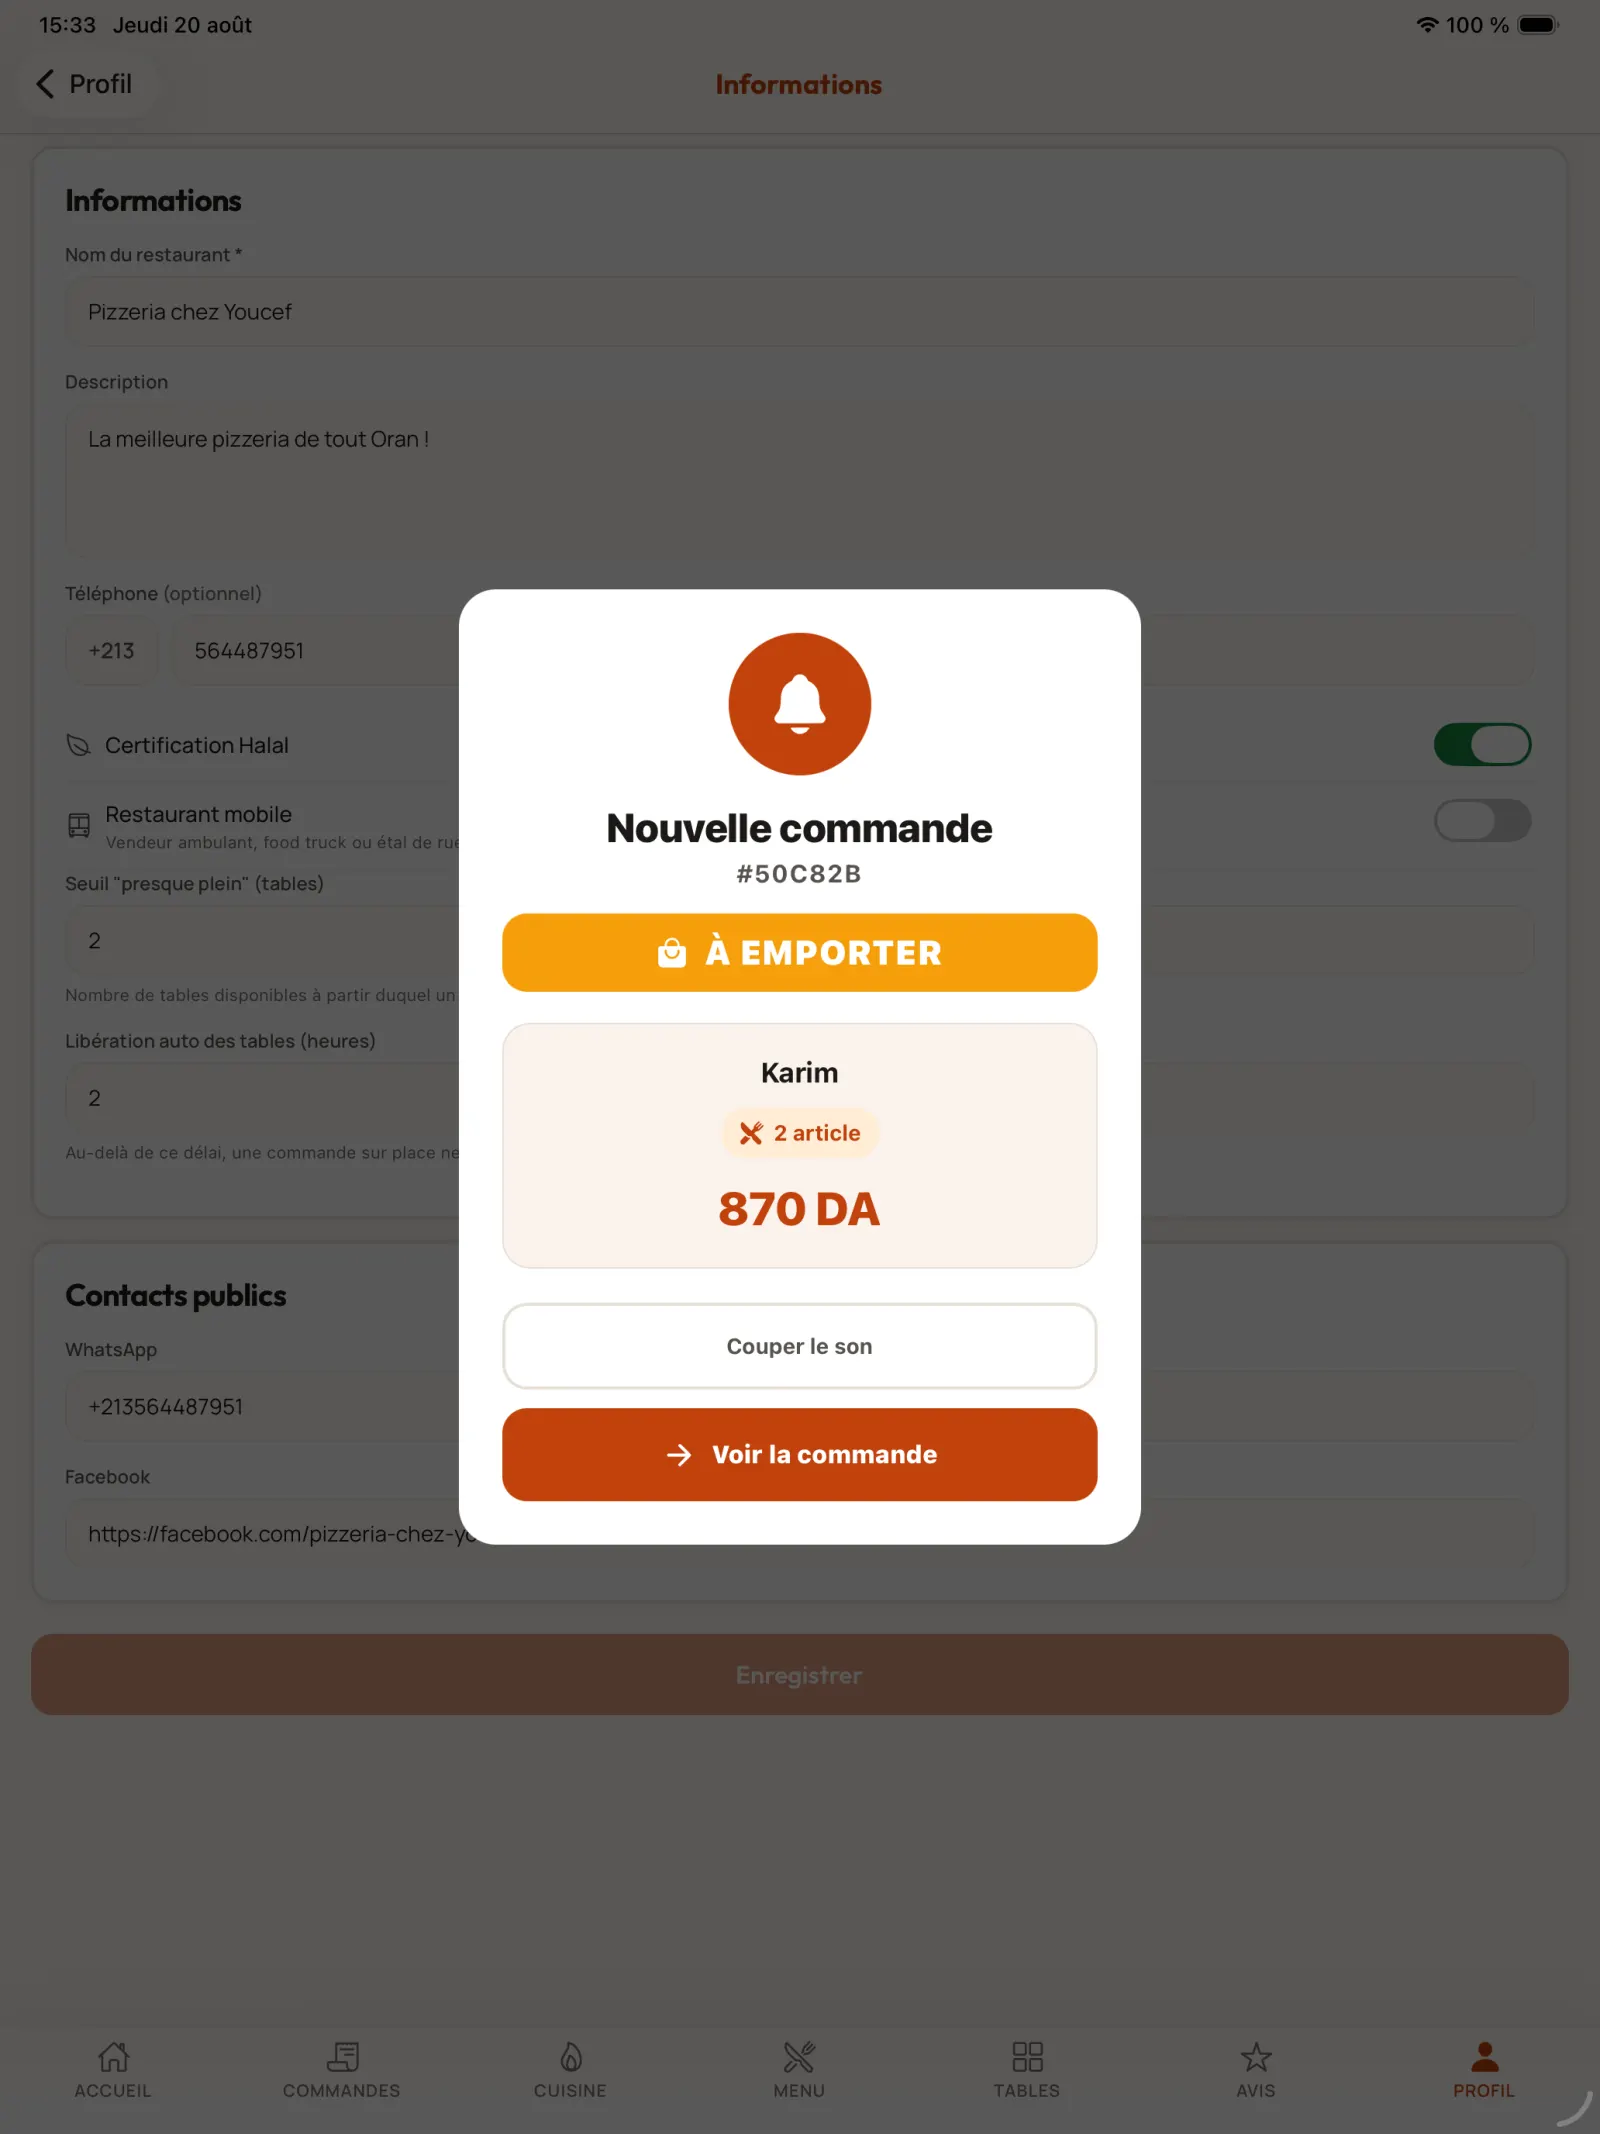
Receive new order alert
KoulChi Pro displays an audio alert with the customer's name. Select “View Order” to review it.
Open full-size image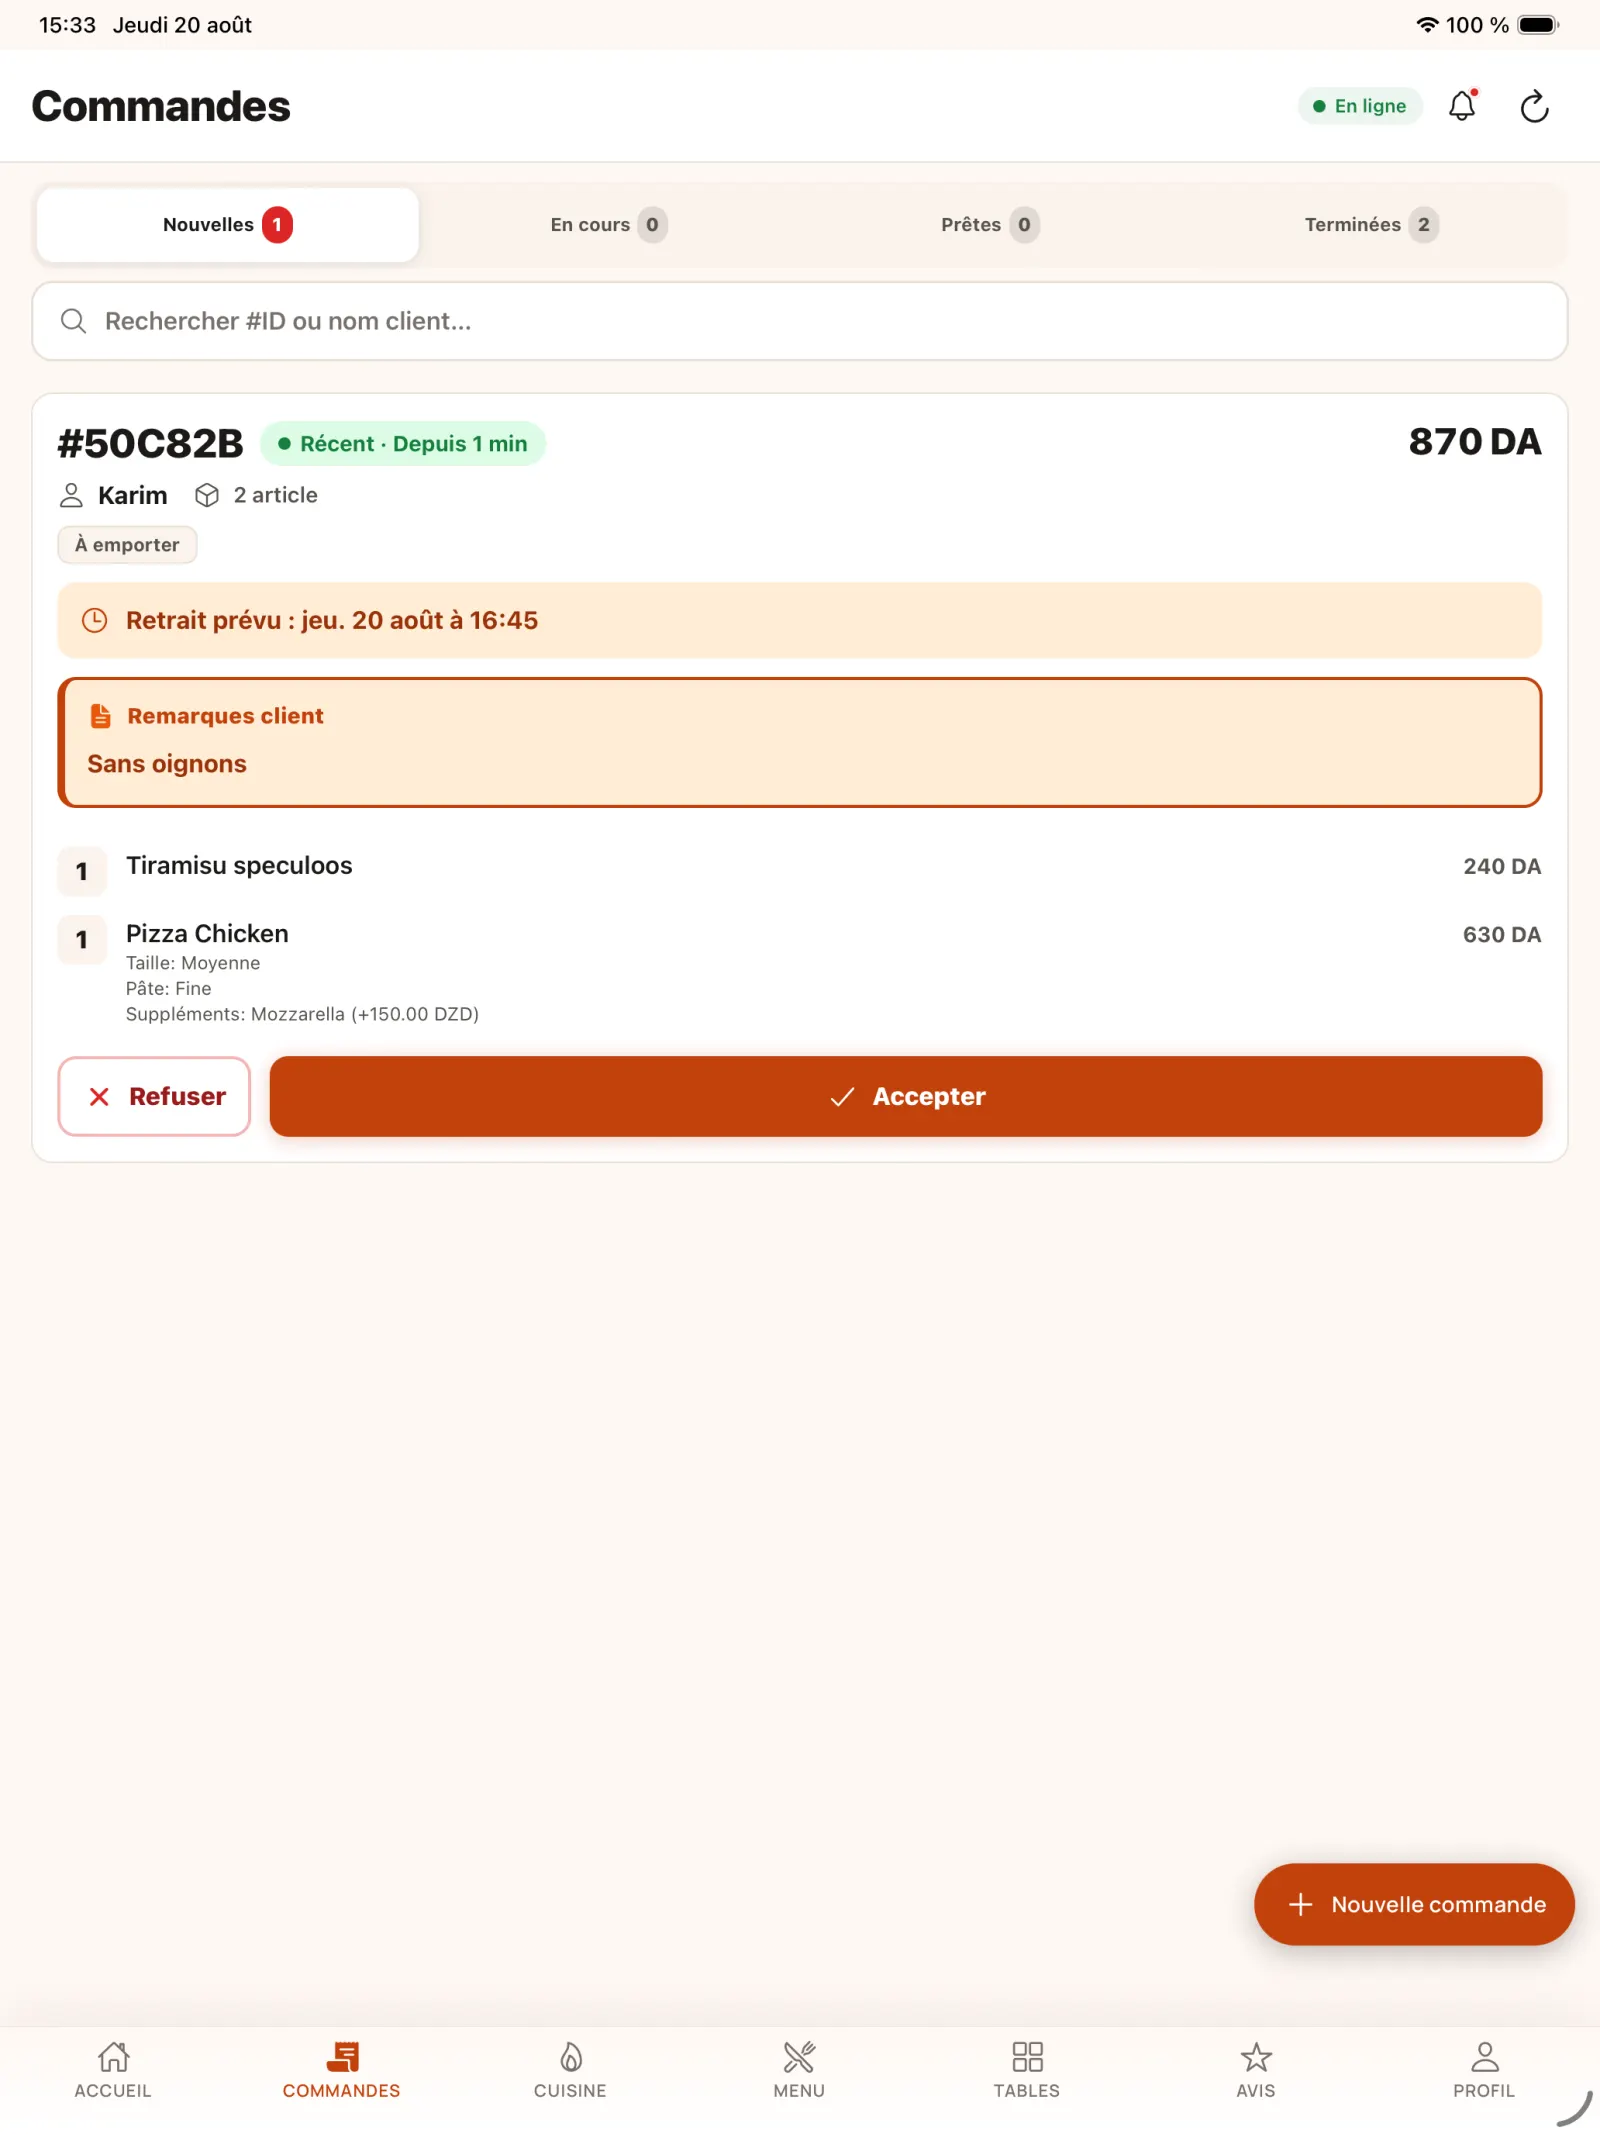
Step 13
Check web order
Check the pickup time, products, options and customer comments, then send the order to the kitchen.
Open full-size image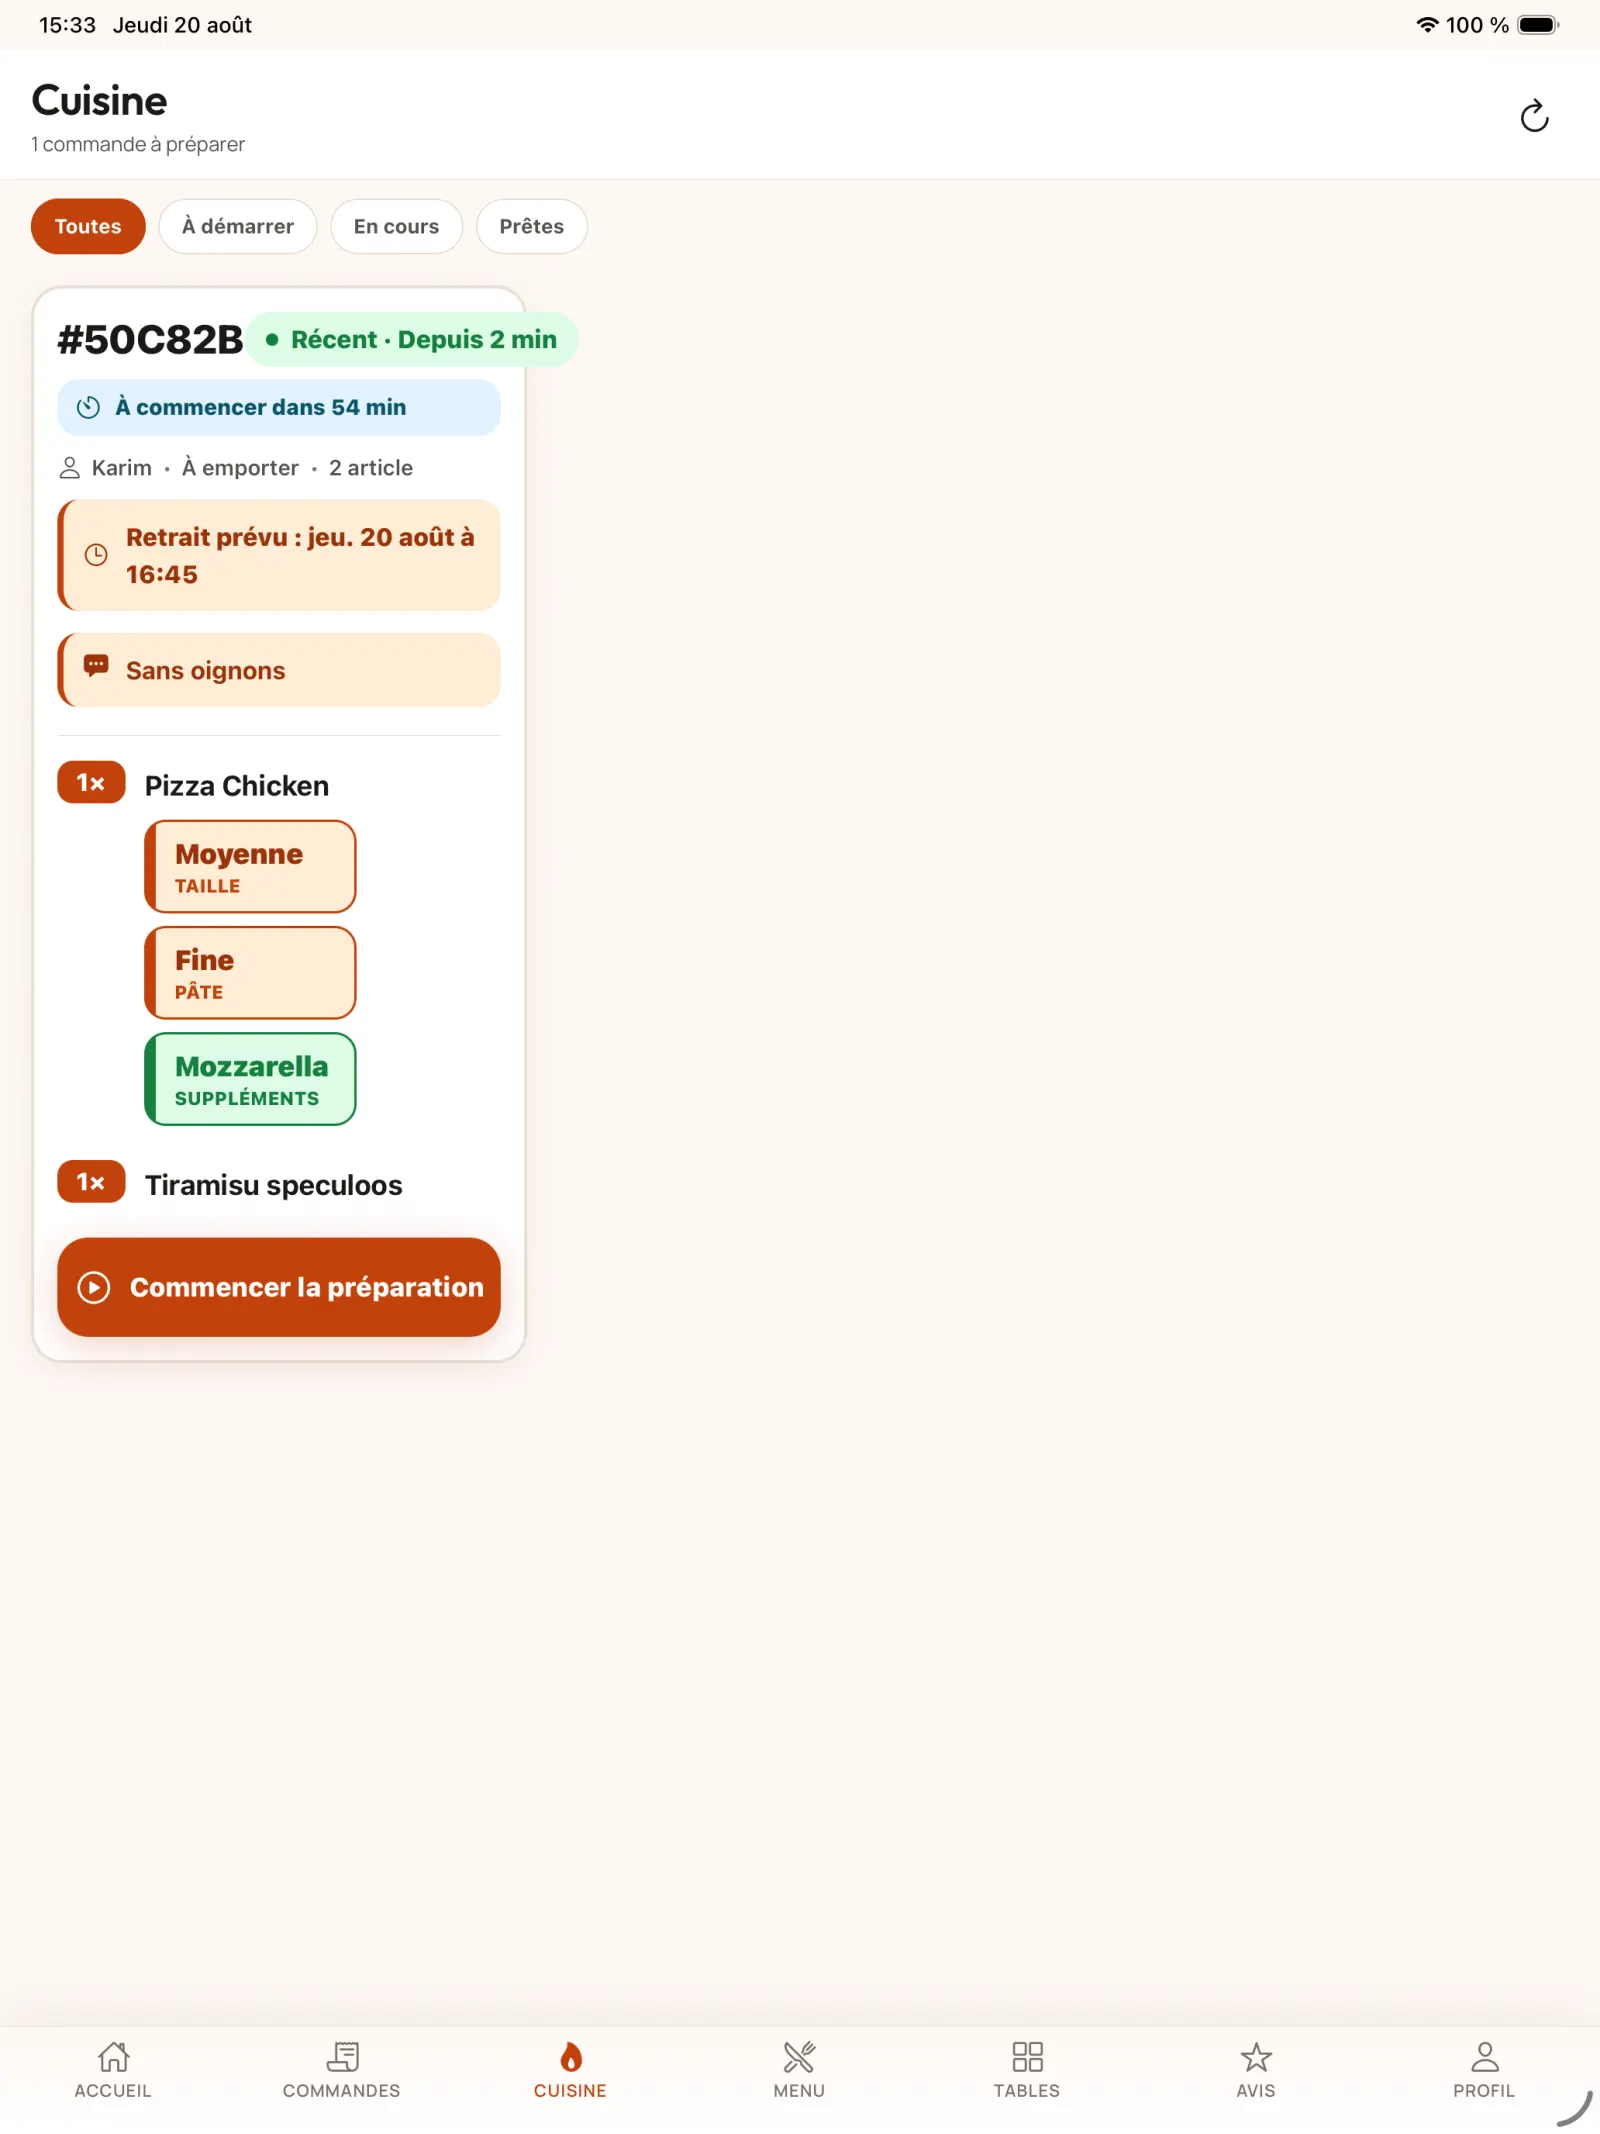
Step 14
Display the order in the kitchen
The kitchen view shows the items and customisations from the web order.
Open full-size image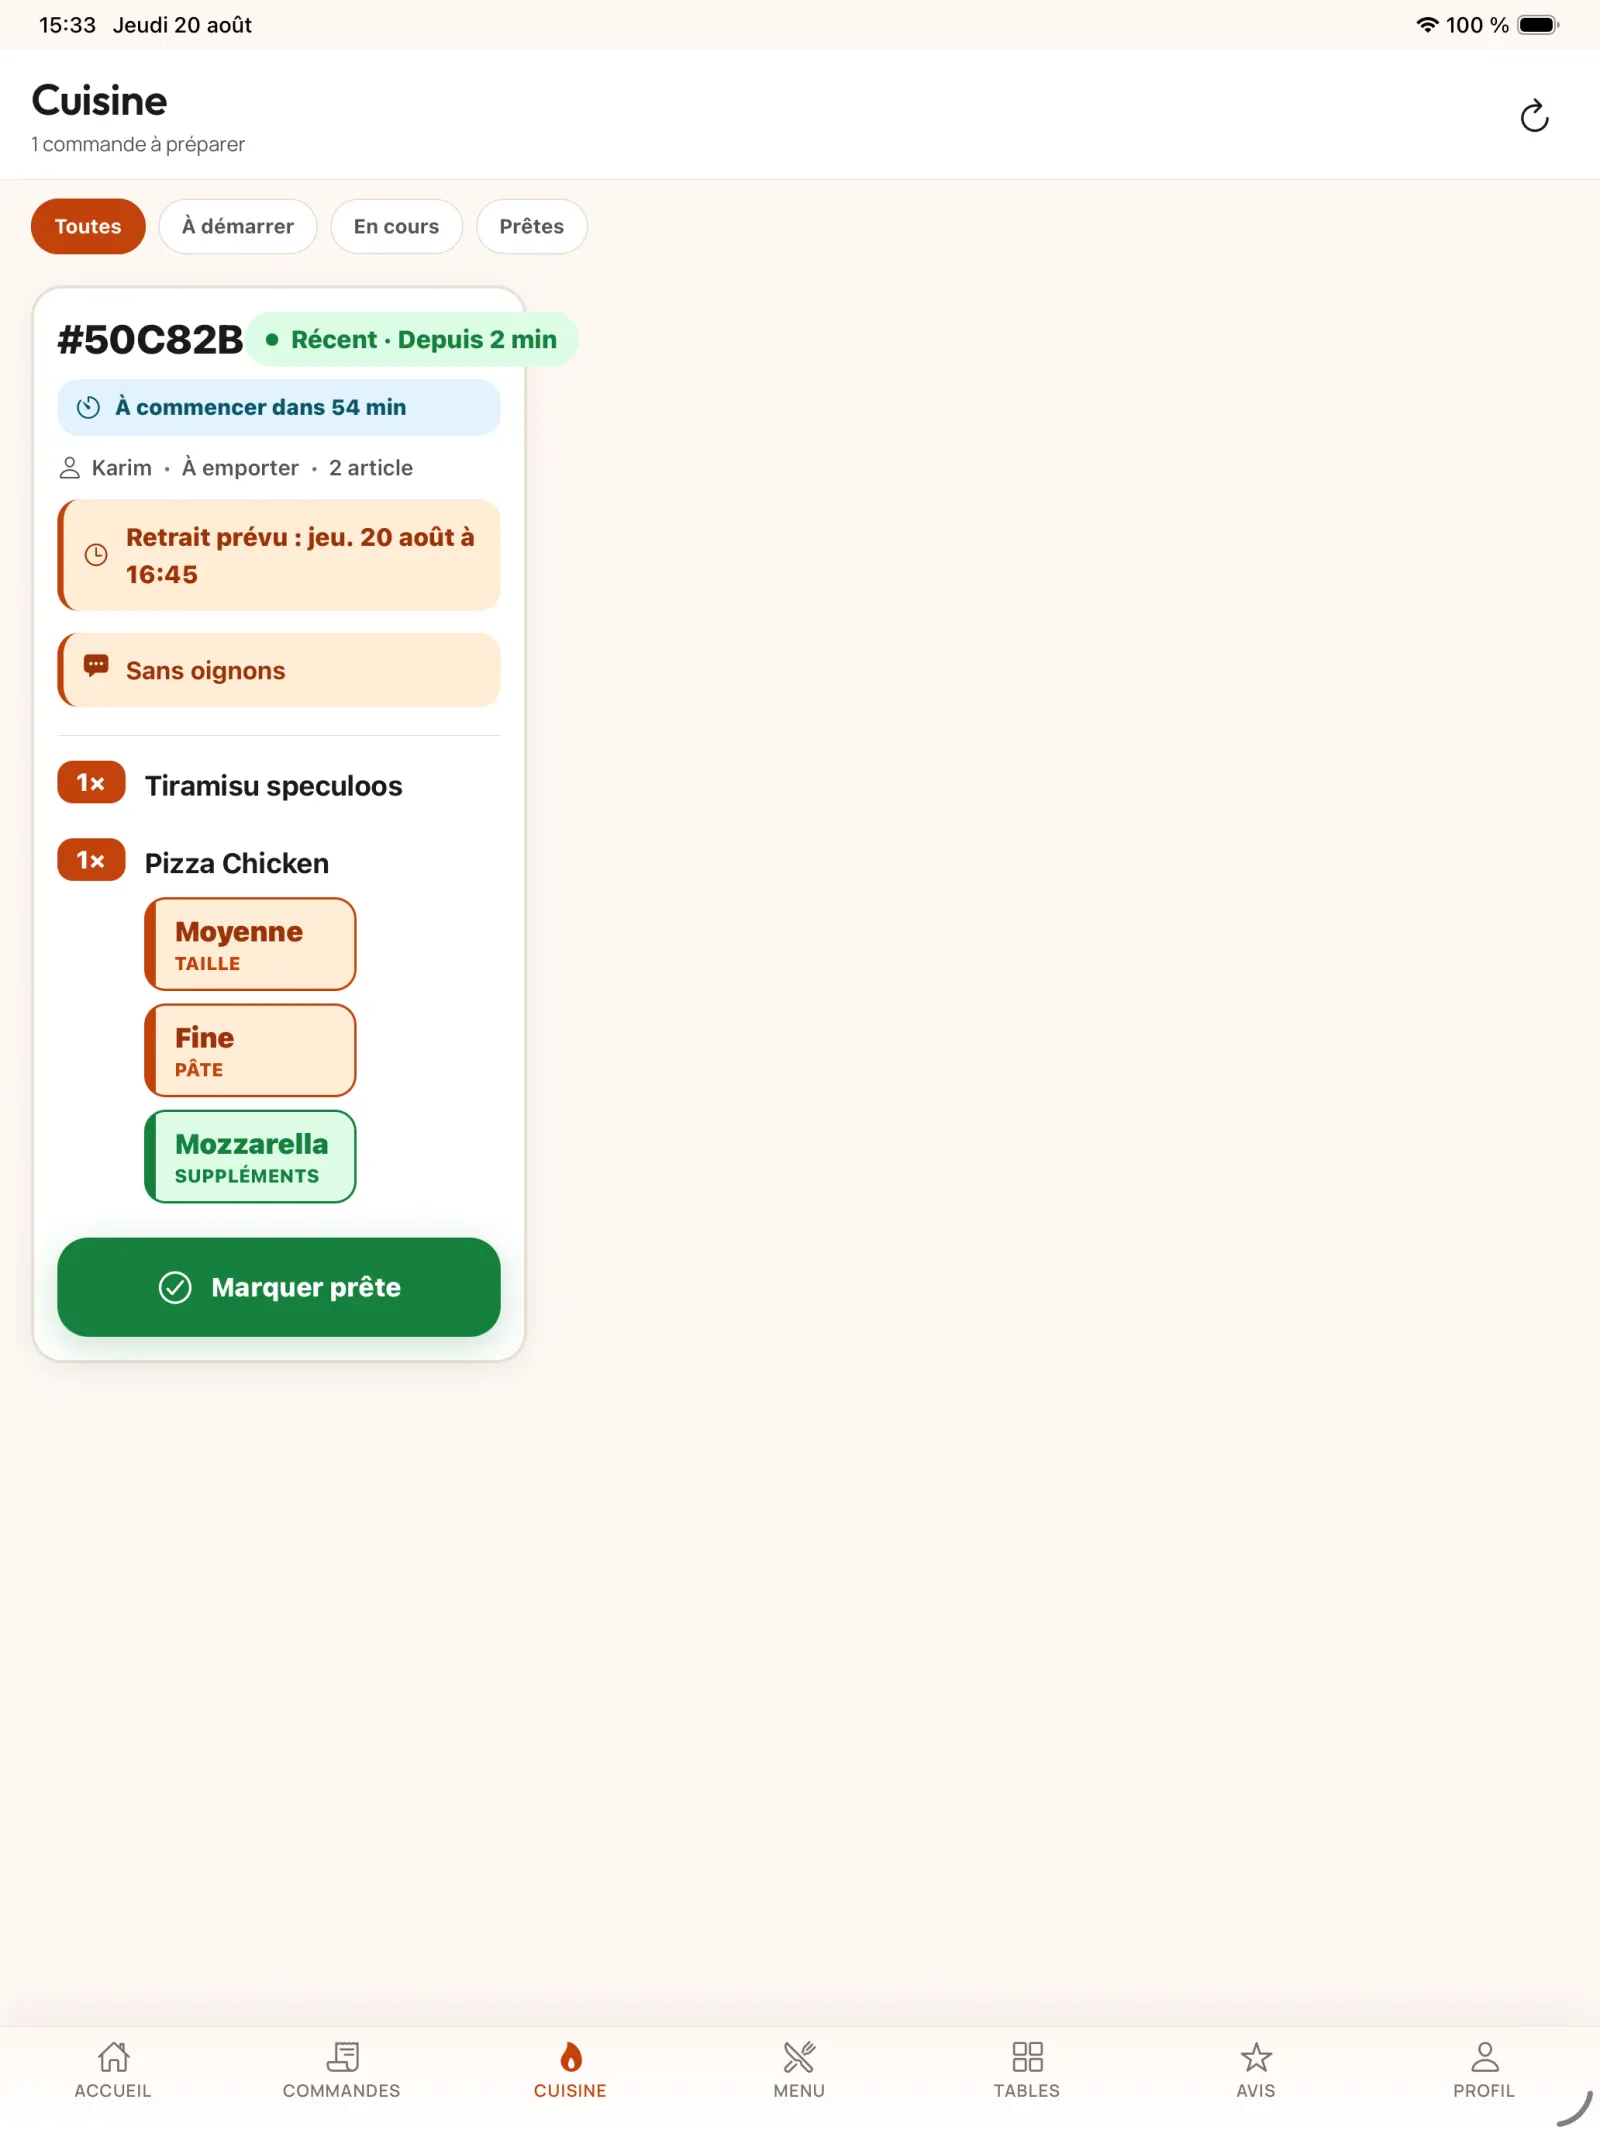
Step 15
Start preparation
When the kitchen starts the order, its status is updated for the customer.
In practice. The change of state is shared in real time: as soon as preparation begins, the customer sees that their order is being prepared on the web or in the KoulChi application.
Open full-size image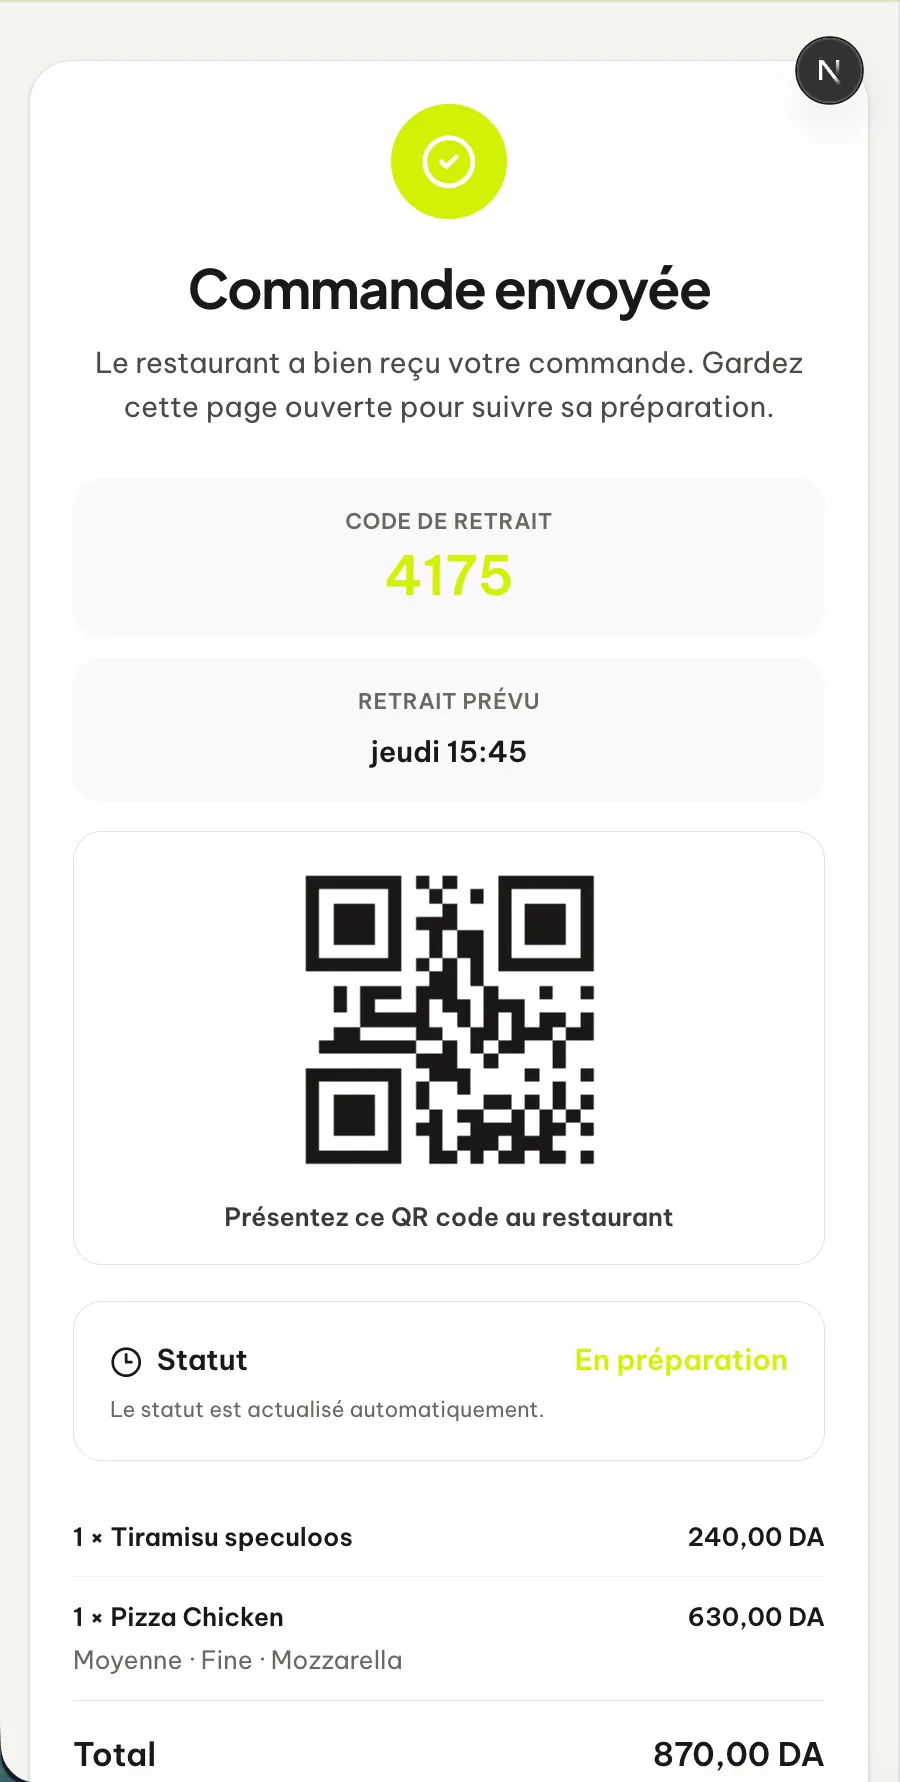
Step 16
See client-side preparation
The tracking page changes to the “In preparation” state without the customer needing to reload it manually.
Open full-size image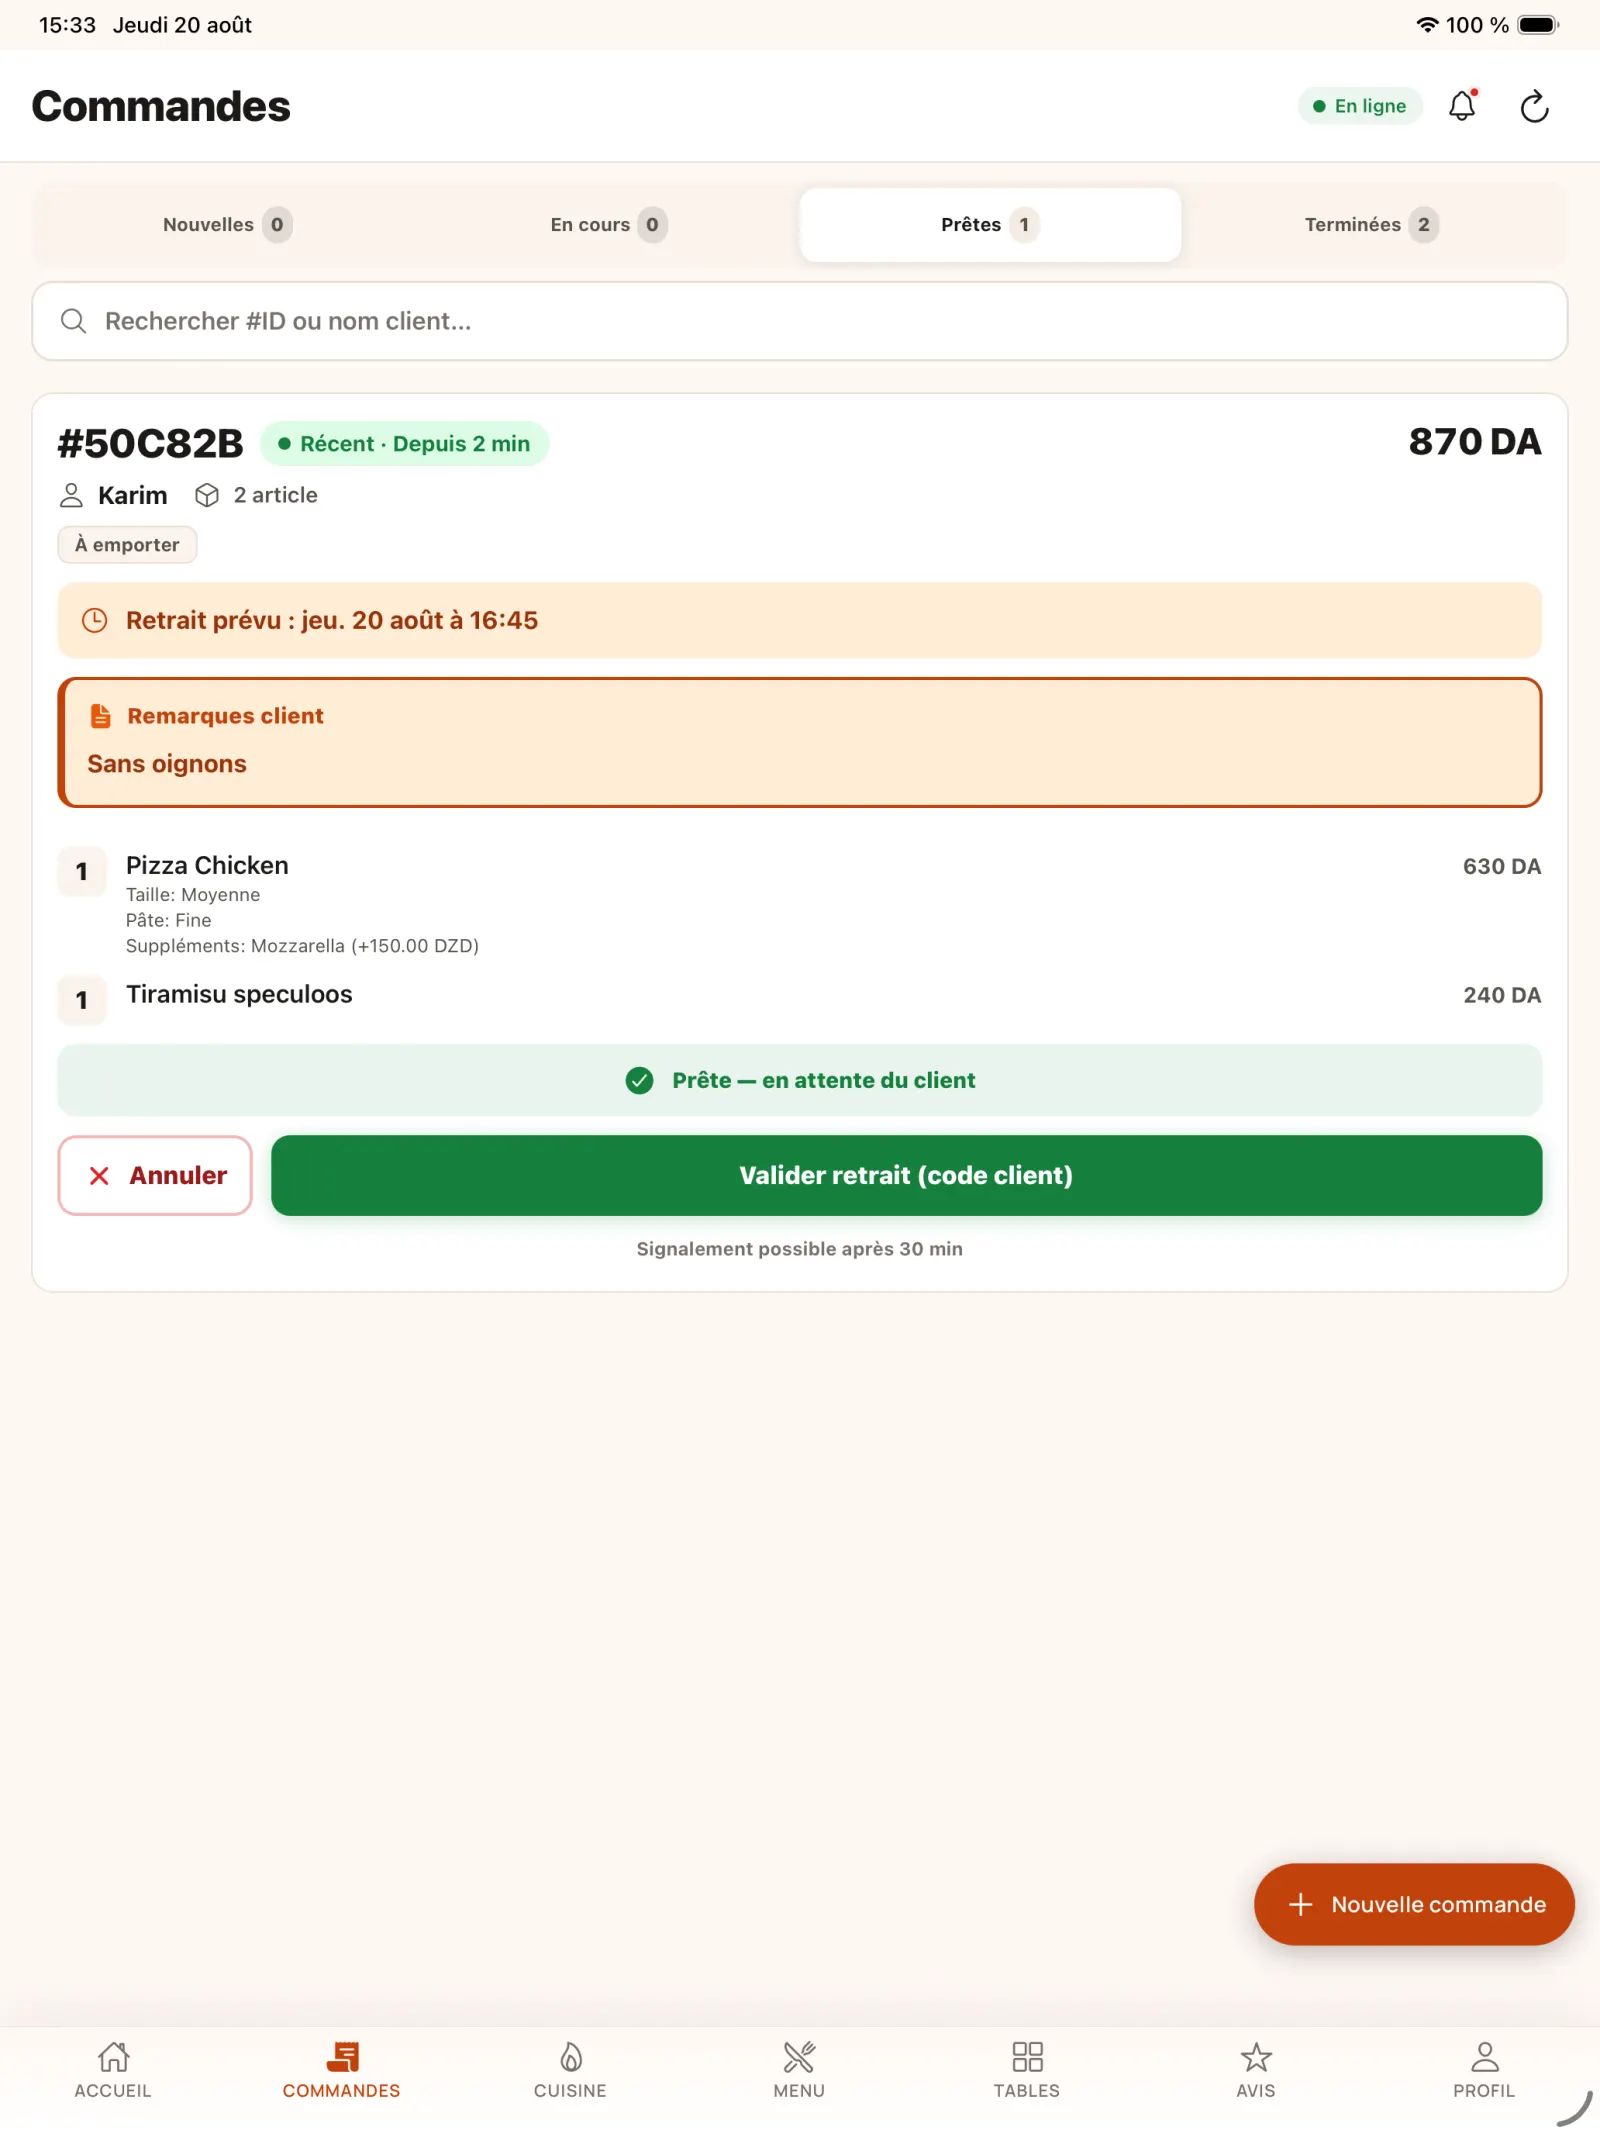
Step 17
Mark order ready
Once all items are completed, the kitchen marks the order ready and waits for pickup.
Open full-size image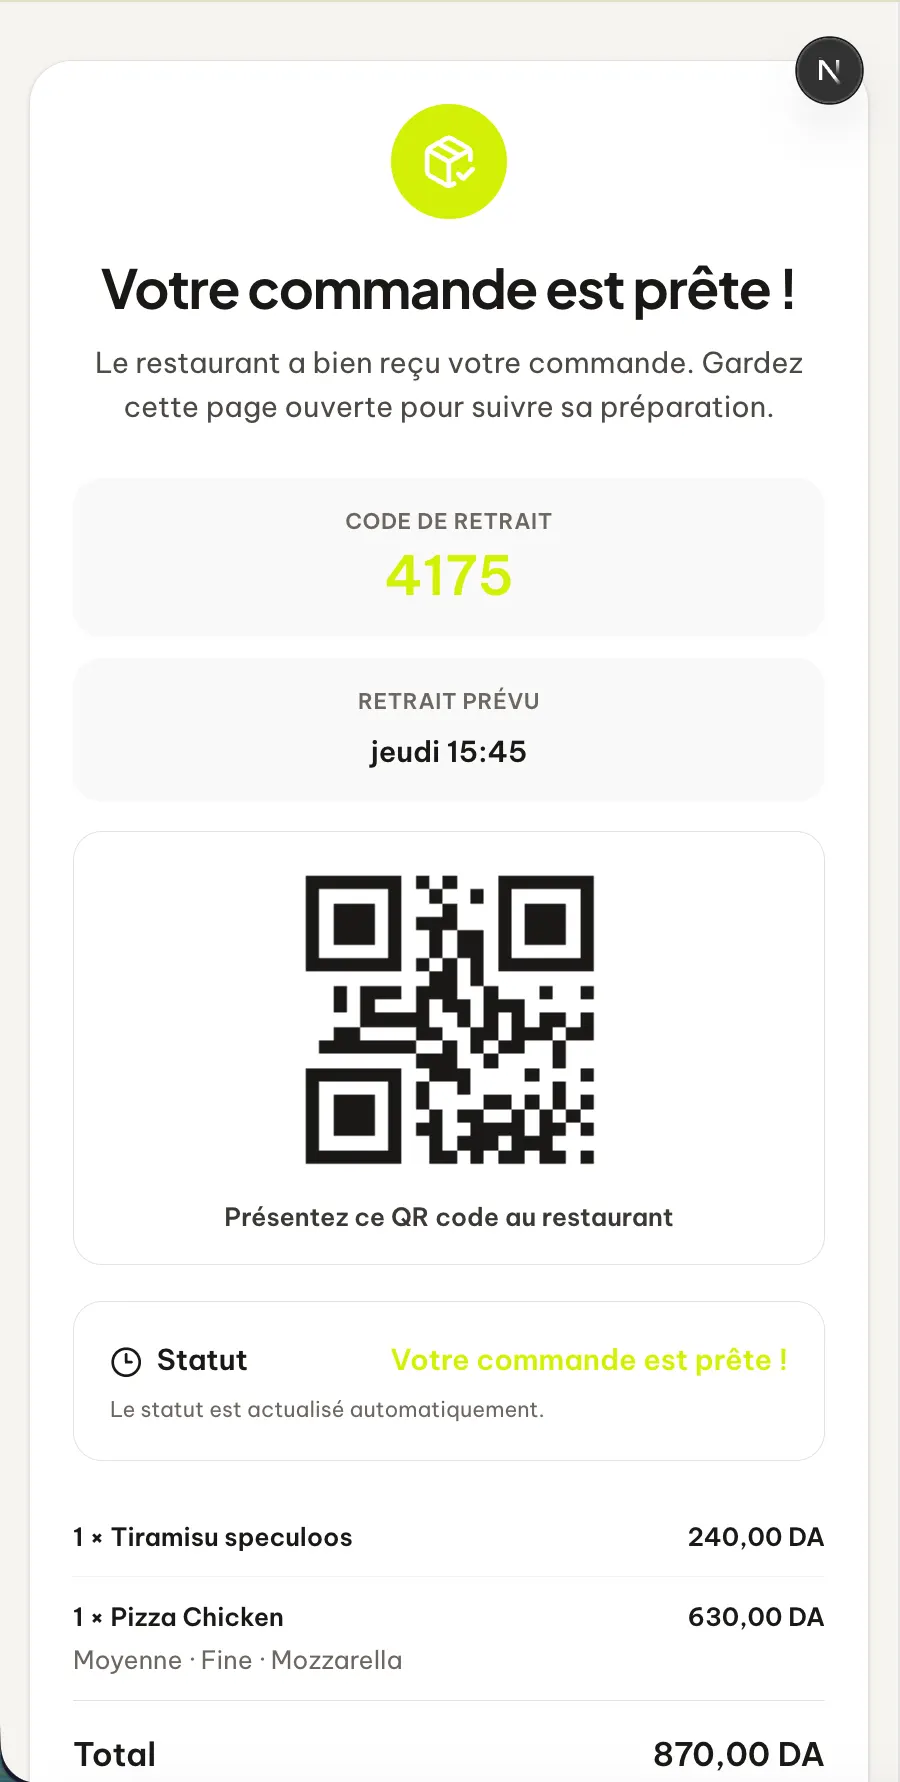
Step 18
Inform the customer
The public page immediately indicates that the order can be picked up.
Open full-size image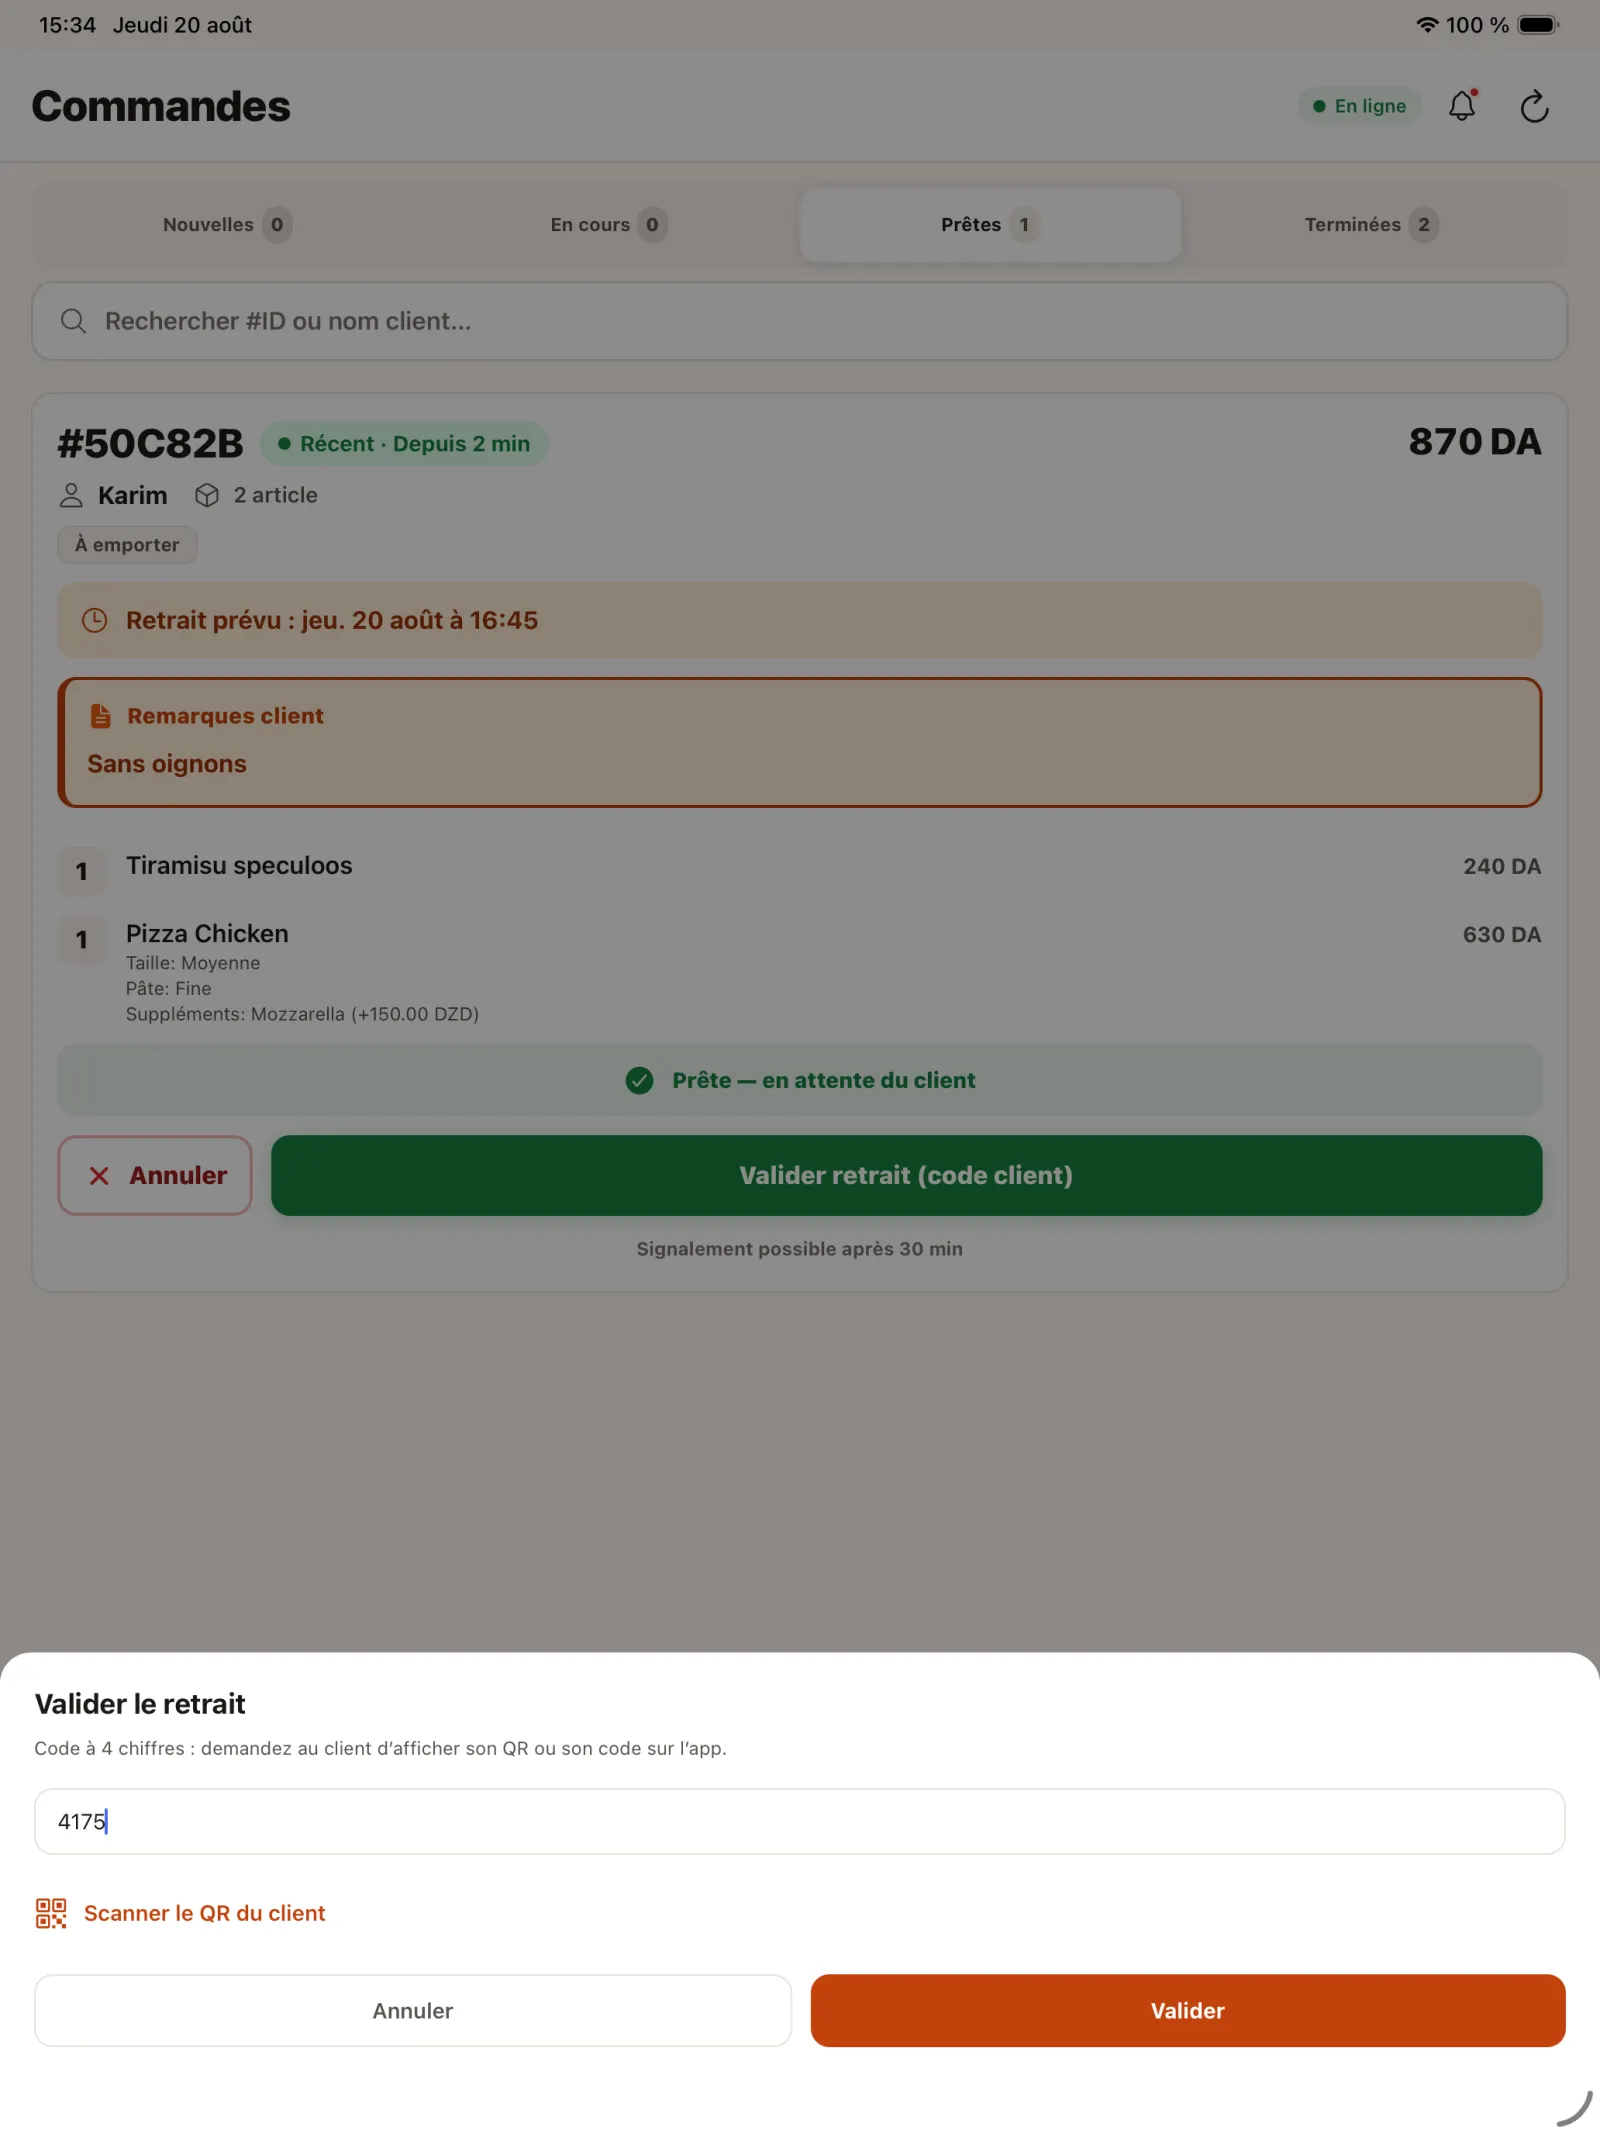
Step 19
Check pickup code
At the counter, enter the customer's code or scan their QR code.
Open full-size image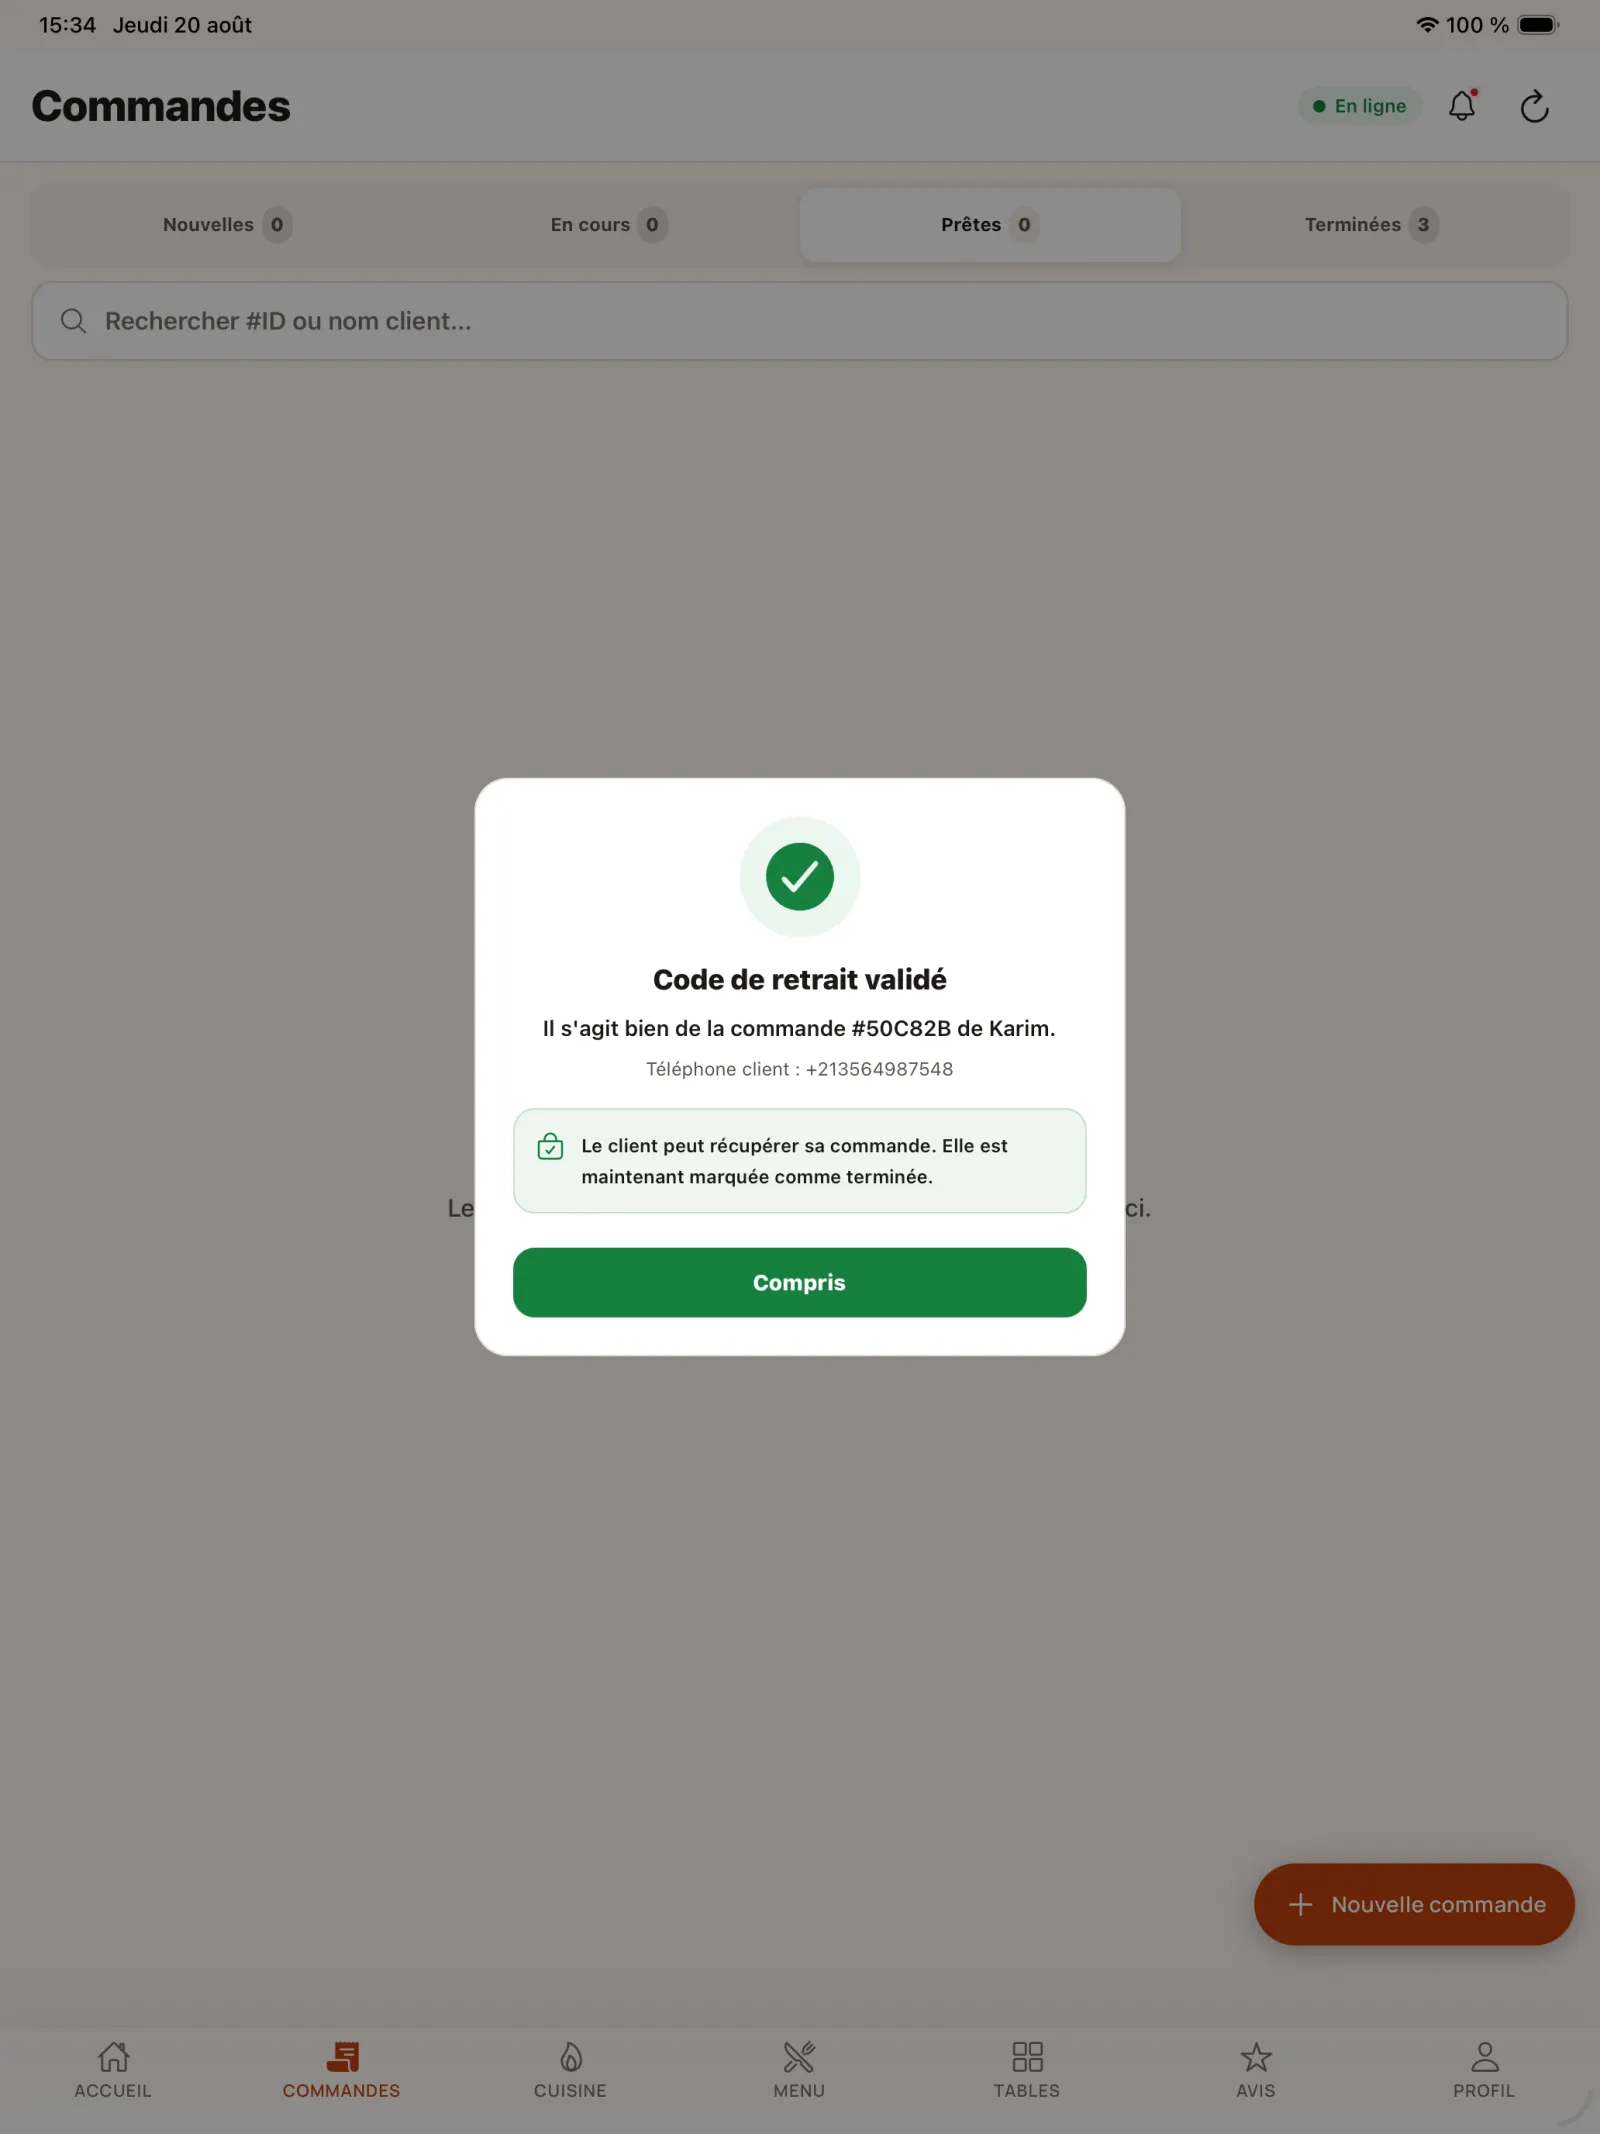
Step 20
Confirm the handover
Validation of the code closes the order in KoulChi Pro and confirms the pickup.
Open full-size image