Guide 1 of 8
Create your KoulChi Pro account and restaurant
This first guide takes the person in charge from registration through to creating their restaurant workspace.
The screenshots show the French interface; the layout and features are the same in every language.
Documentation navigation
Chapter 1
Create your professional account
Registration begins in the KoulChi Pro app. The same account will then allow access to the Pro portal on the web.
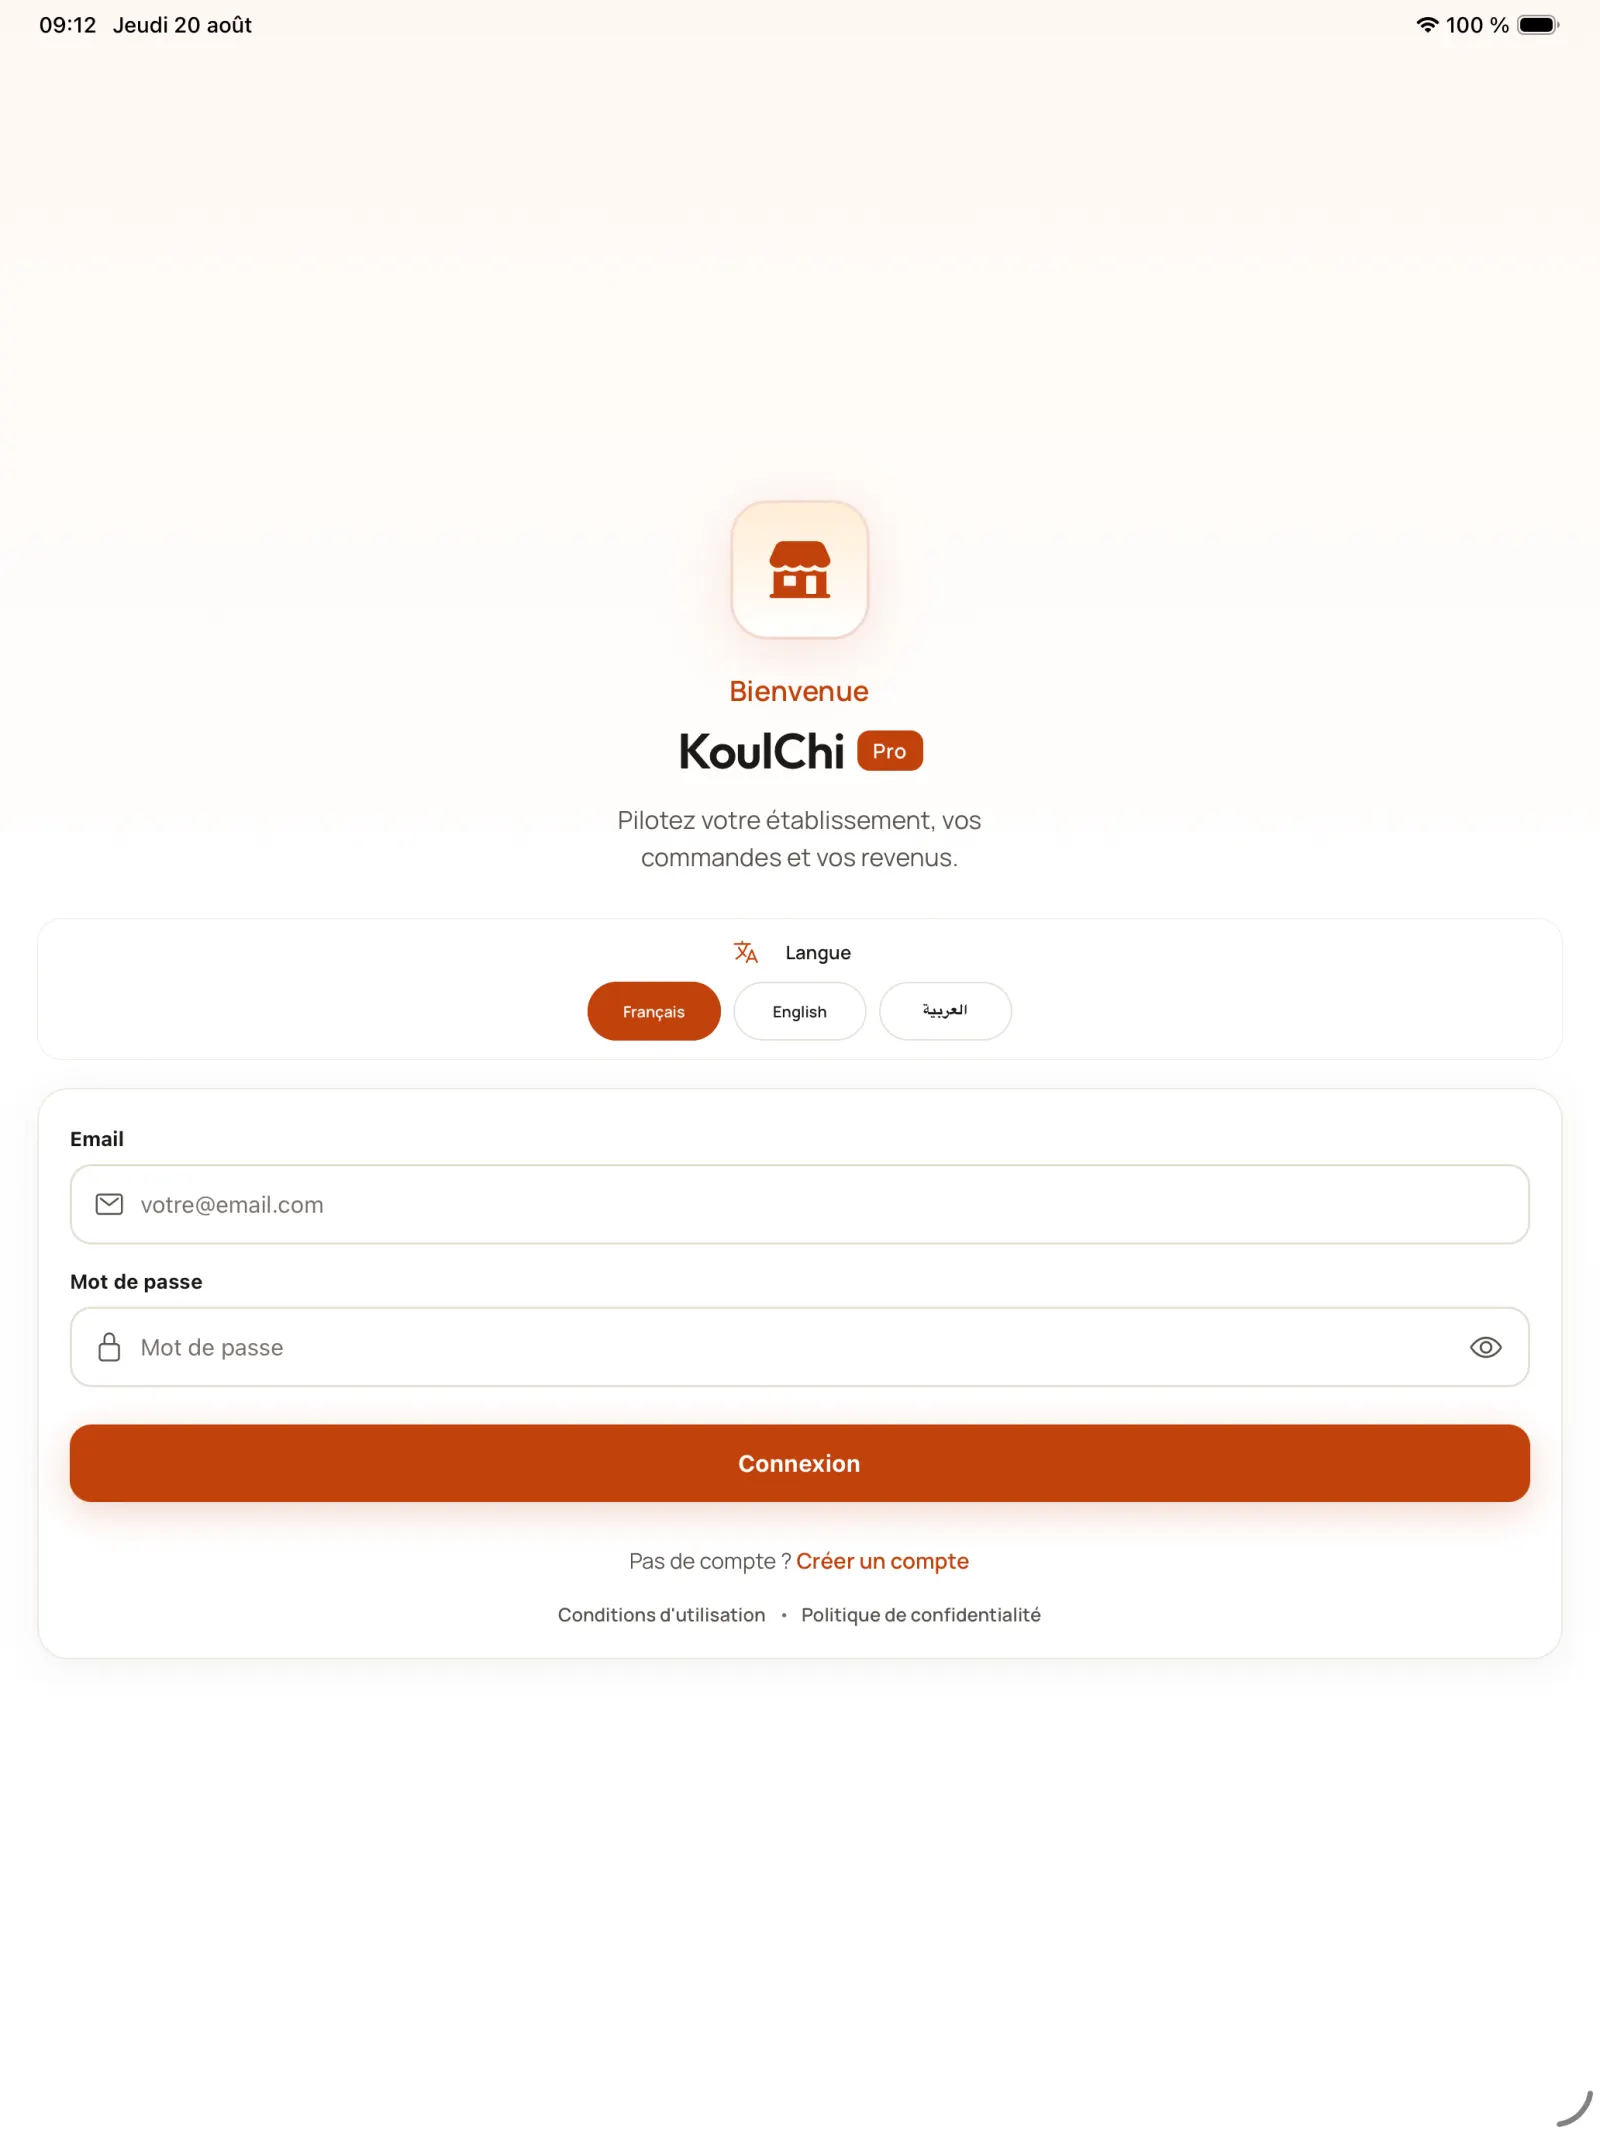
Step 1
Access account creation
Choose the app language, then select “Create Account” under the login form.
Open full-size image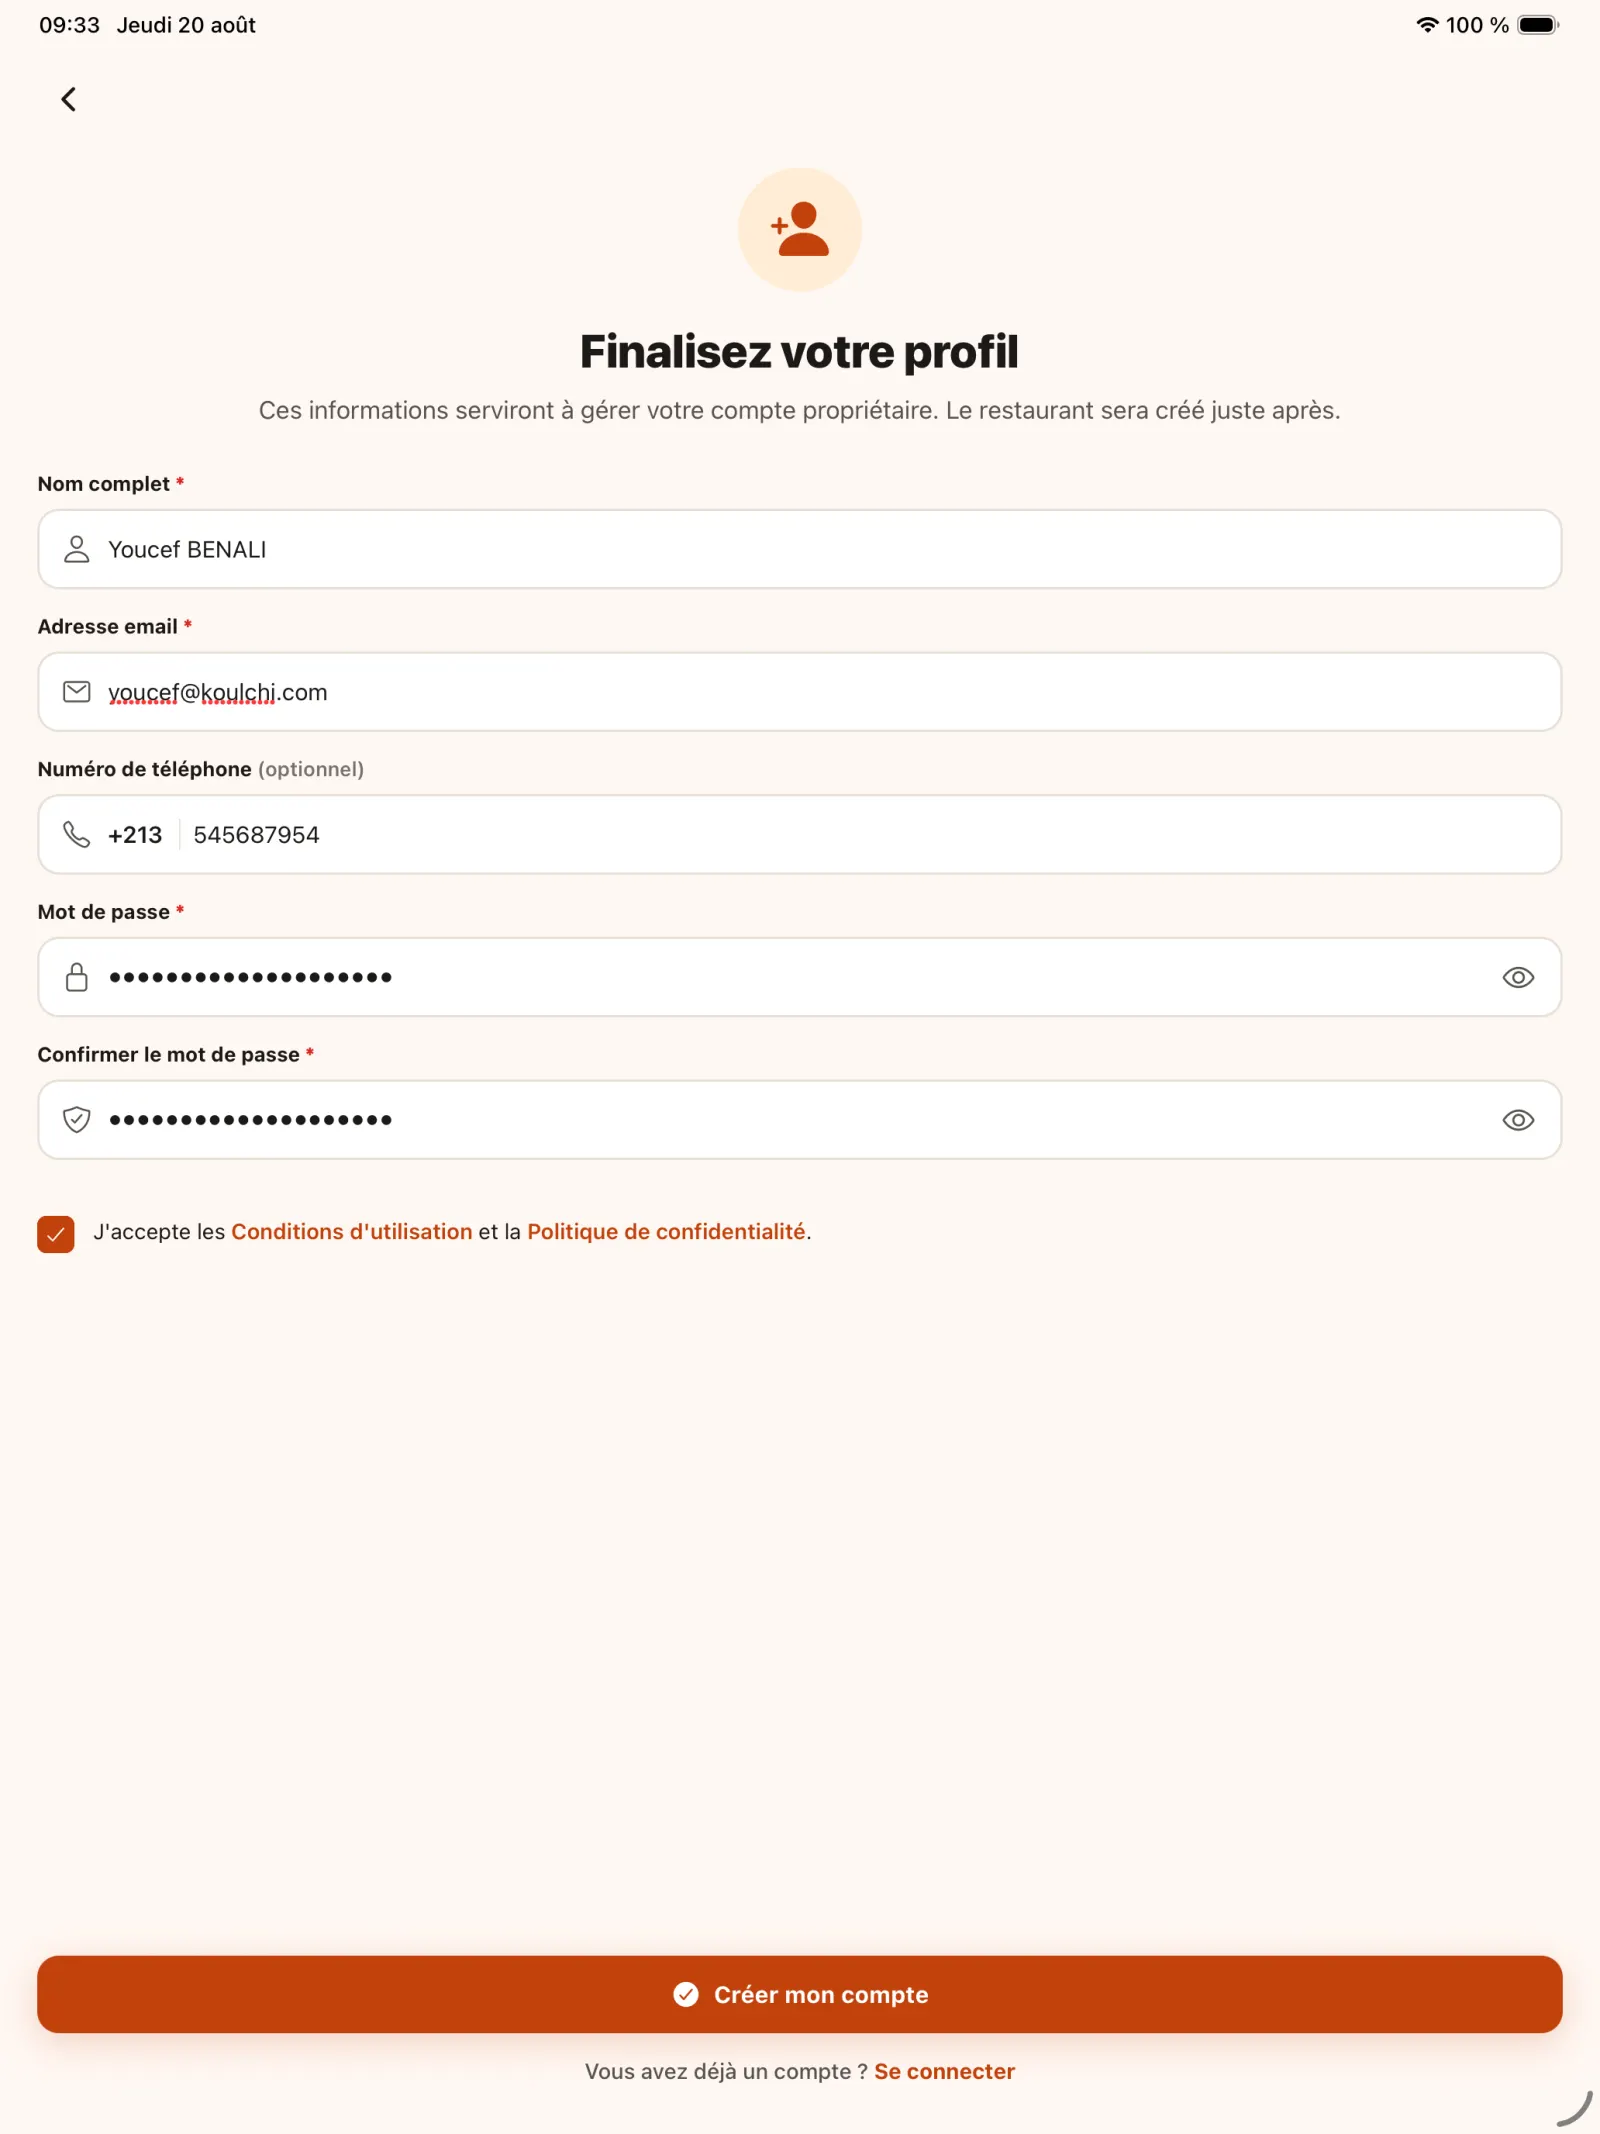
Step 2
Fill in your information
Provide your identity, email address, and phone number, then choose a password that meets the criteria displayed. Review and accept the legal documents before continuing.
Open full-size image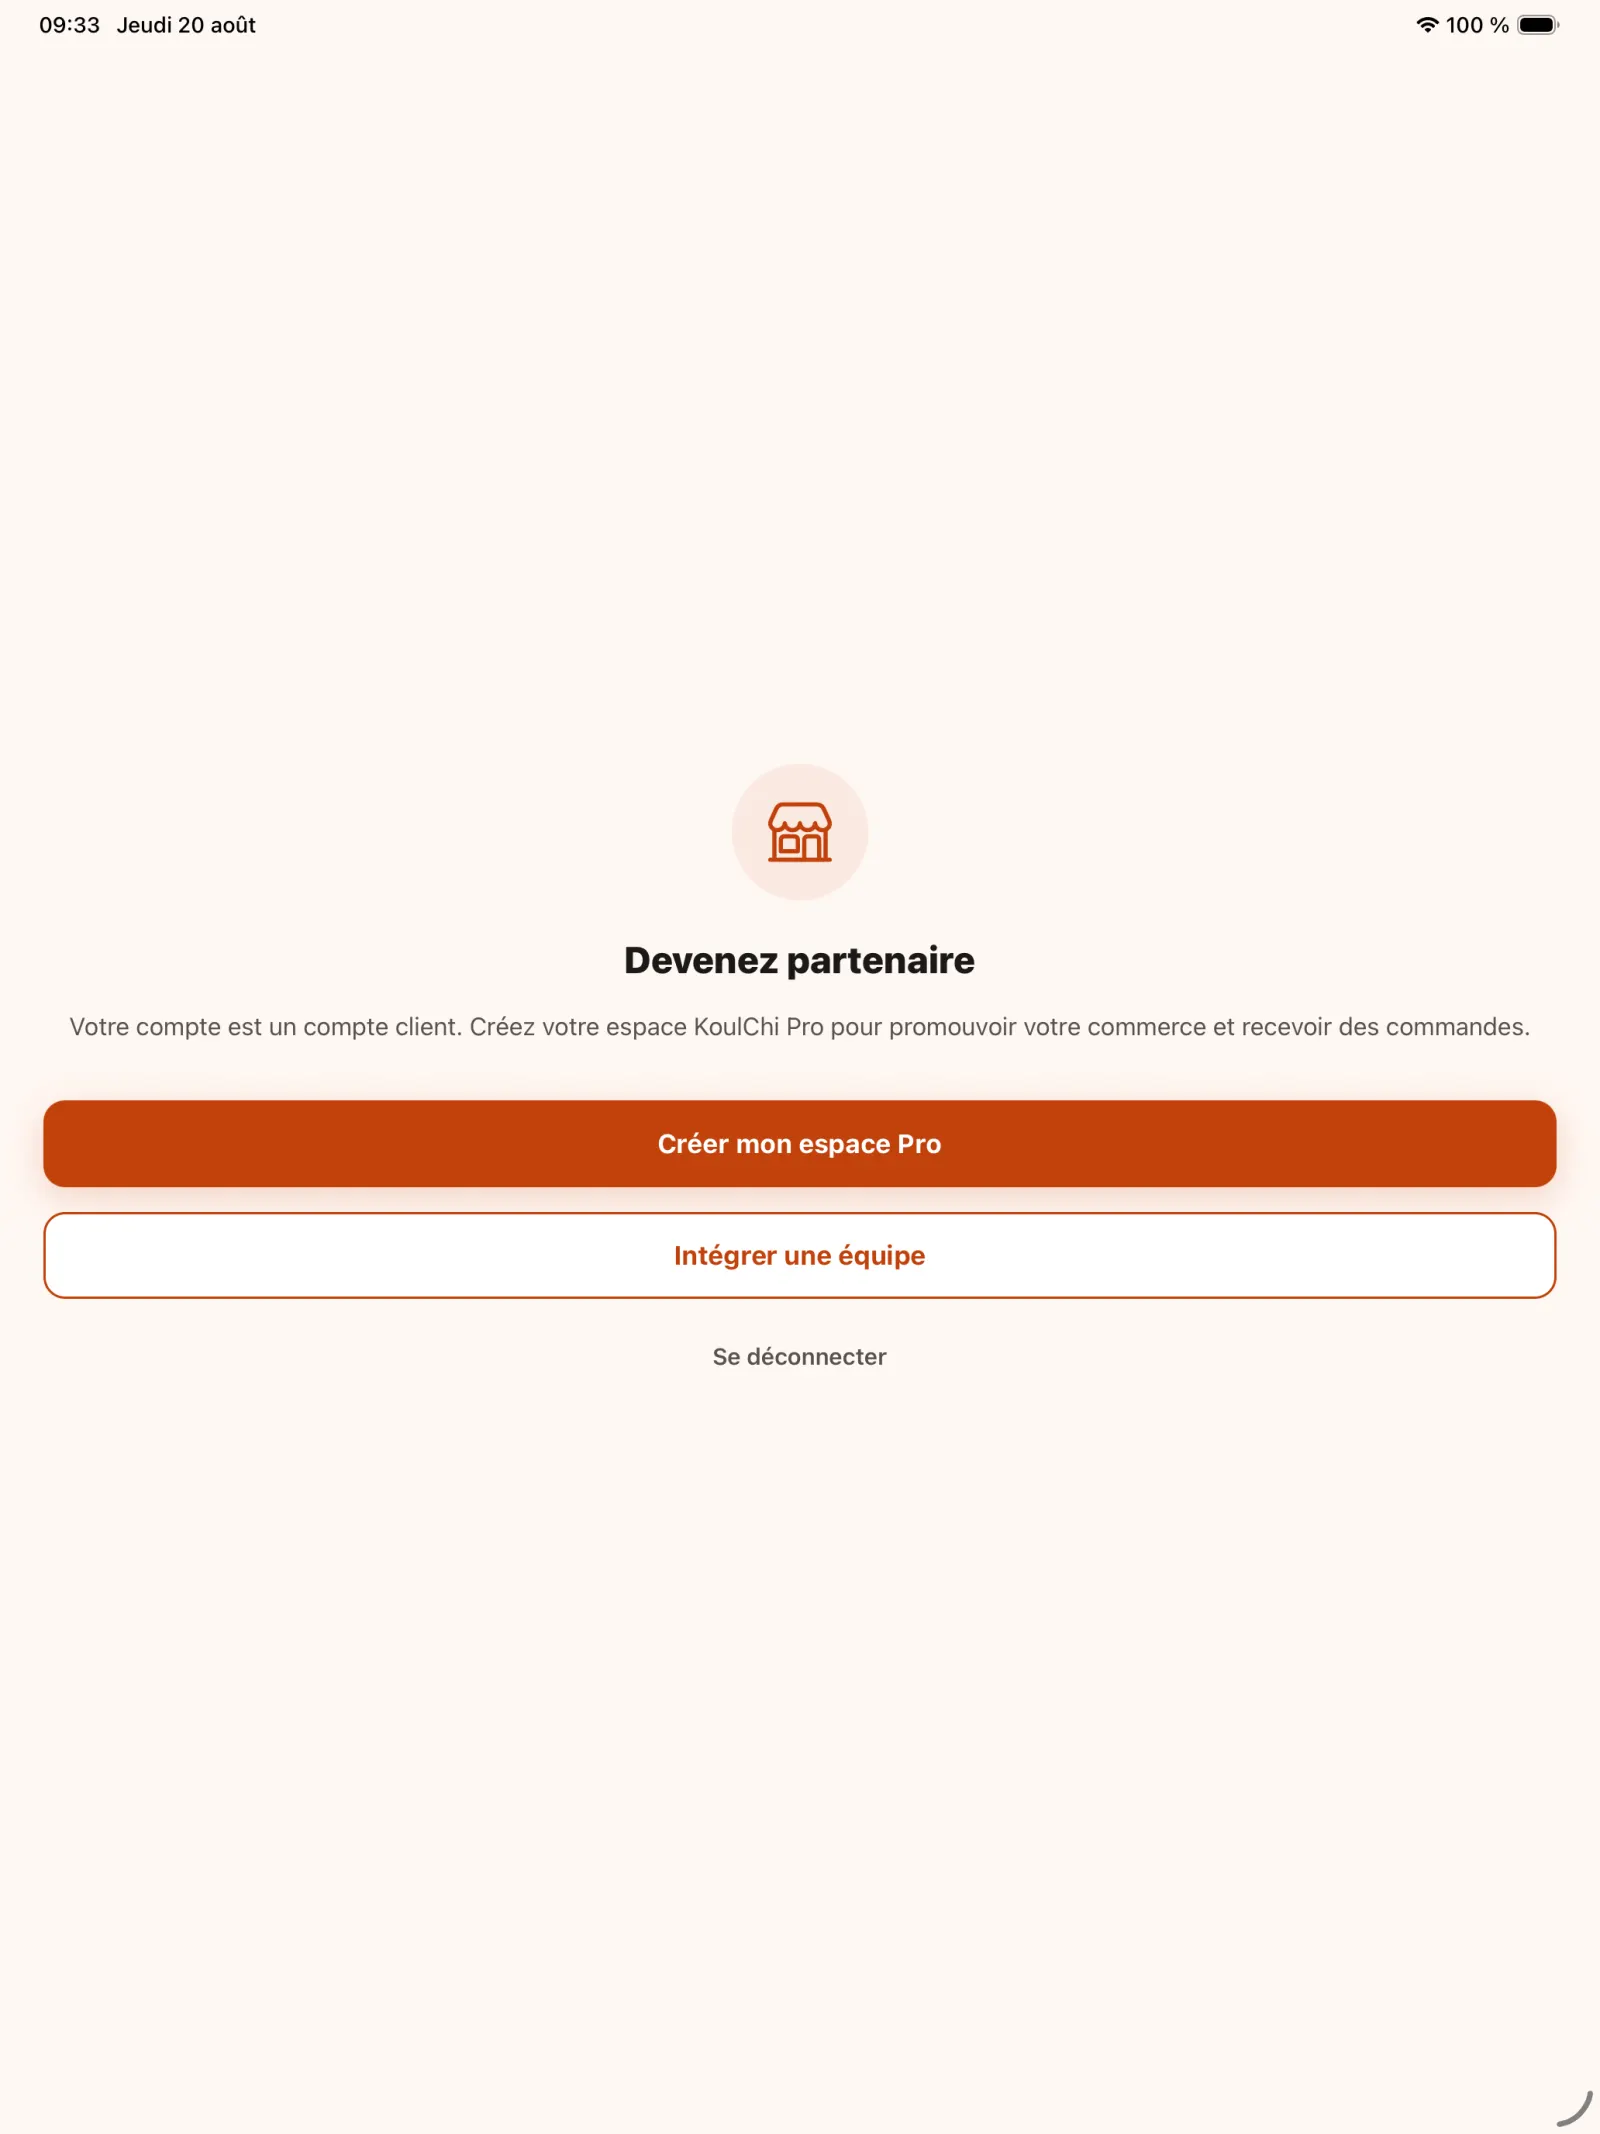
Step 3
Create your Pro portal
Select “Create my Pro portal” to register your own establishment. The “Join a Team” option is for staff members invited to an existing restaurant.
In practice. KoulChi Pro distinguishes between the manager who creates the establishment and the staff members who join a team. Each person keeps their own account instead of sharing common identifiers.
Open full-size image
Chapter 2
Register your restaurant
The initial profile brings together information that will help customers understand the activity and find the establishment.
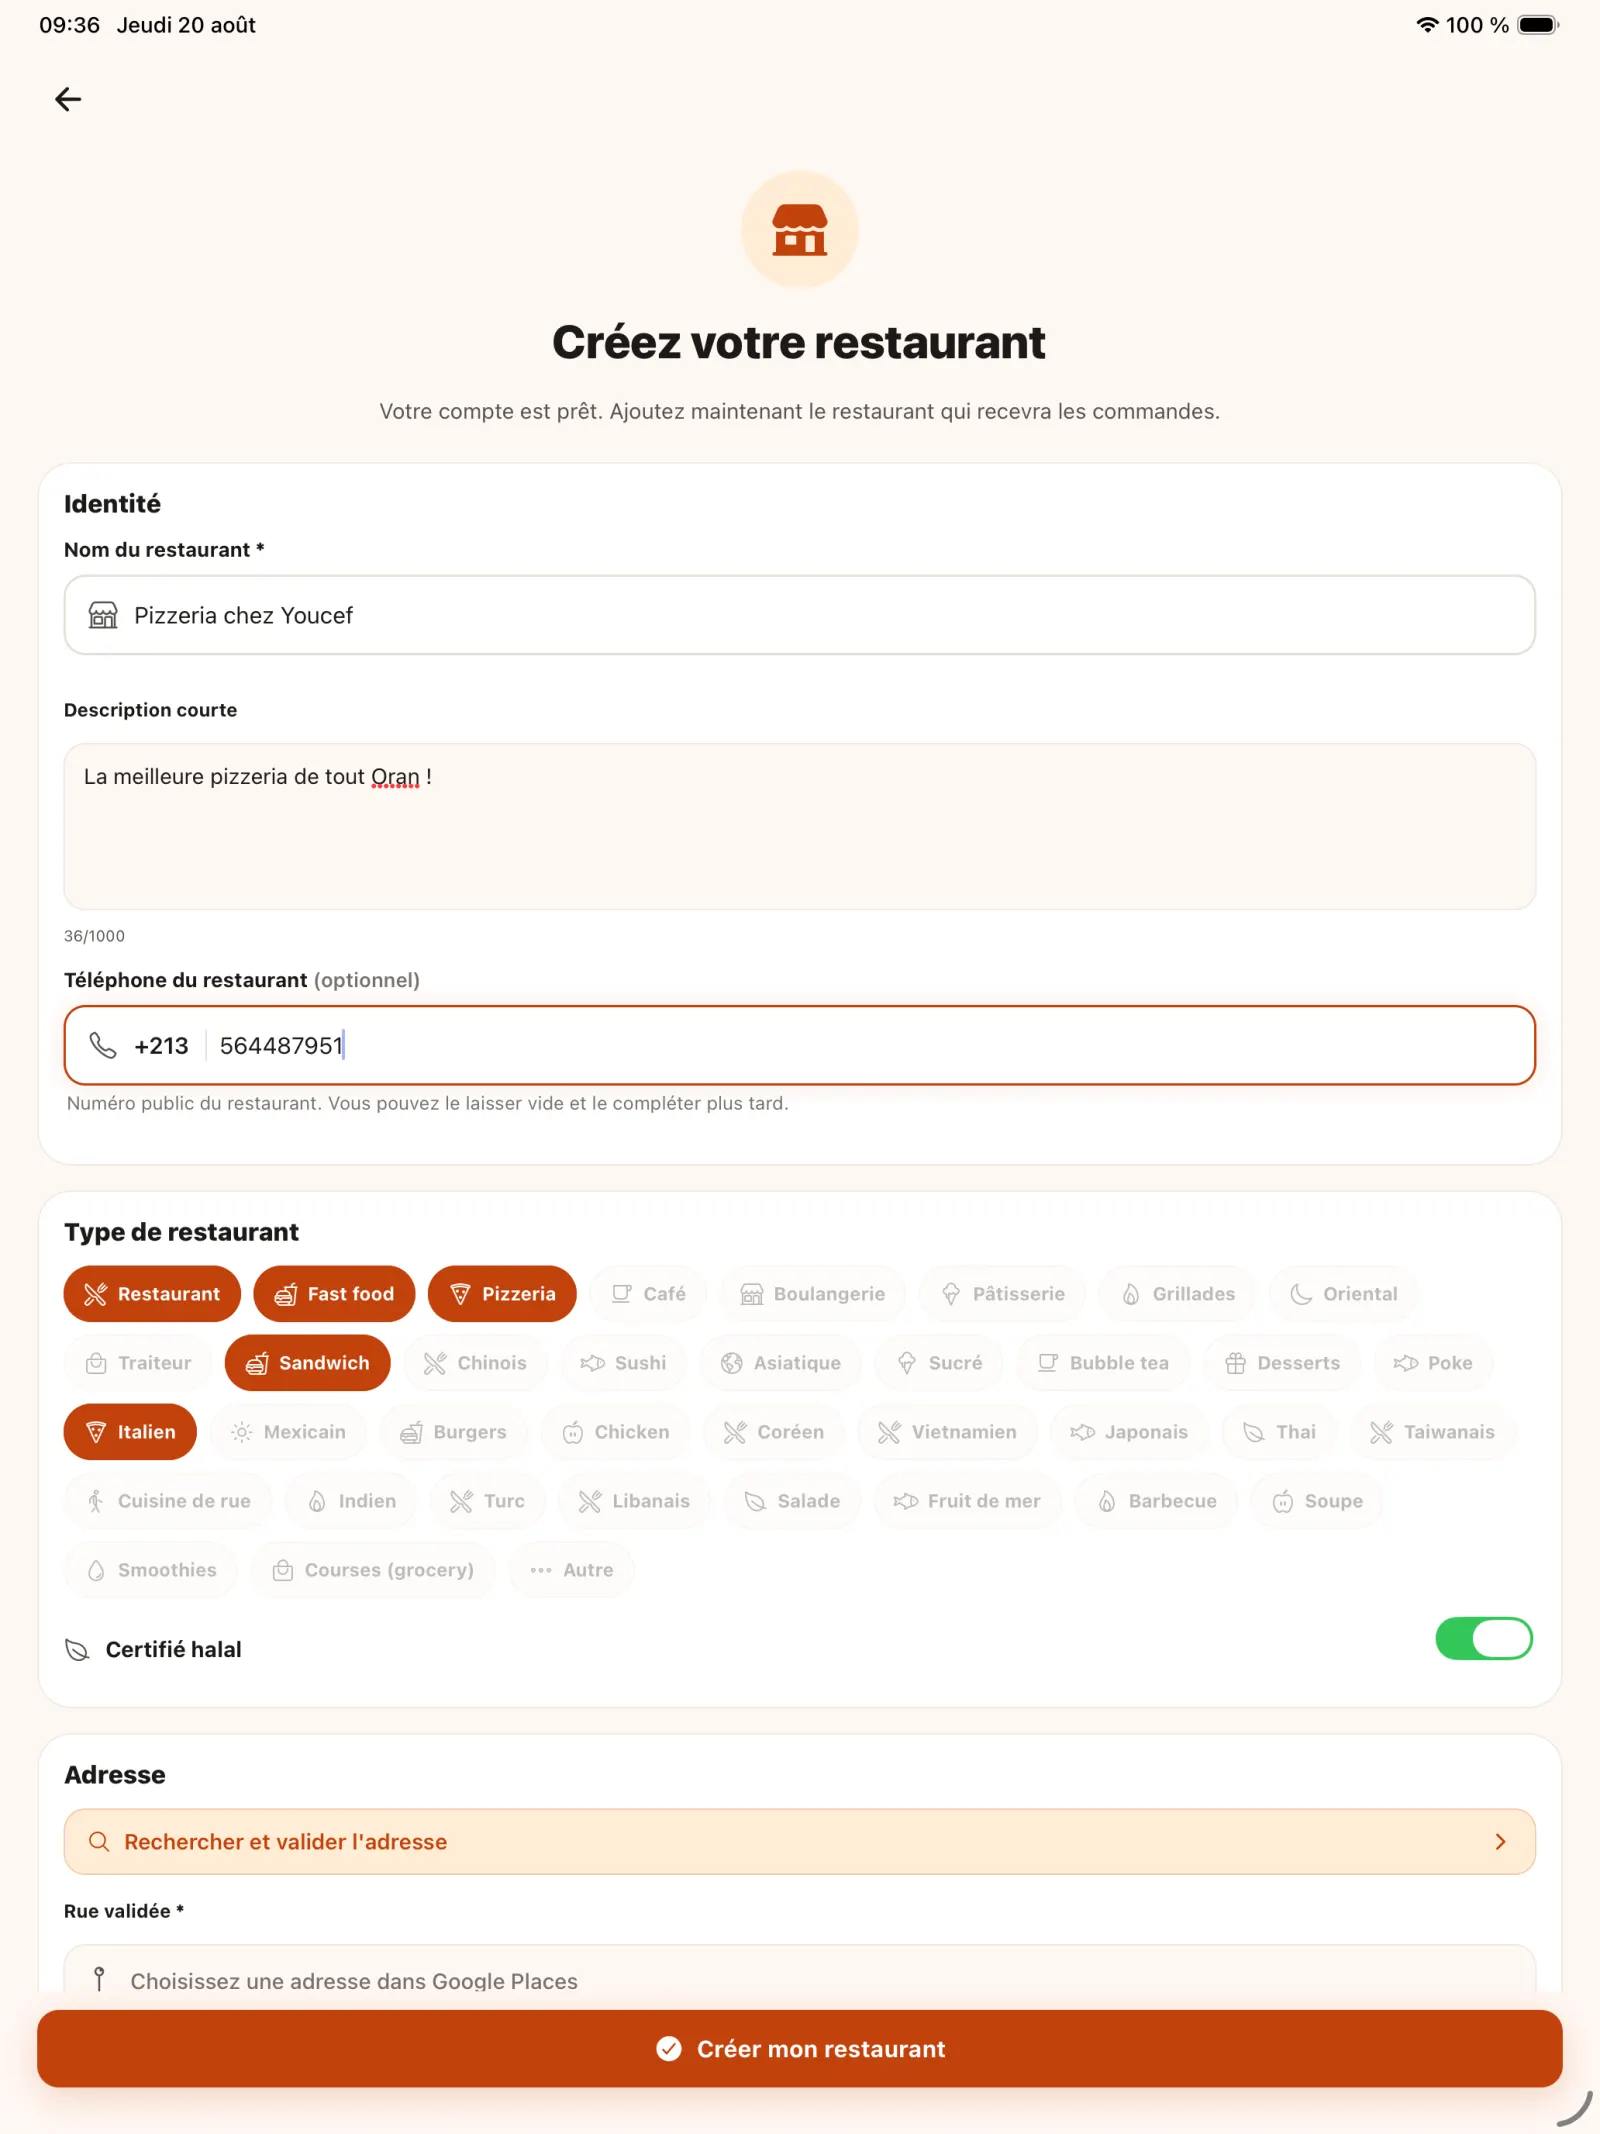
Step 4
Introduce your restaurant
Enter the restaurant name, description, and public phone number. Then select up to five types of cuisine representative of your offer.
In practice. For a pizzeria that also sells sandwiches, you can for example choose “Pizzeria”, “Italian”, “Fast food” and “Sandwich”. This information is not only descriptive: it allows customers to find you using search filters.
Open full-size image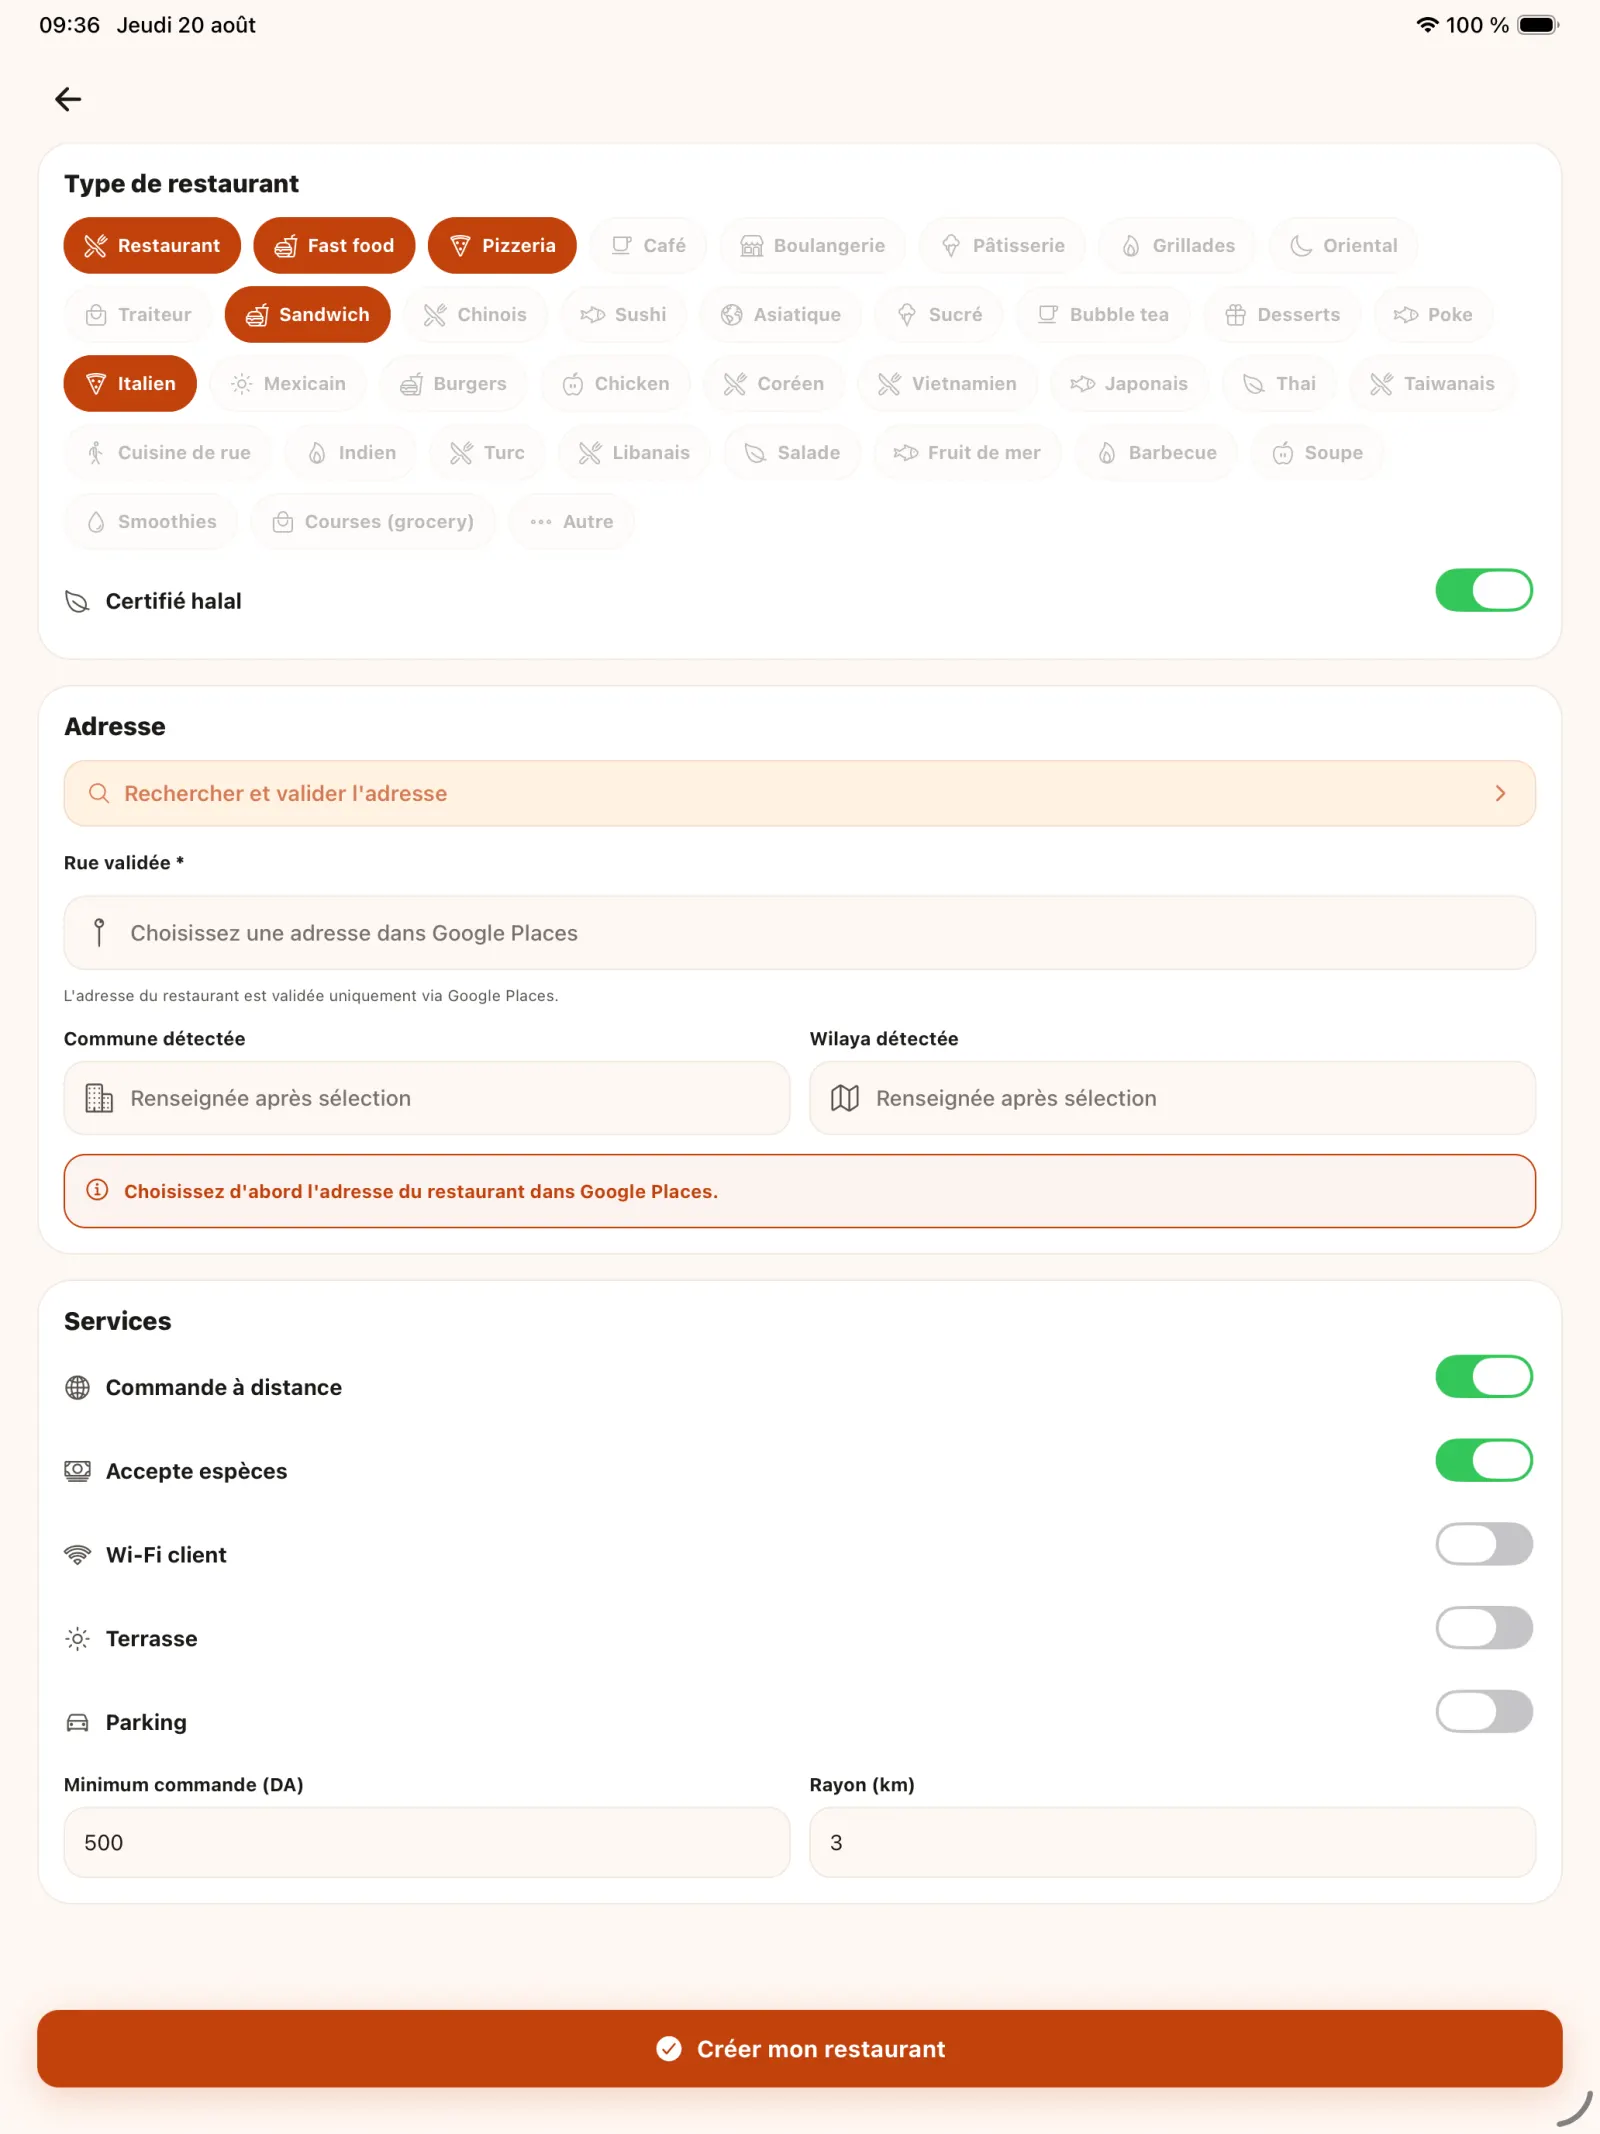
Step 5
Set the address and services
Validate an address proposed by the search, then indicate the services available: remote order, cash, Wi-Fi, terrace or parking. Also adjust the minimum order if necessary.
In practice. The services provided give an additional reason to choose your establishment. Accessible Wi-Fi may appeal to students and people who work outside the home, while "Remote Ordering" enables pickup of pre-prepared orders. A minimum set at 0 DA allows all baskets to be accepted.
Open full-size image
Step 6
Choose a verified address
Start typing the address and select the exact suggestion from the list. This validation improves the location of the restaurant for customers.
Open full-size image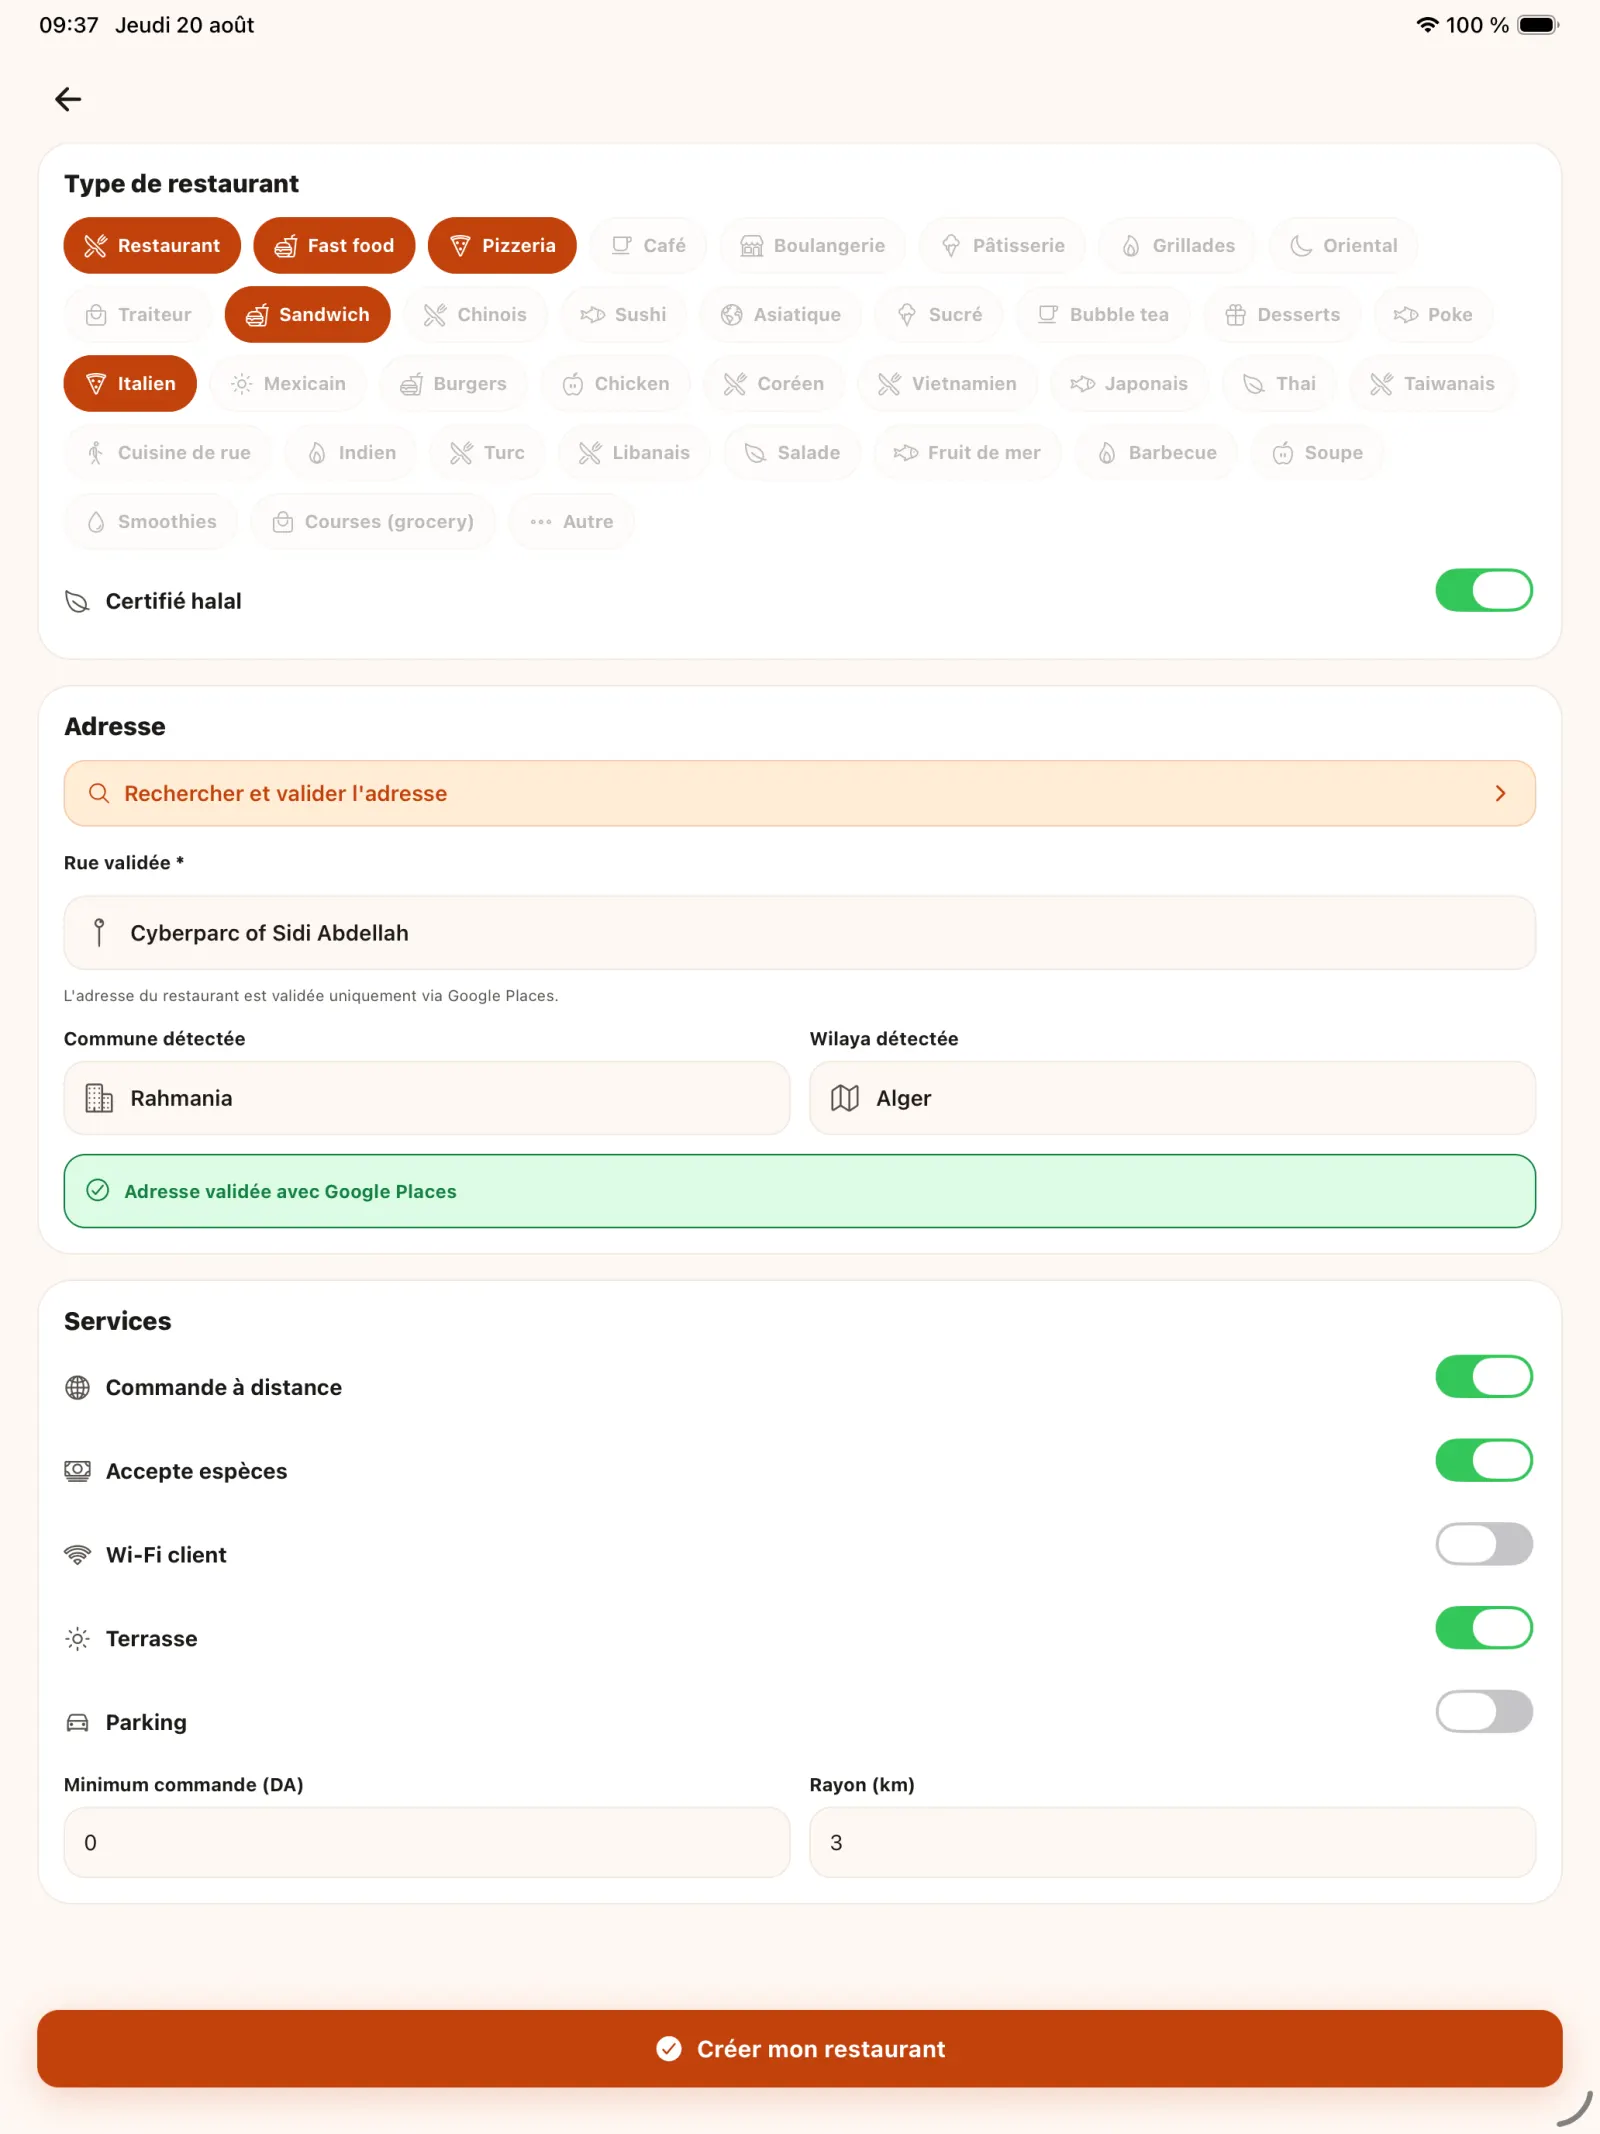
Step 7
Review the details before creating
Review the address, services, types of cuisine and minimum order. Once the information is confirmed, create the restaurant.
In practice. In the example in this documentation, the pizzeria accepts remote click and collect orders, has a terrace and imposes no minimum order. This type of verification avoids publishing a commercial rule different from that actually applied at the counter.
Open full-size image
Chapter 3
Explore the admin area
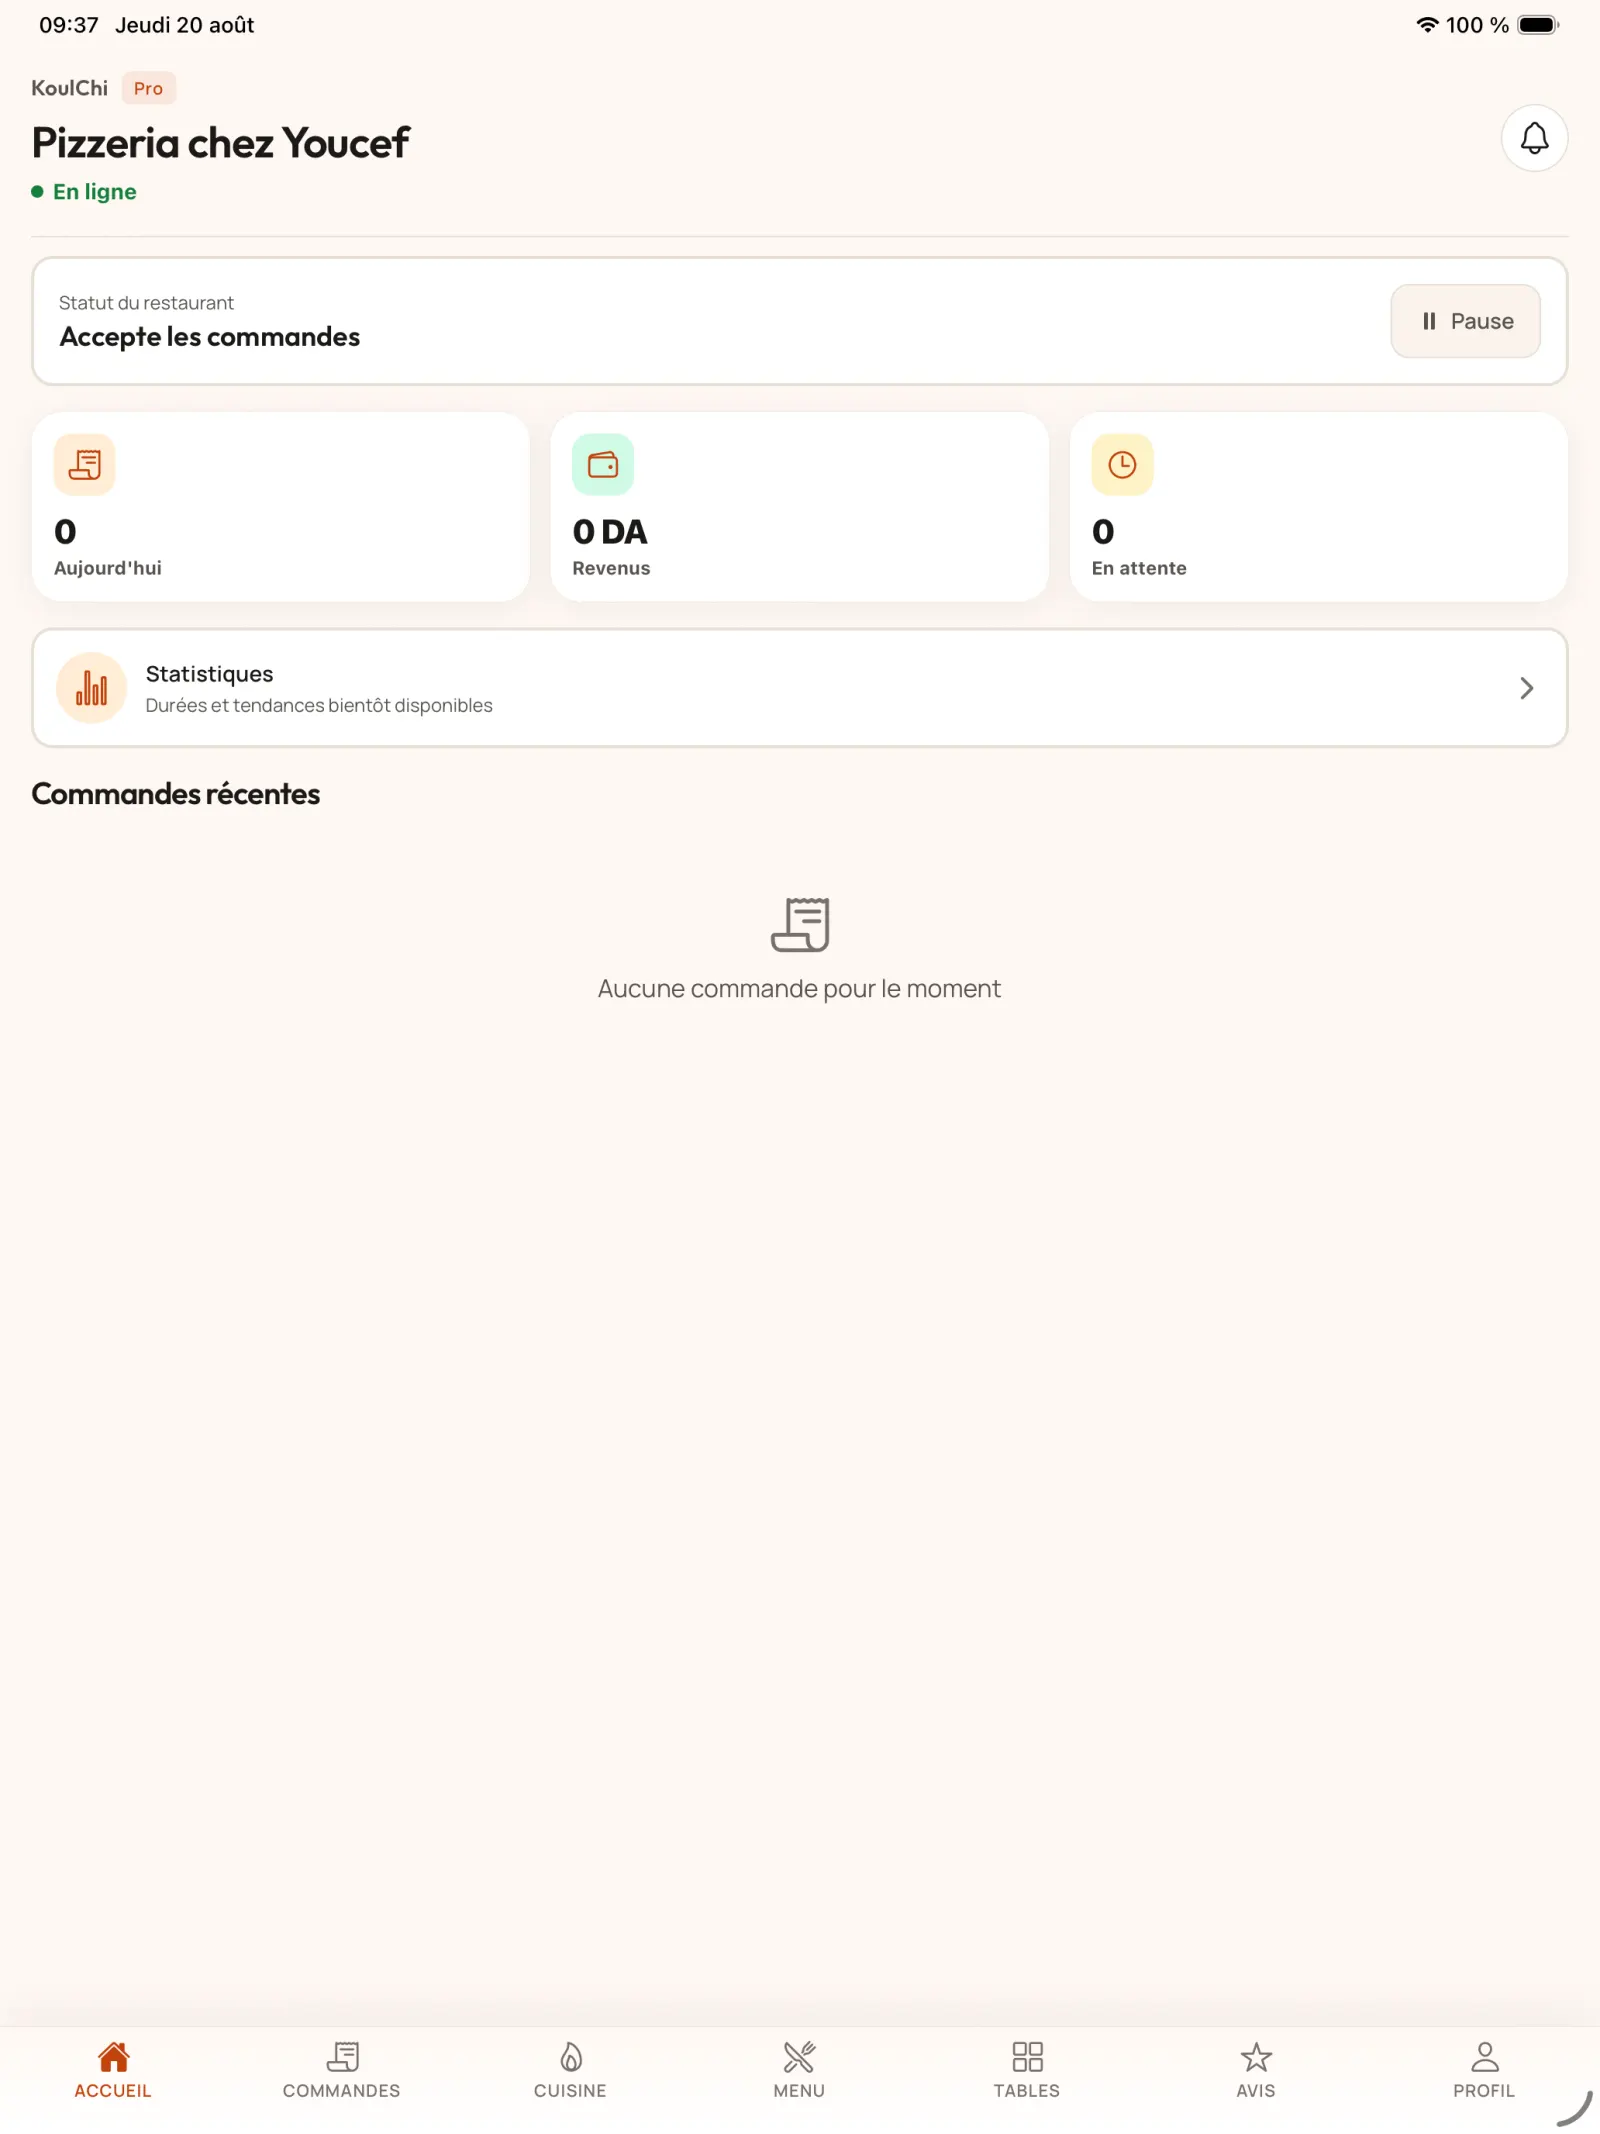
Once the restaurant is created, the owner reaches their mobile dashboard.
Step 8
Open dashboard
The dashboard brings together today's indicators, recent orders and restaurant pause. Then open the “Profile” tab to complete the configuration.
In practice. Pausing is useful during an interruption or when the team can no longer absorb online orders. As long as the restaurant is on pause, no new remote orders are accepted; this action remains reserved for the administrator.
Open full-size image