Guide 3 of 8
Create menus, categories, options and suggestions
Build a clear catalogue, adapt each dish to the choices offered by the restaurant and highlight complementary products.
The screenshots show the French interface; the layout and features are the same in every language.
Documentation navigation
Chapter 1
Add the first products
Each product can include a photo, price, category, description and availability status.
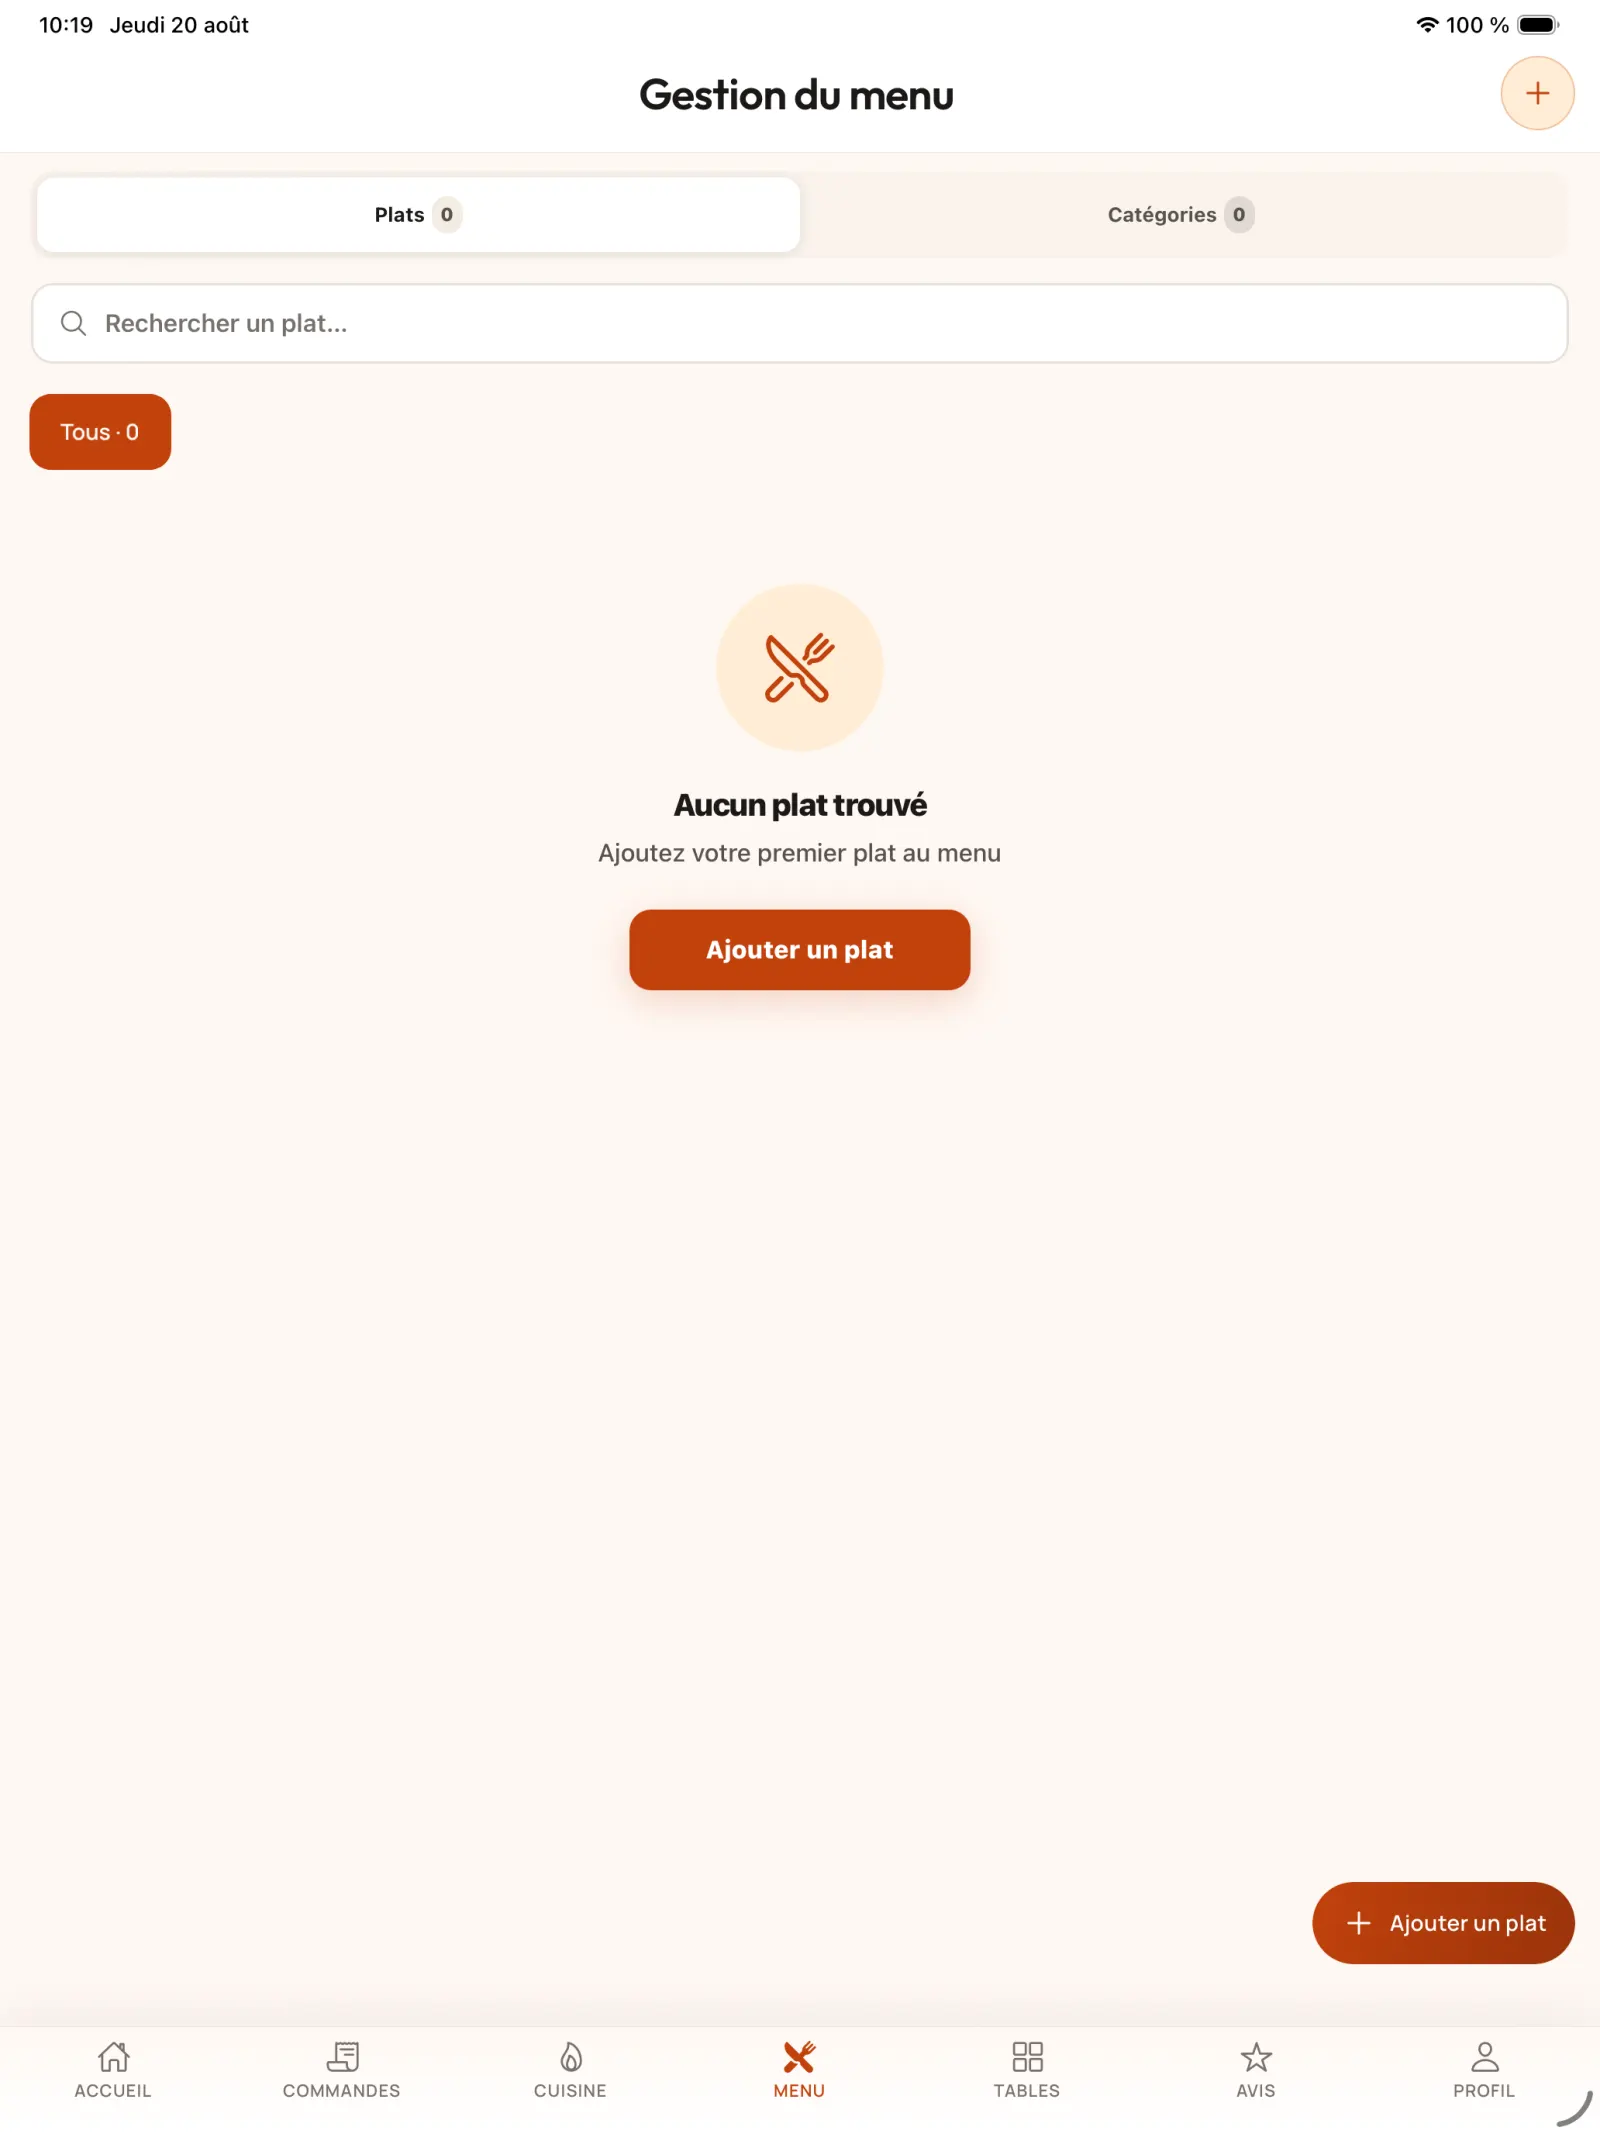
Step 1
Open menu management
Select the “Menu” tab, then use “Add Dish” or the add button at the bottom of the screen.
Open full-size image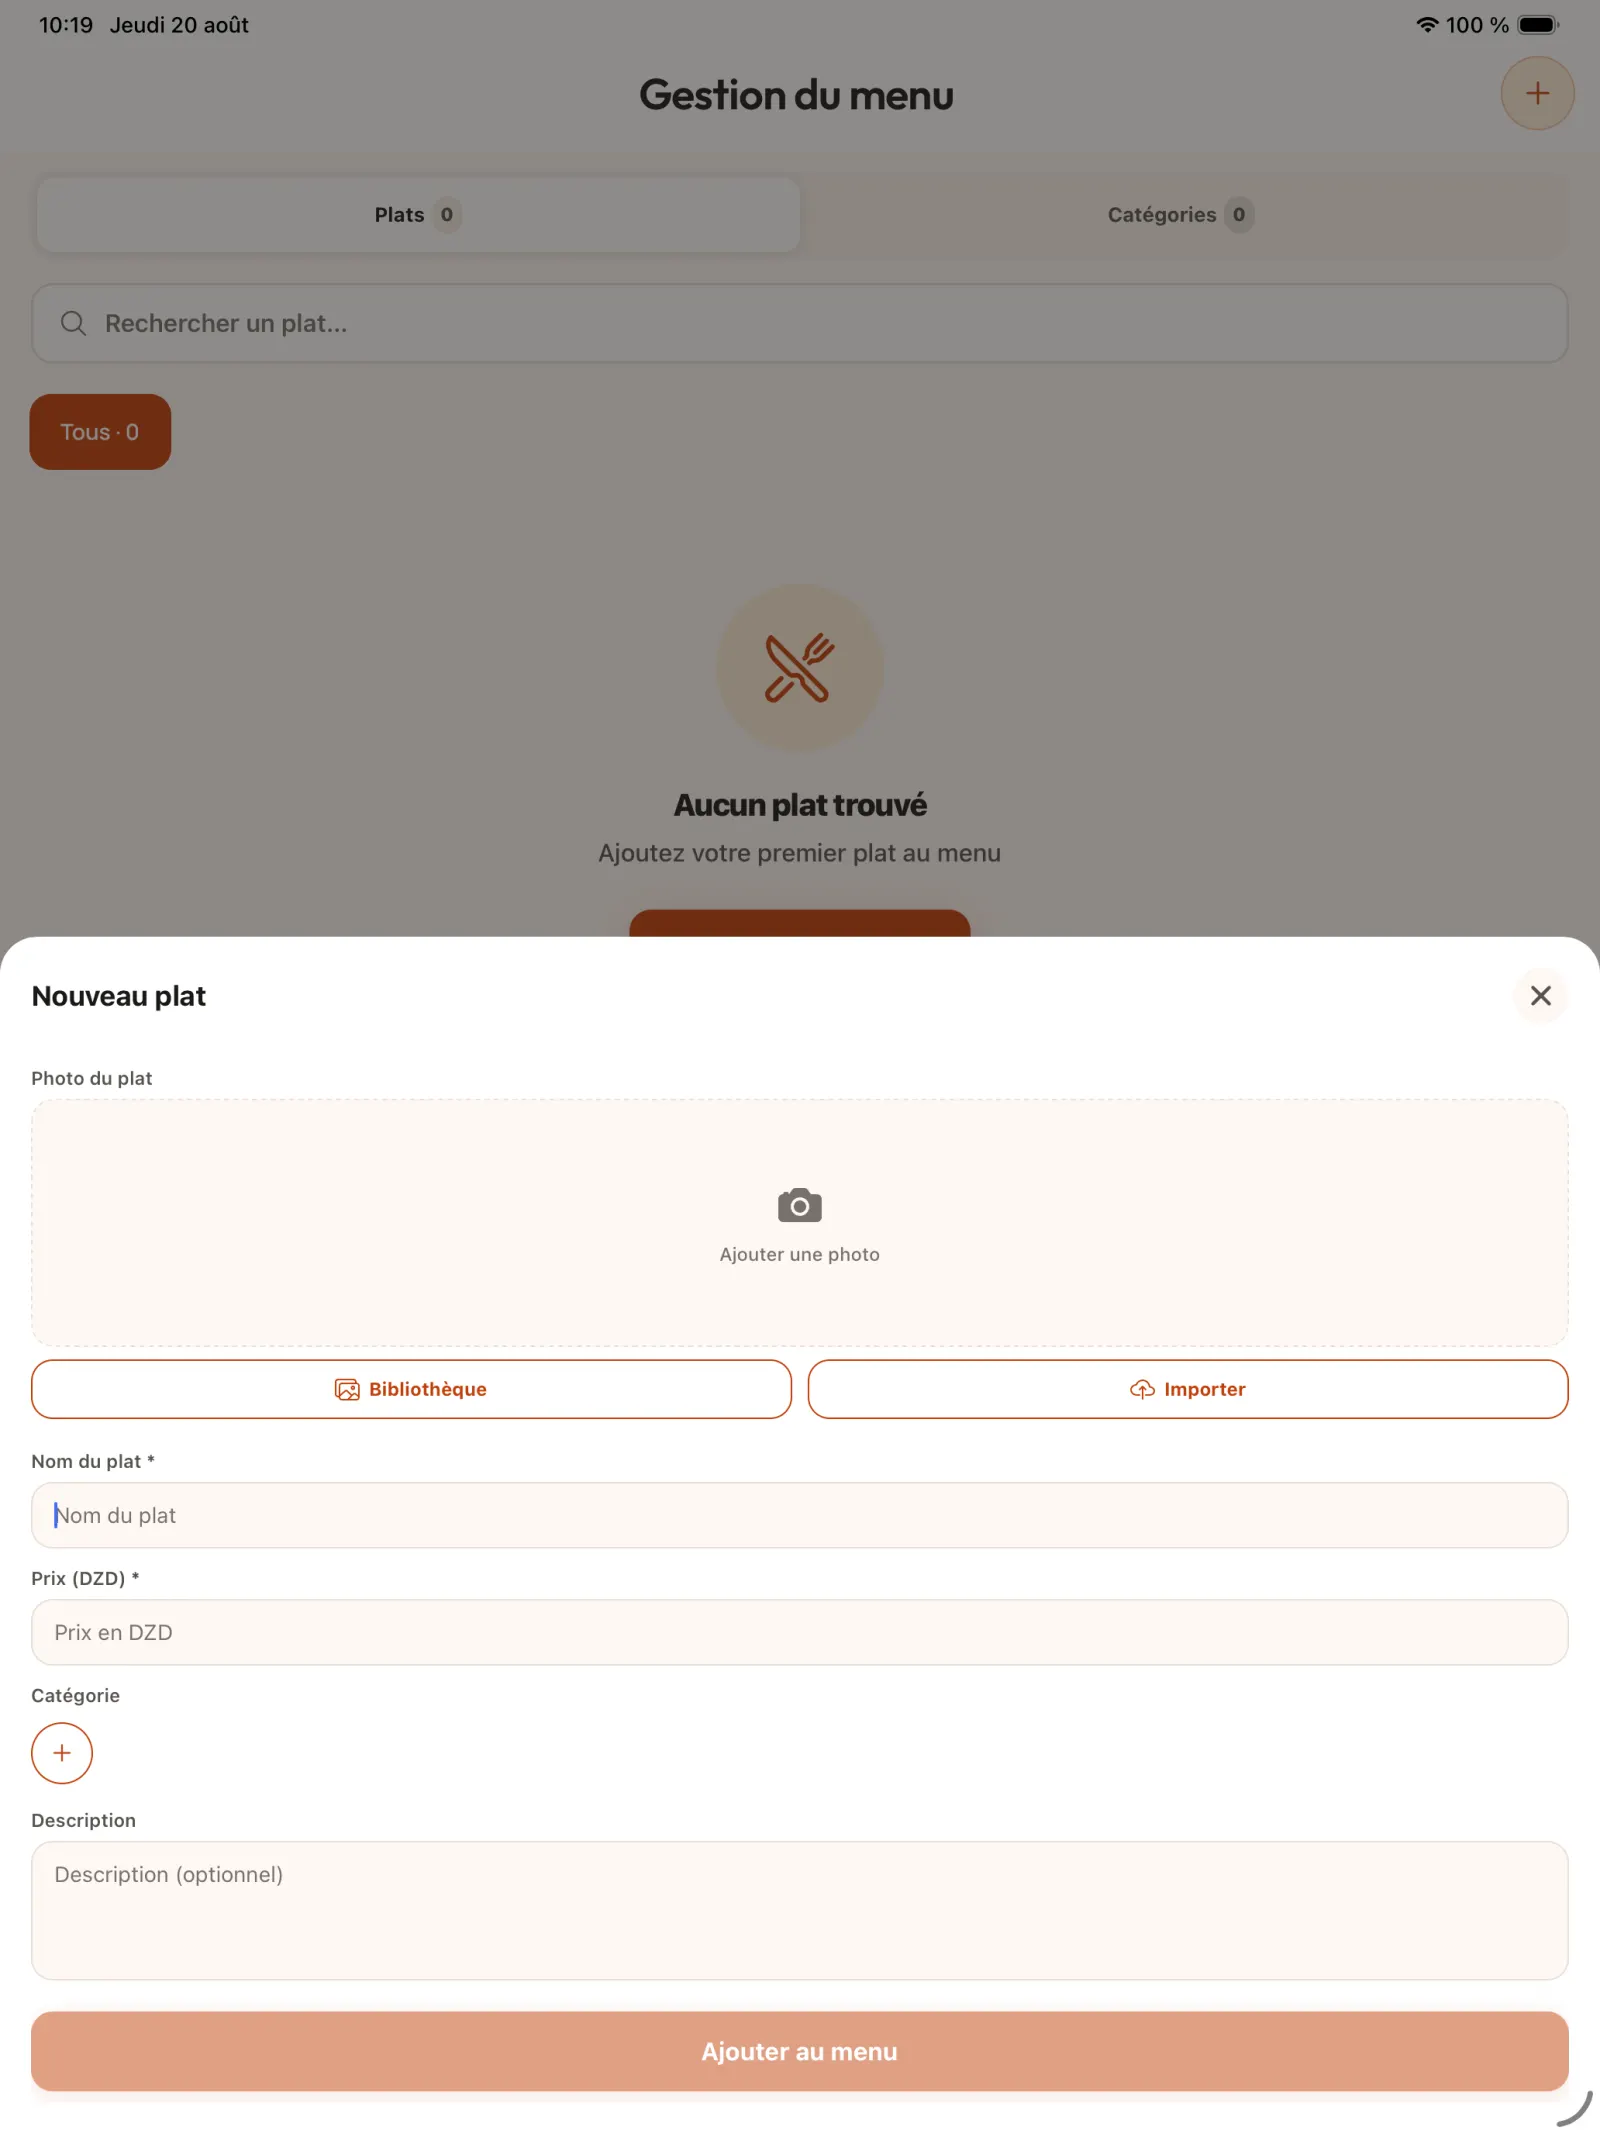
Step 2
Enter the new product details
Add a photo, a name and a price in dinars. Associate the product with an existing category or create one, then optionally complete its description.
In practice. Categories serve two purposes: they speed up order taking by staff and allow the customer to filter the menu. The description can present the product, detail its ingredients or provide useful information before purchasing.
Open full-size image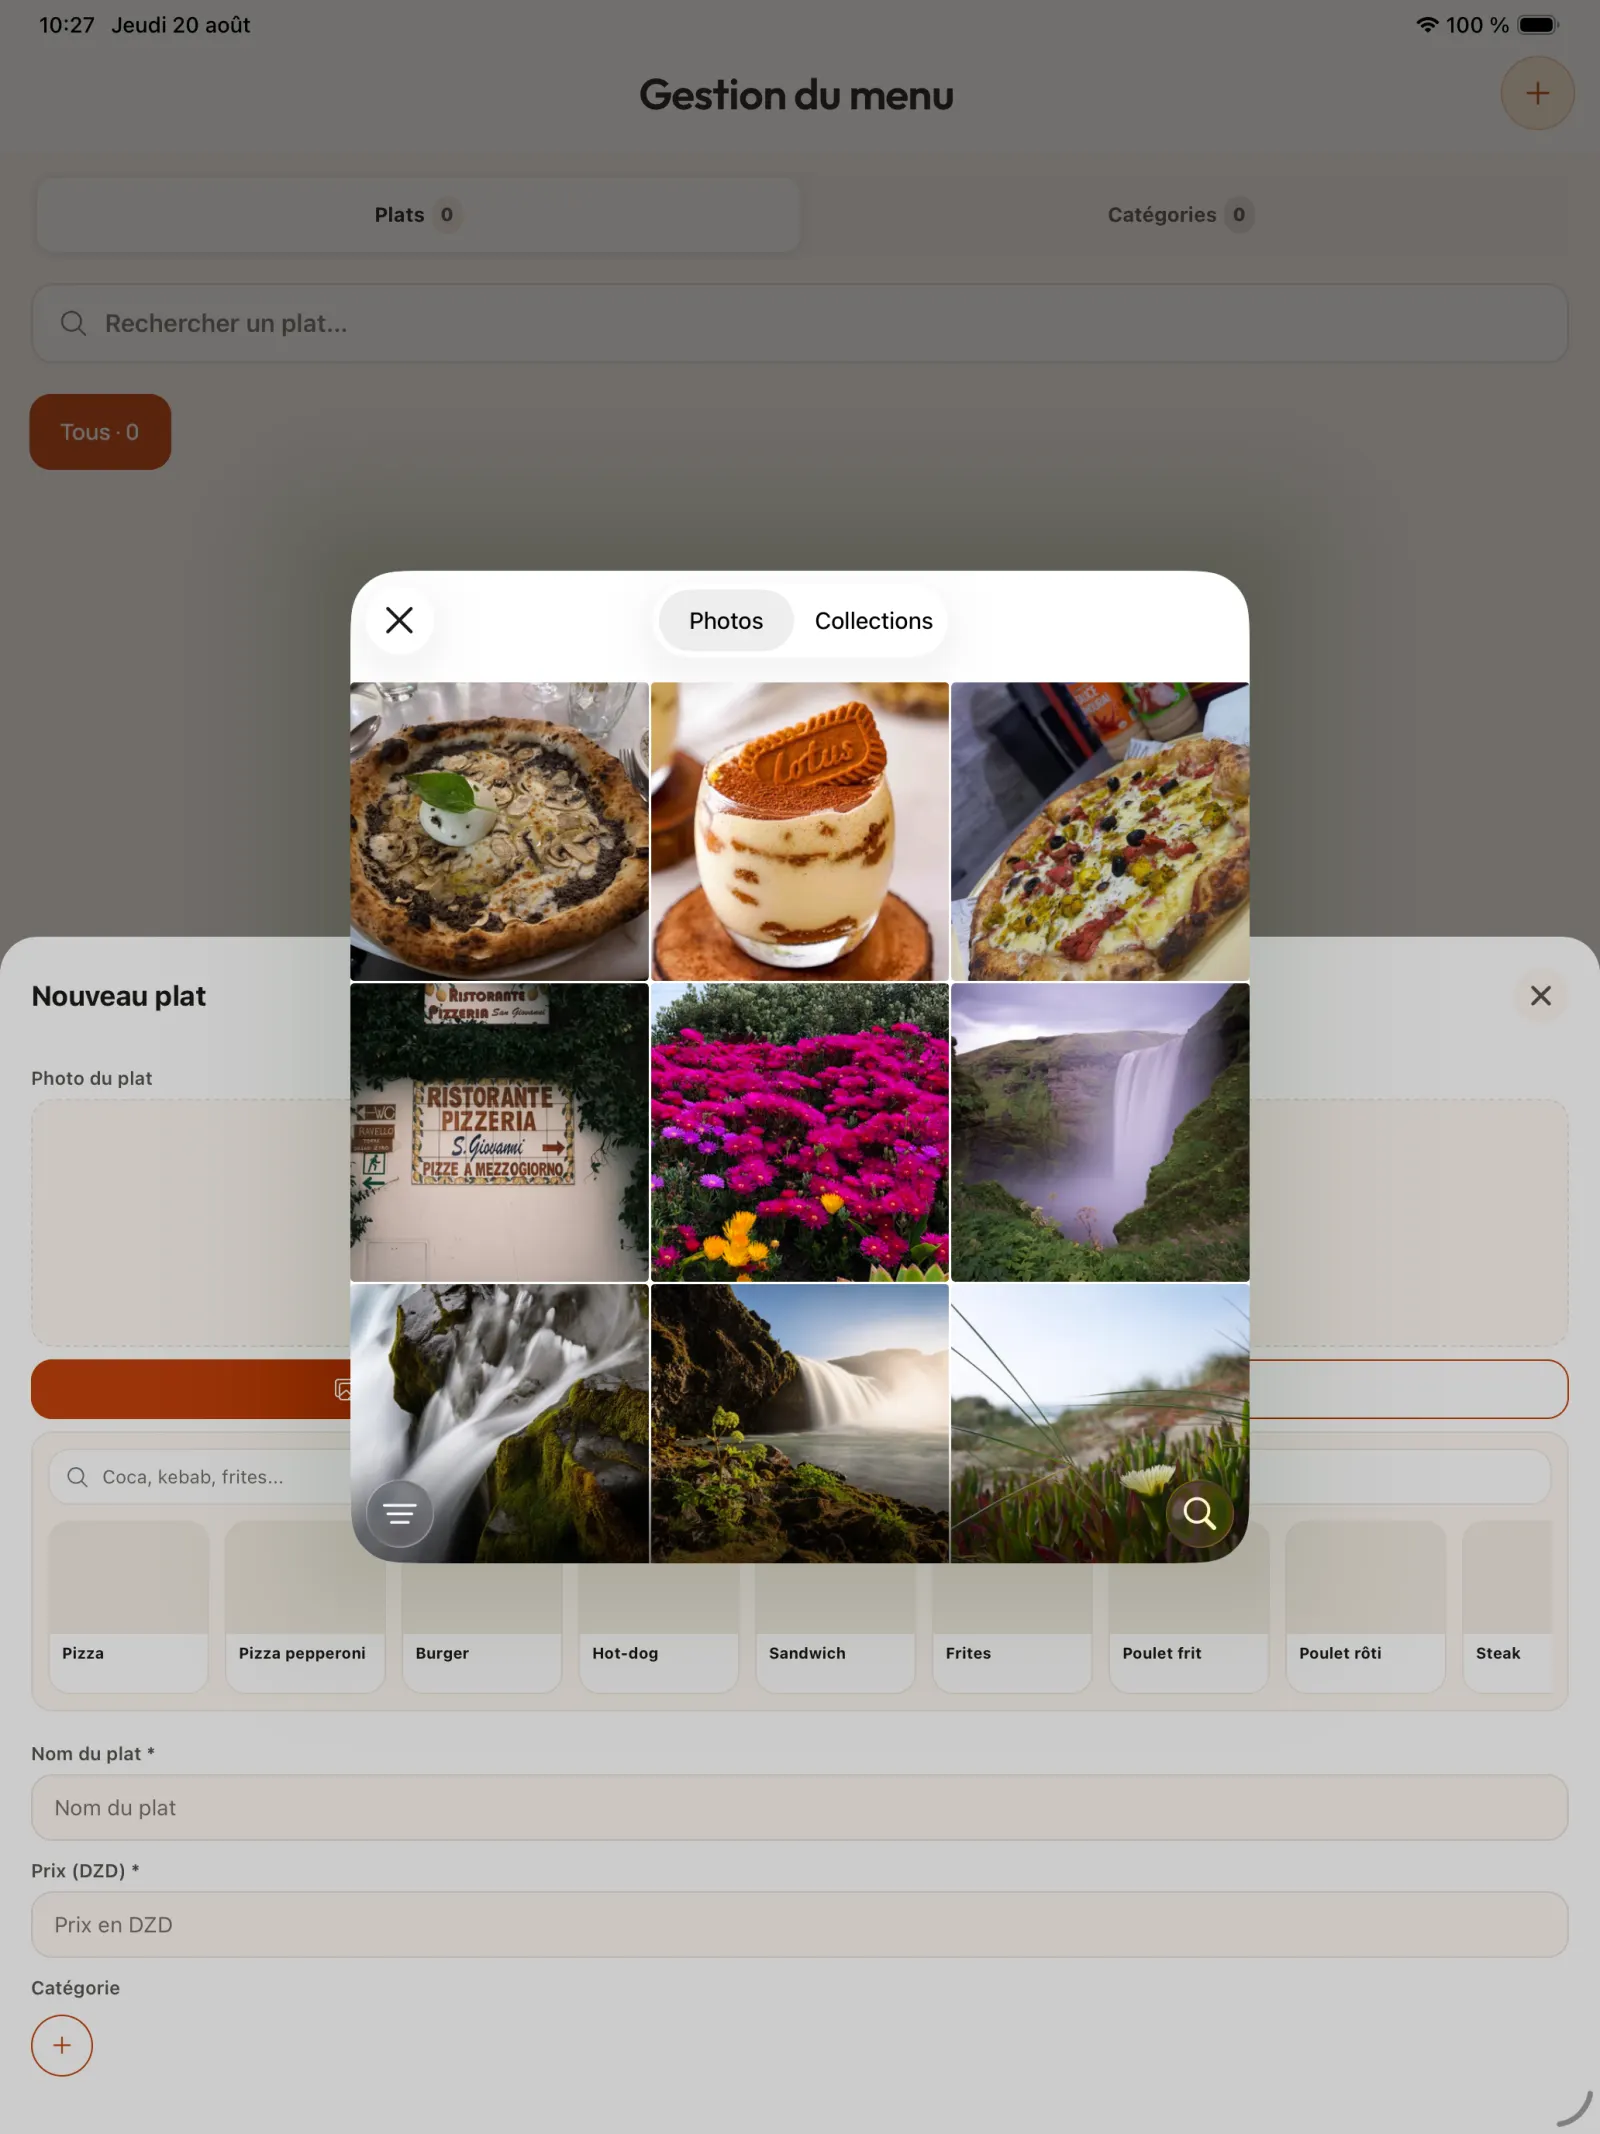
Step 3
Select dish photo
Choose a clear, representative image from the photo library.
Open full-size image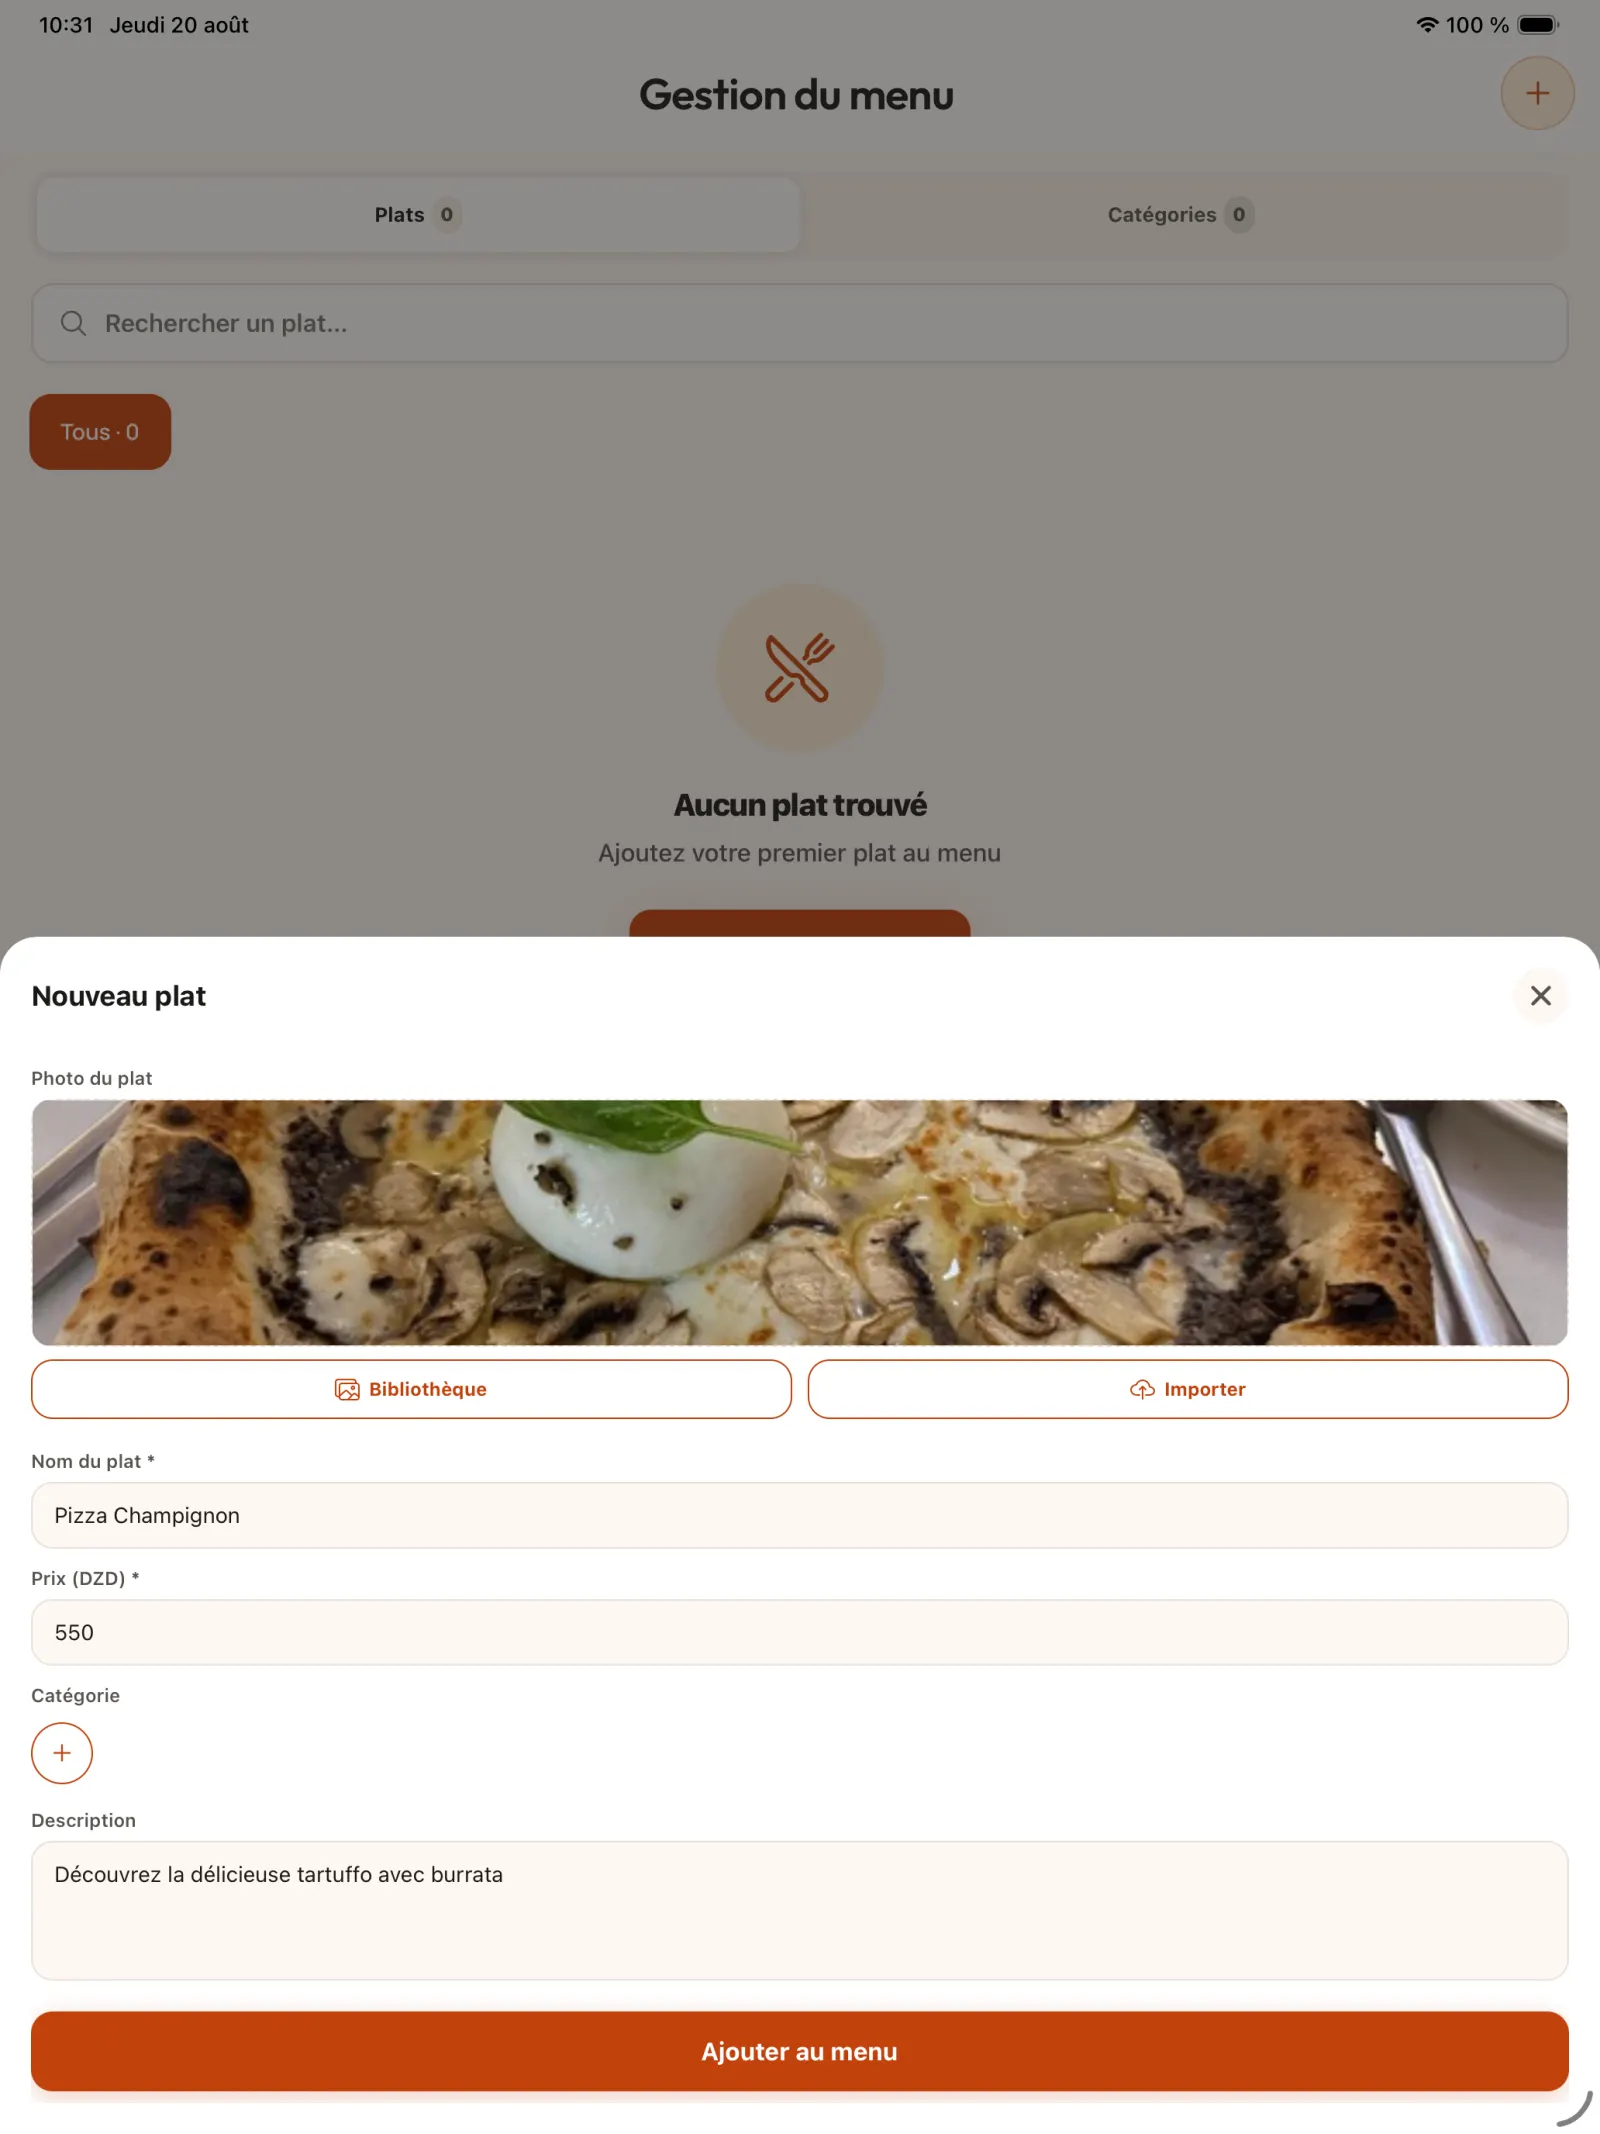
Step 4
Review the form
Review the name, price, category and description before adding the product to the menu.
Open full-size image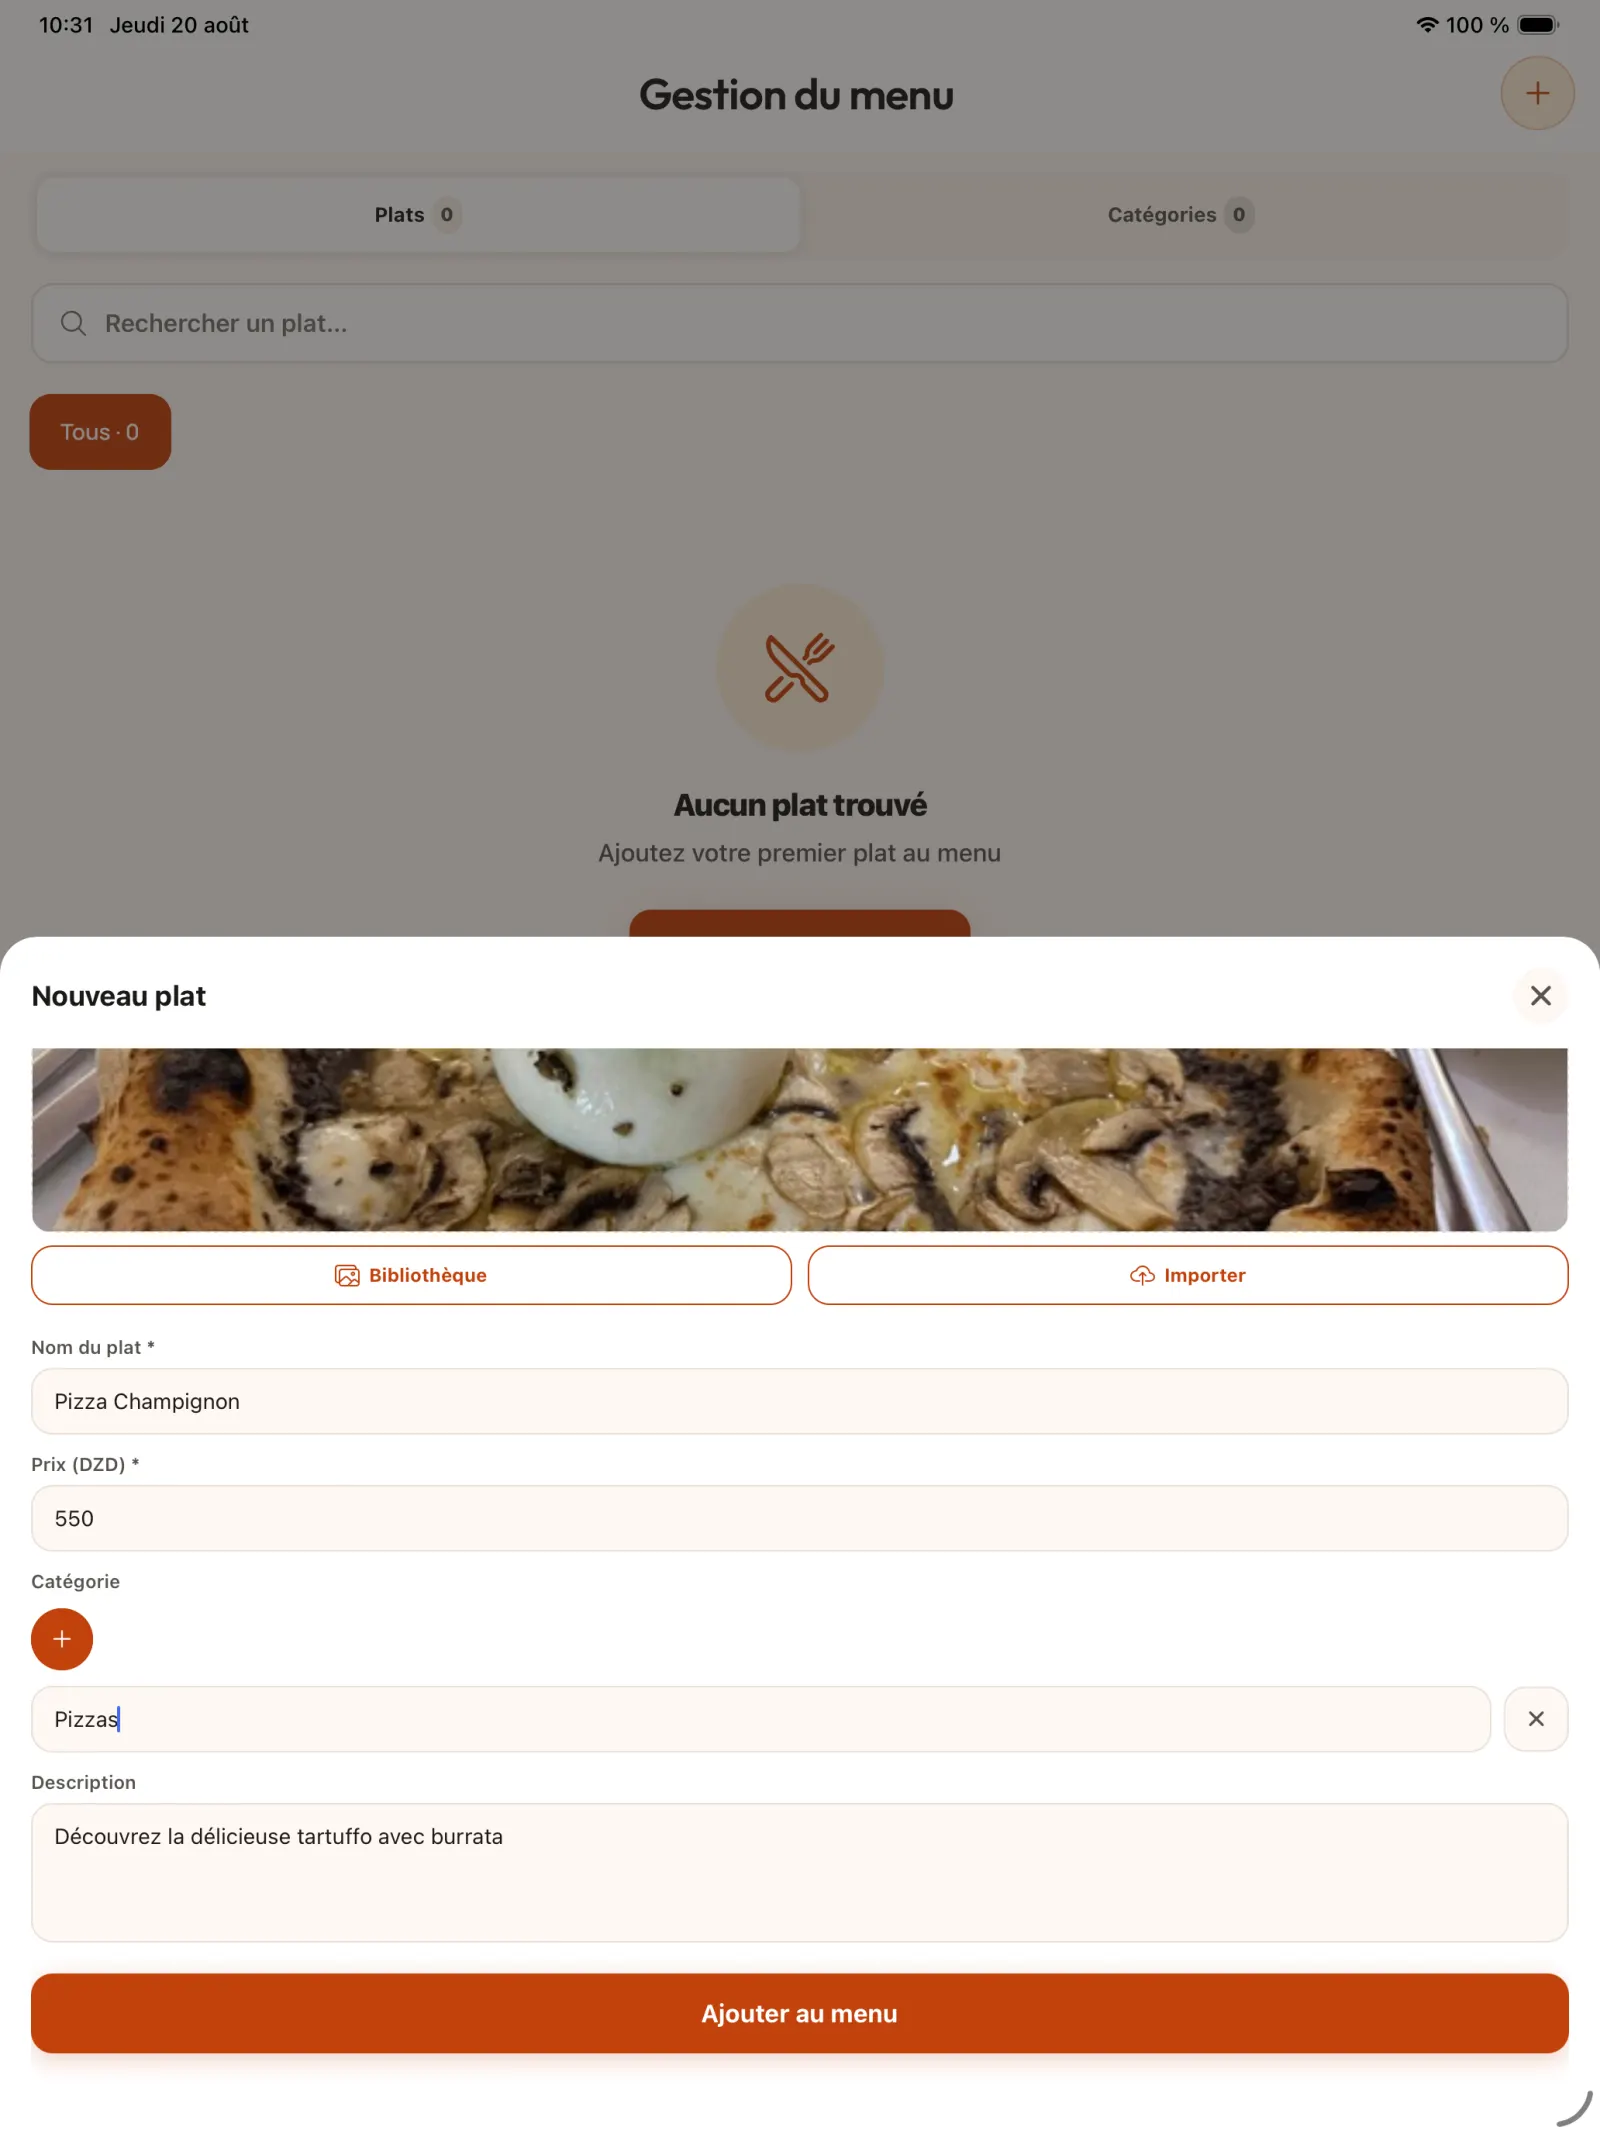
Step 5
Create a category while adding
Use the button to add the “Category” field, name the new category then select it for the current product.
Open full-size image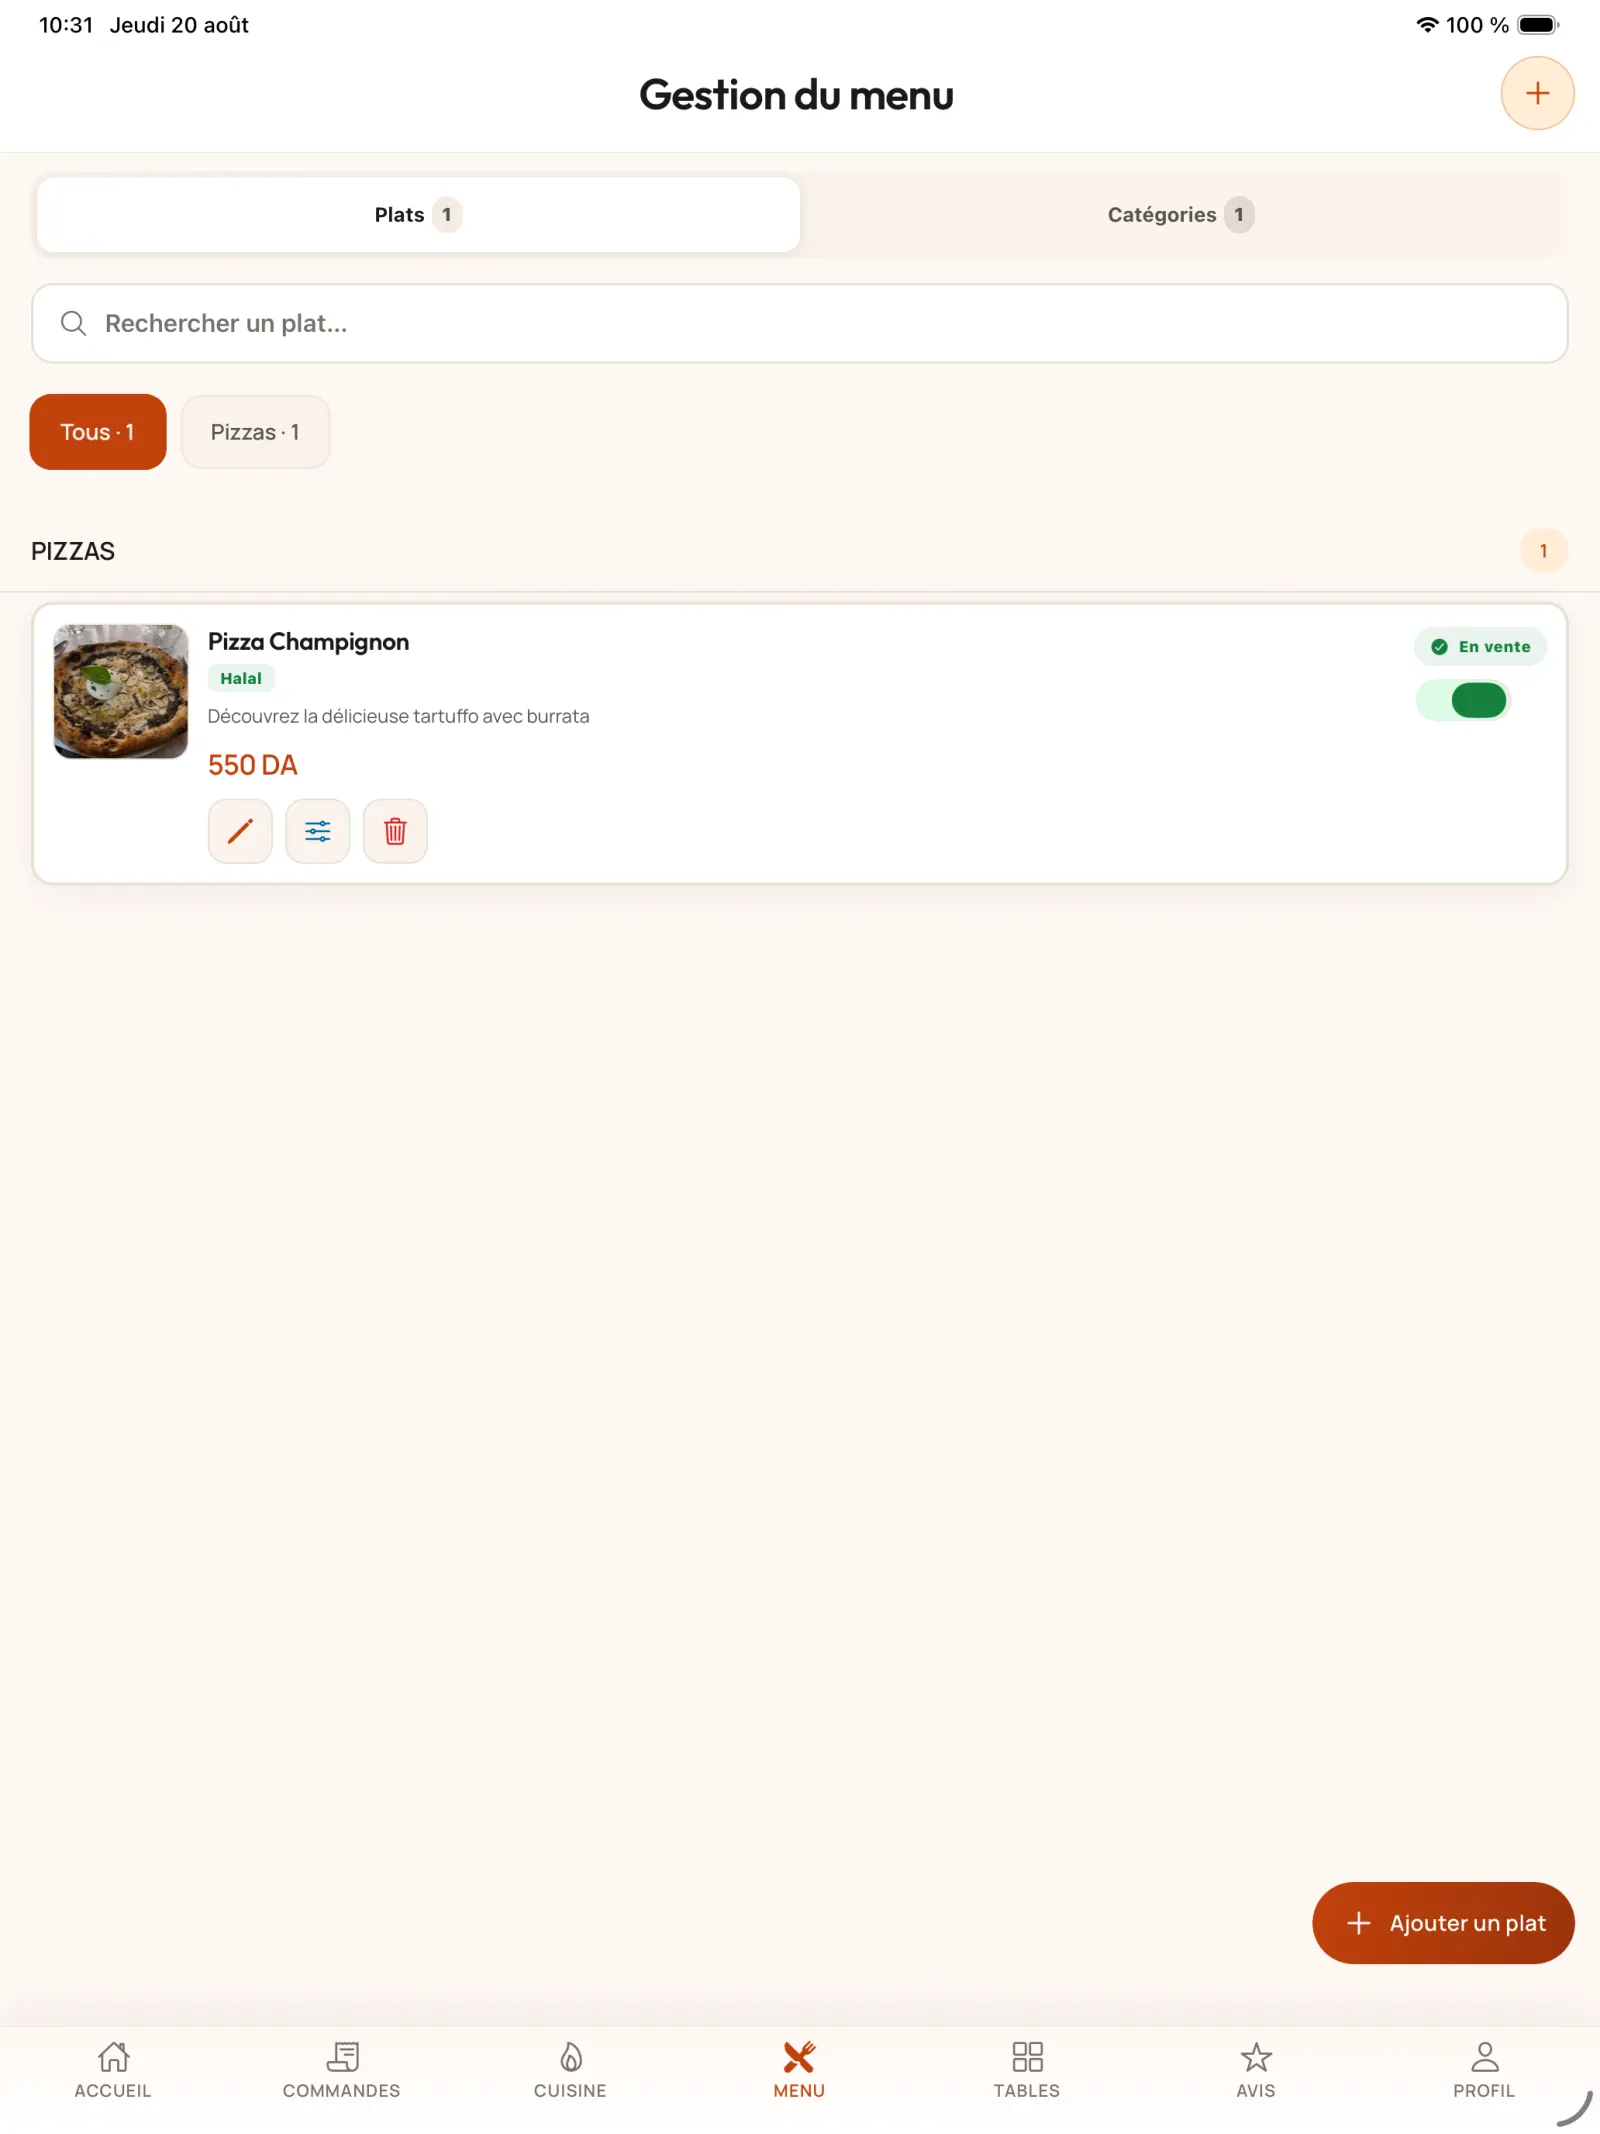
Step 6
Manage product availability
The product immediately appears in the menu. Turn off its switch to temporarily remove it from sale without deleting it.
In practice. If an ingredient or product is out of stock, temporarily deactivate the dish. It disappears from the order path, but its form and configuration remain ready for its resale.
Open full-size image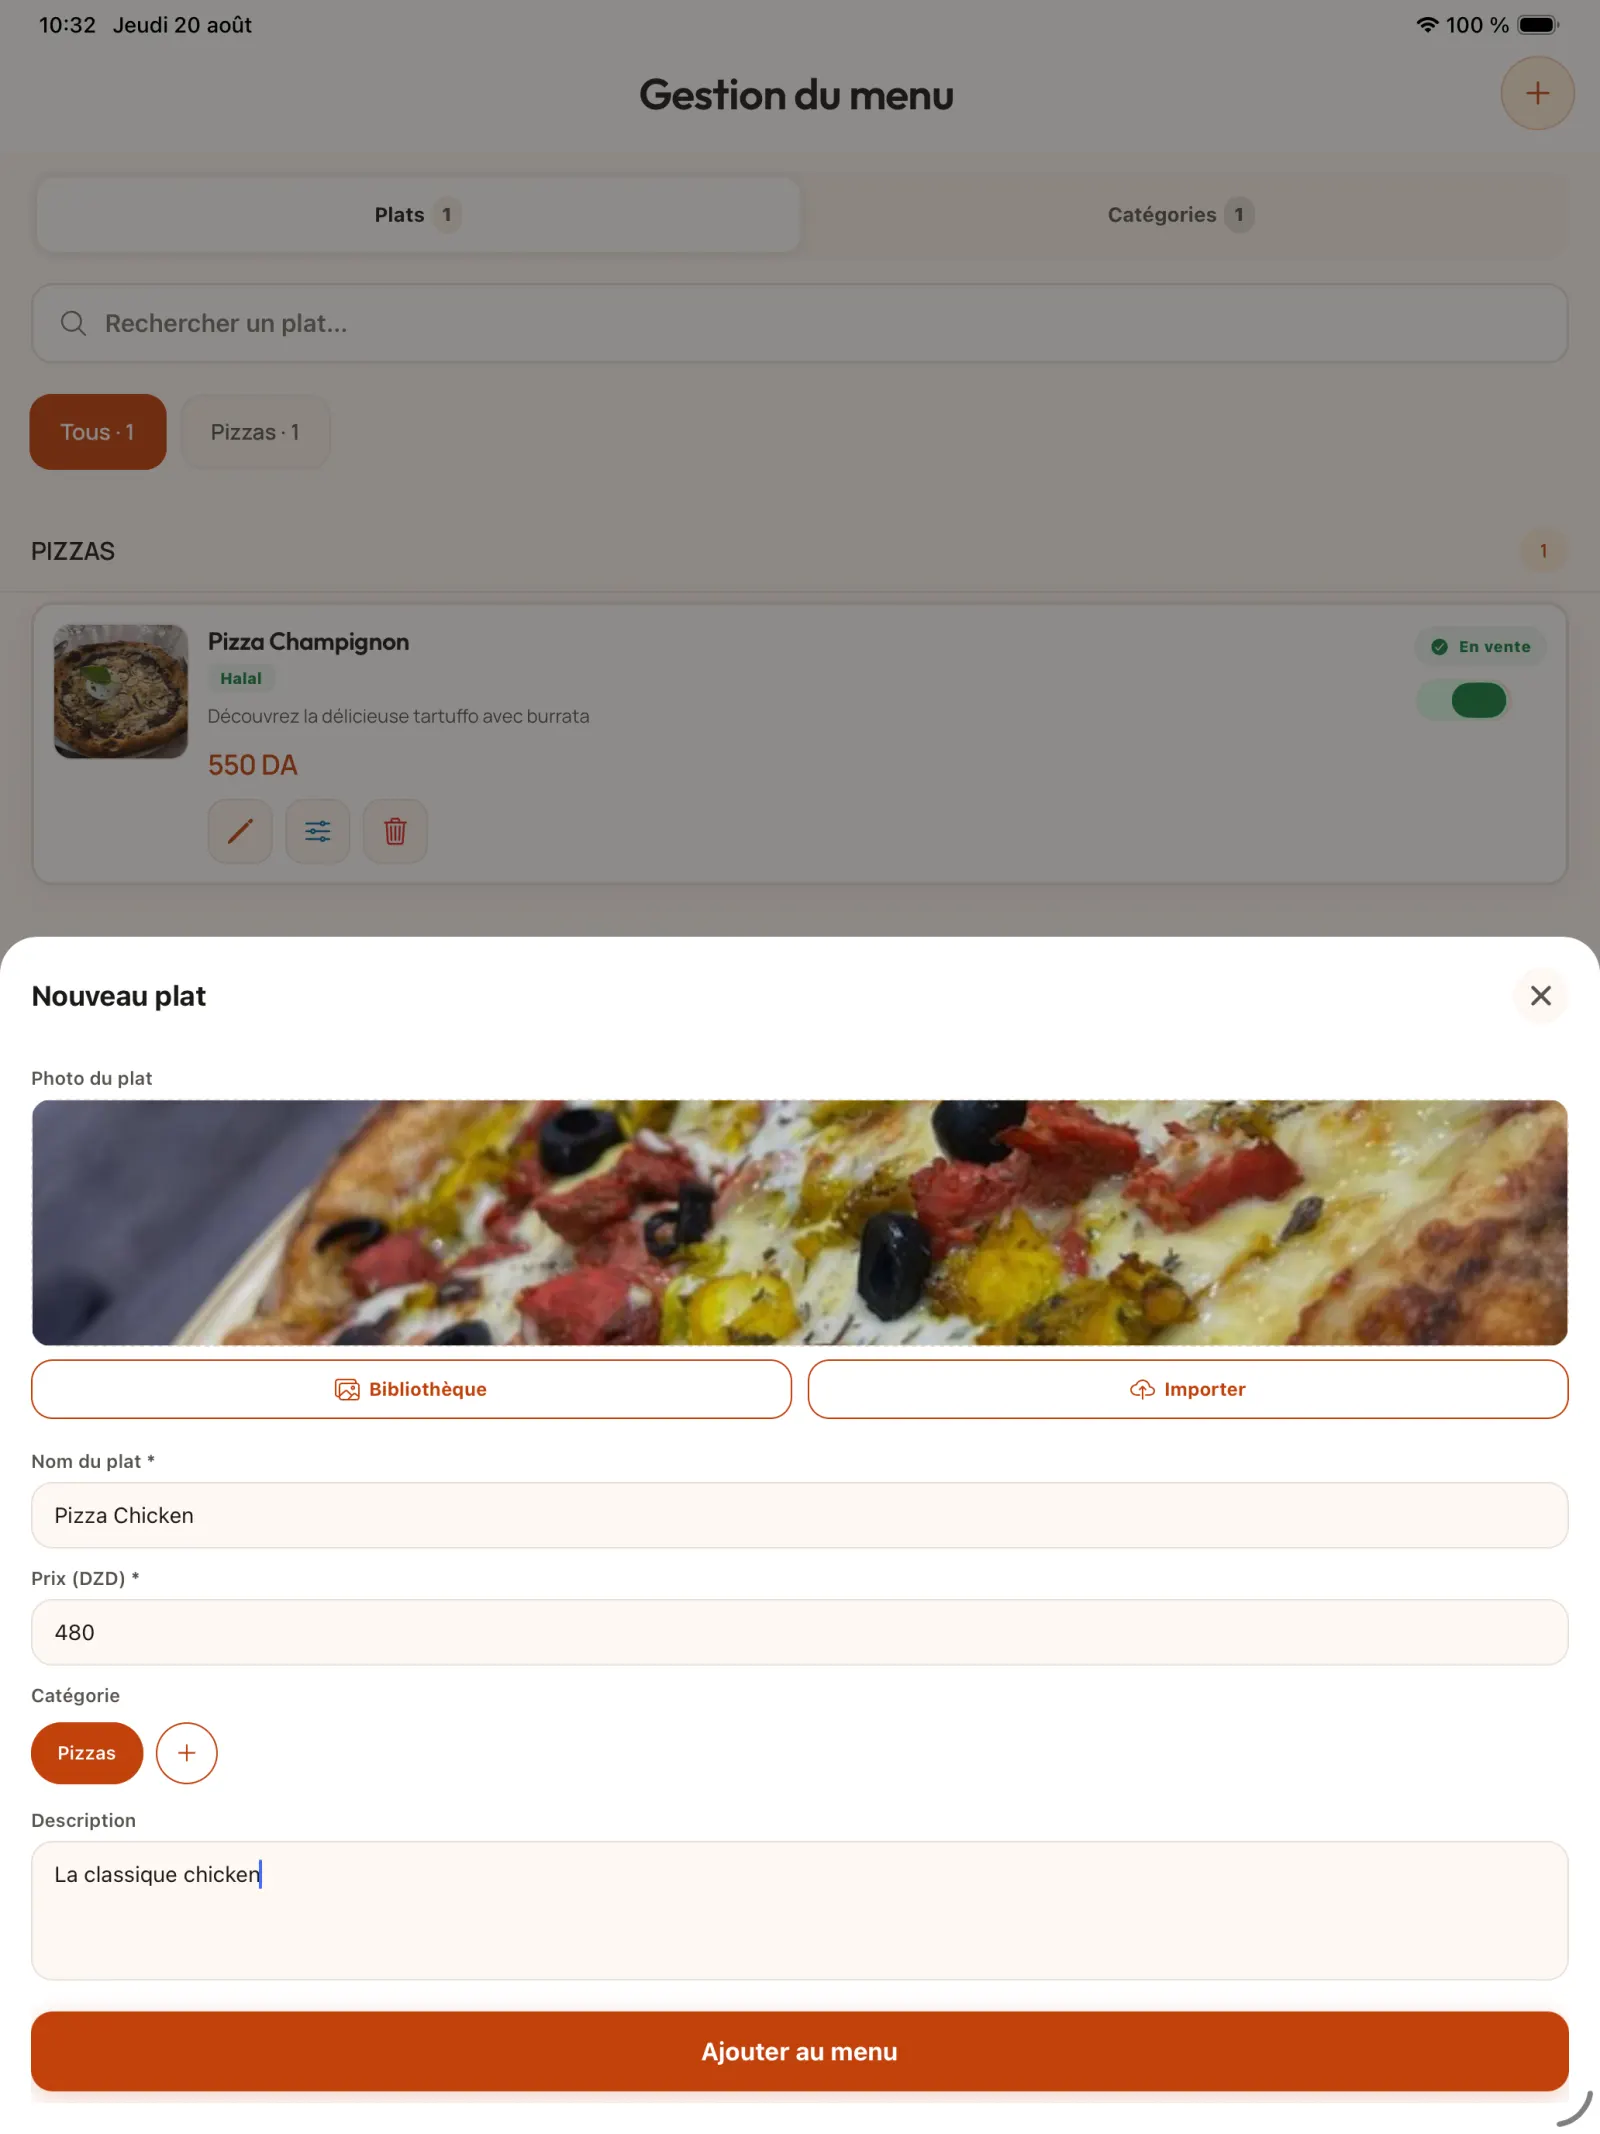
Step 7
Add multiple products to a category
Create the other dishes and link them to the corresponding categories to make the search easier for the team and customers.
Open full-size image
Chapter 2
Configure product options
The option groups represent the choices offered to the customer: size, dough, bread, cooking, sauces or supplements.
Step 8
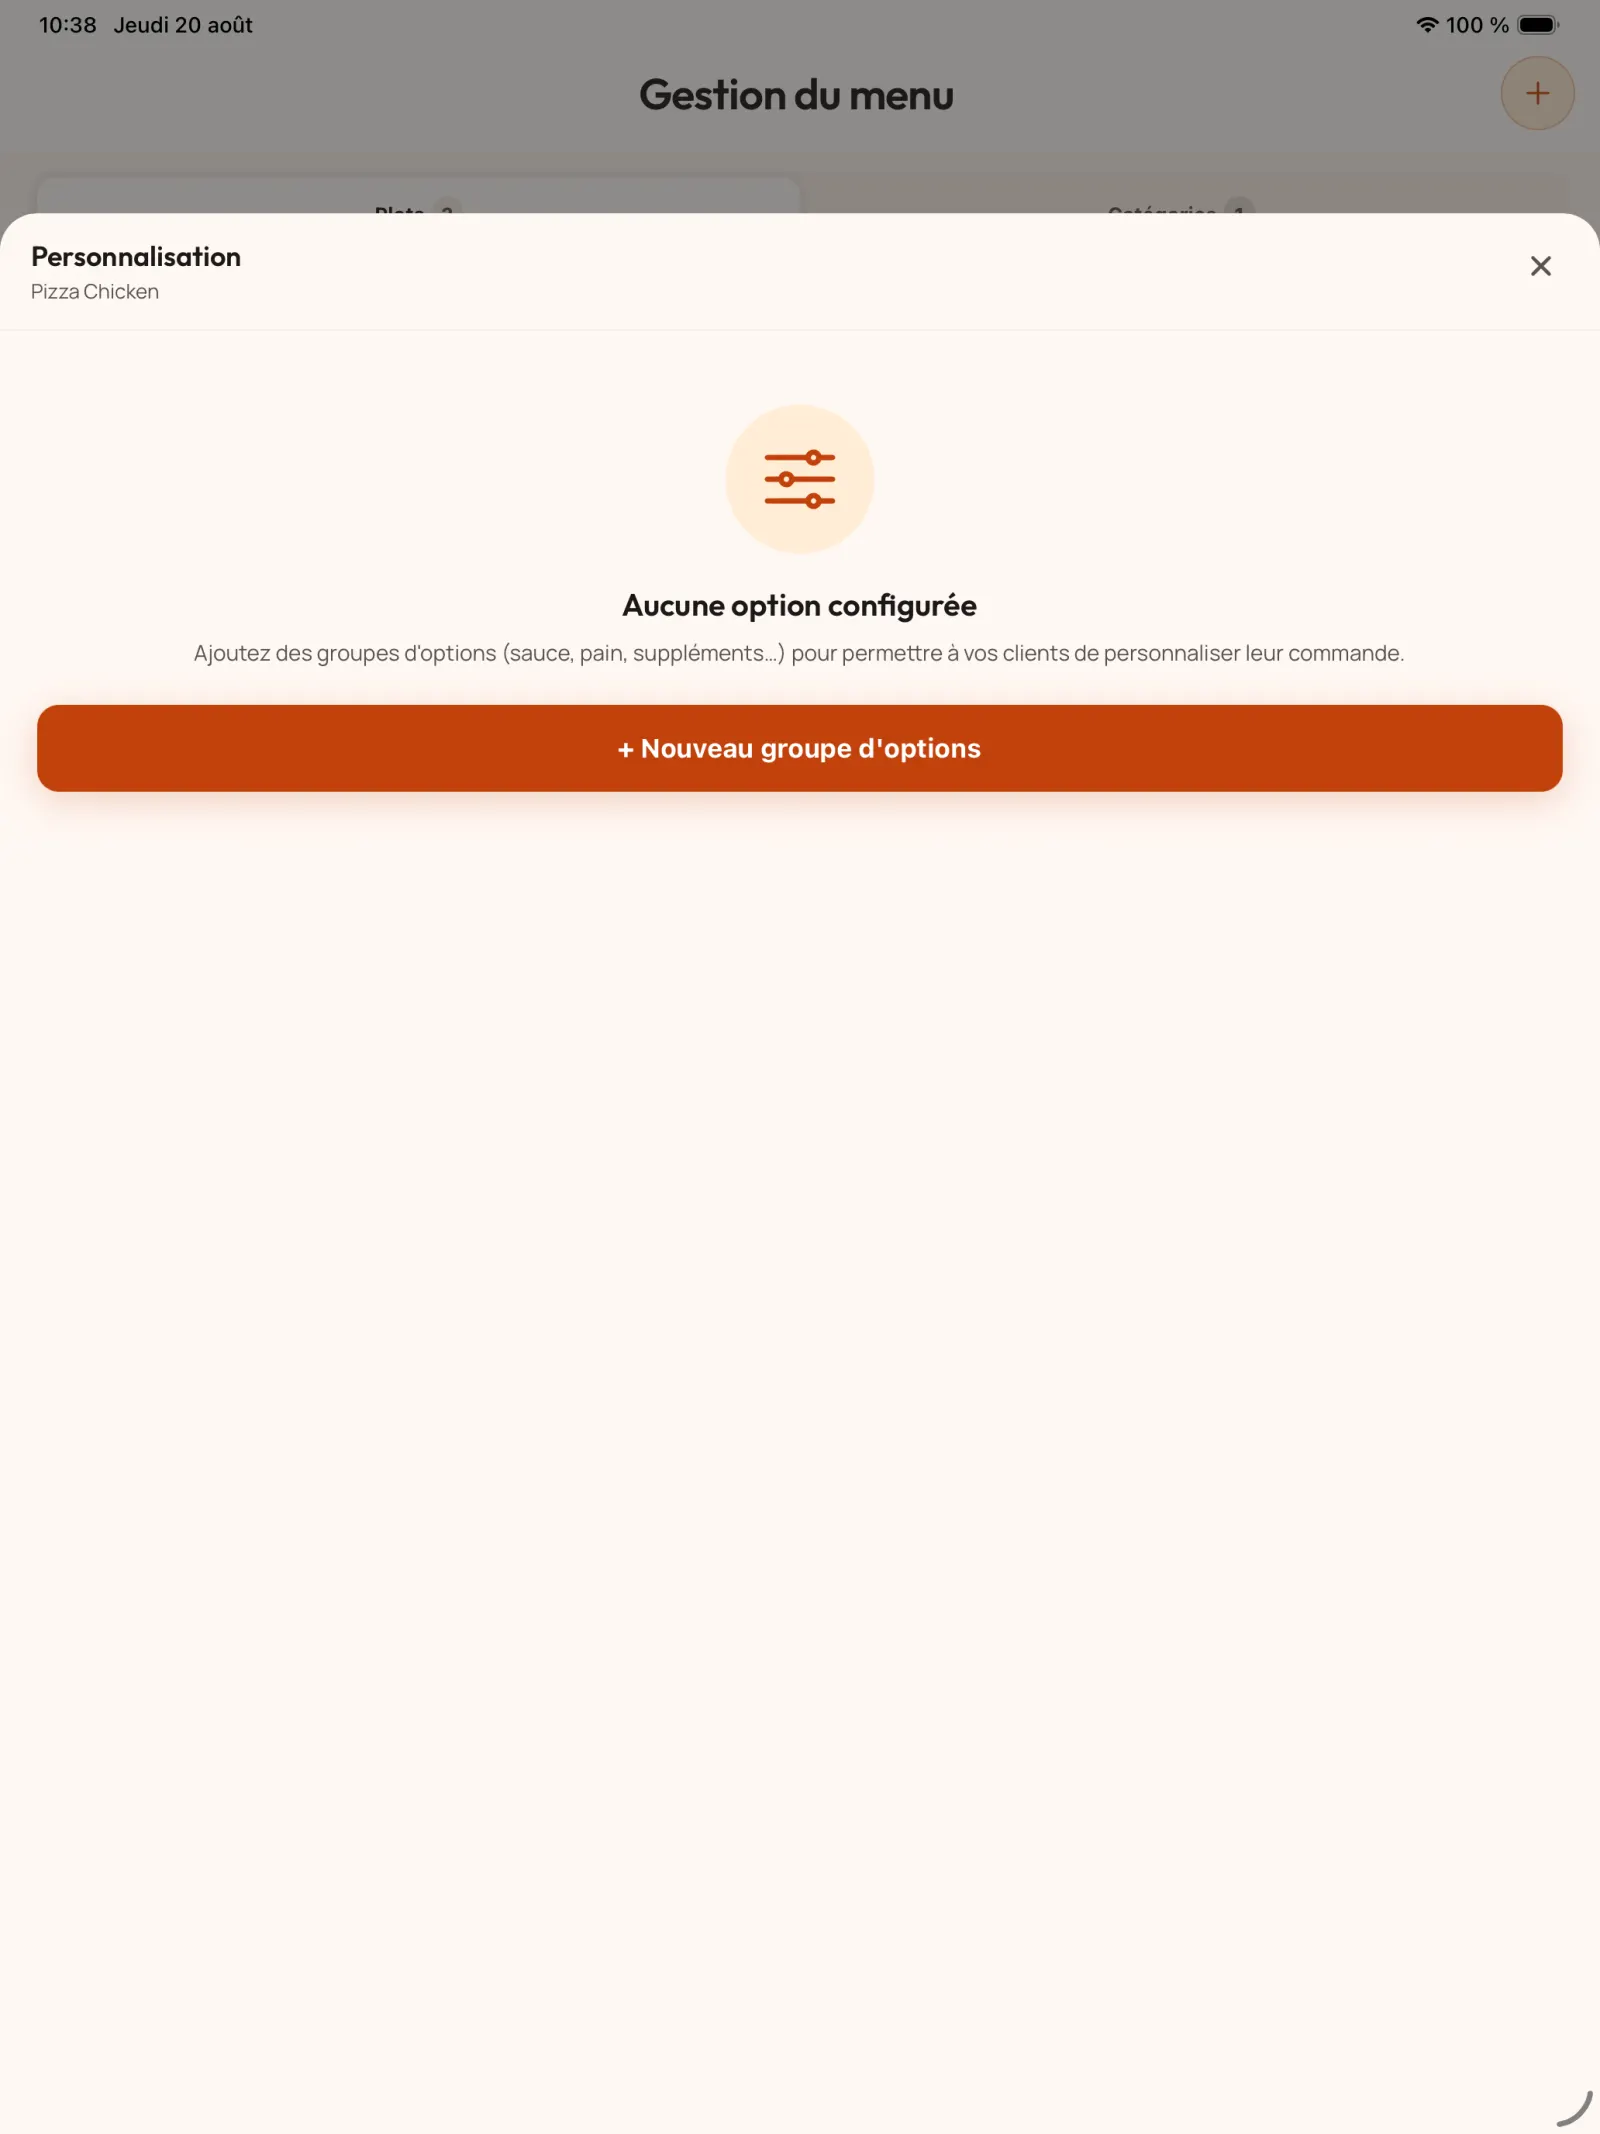
Open the product configuration
From the product page, open its composition then select “New group of options”.
In practice. The composition translates your actual offer in the application. A pizzeria may offer several pastas; a kebab or shawarma can request bread, meat, sauce and extras directly on the customer's screen.
Open full-size image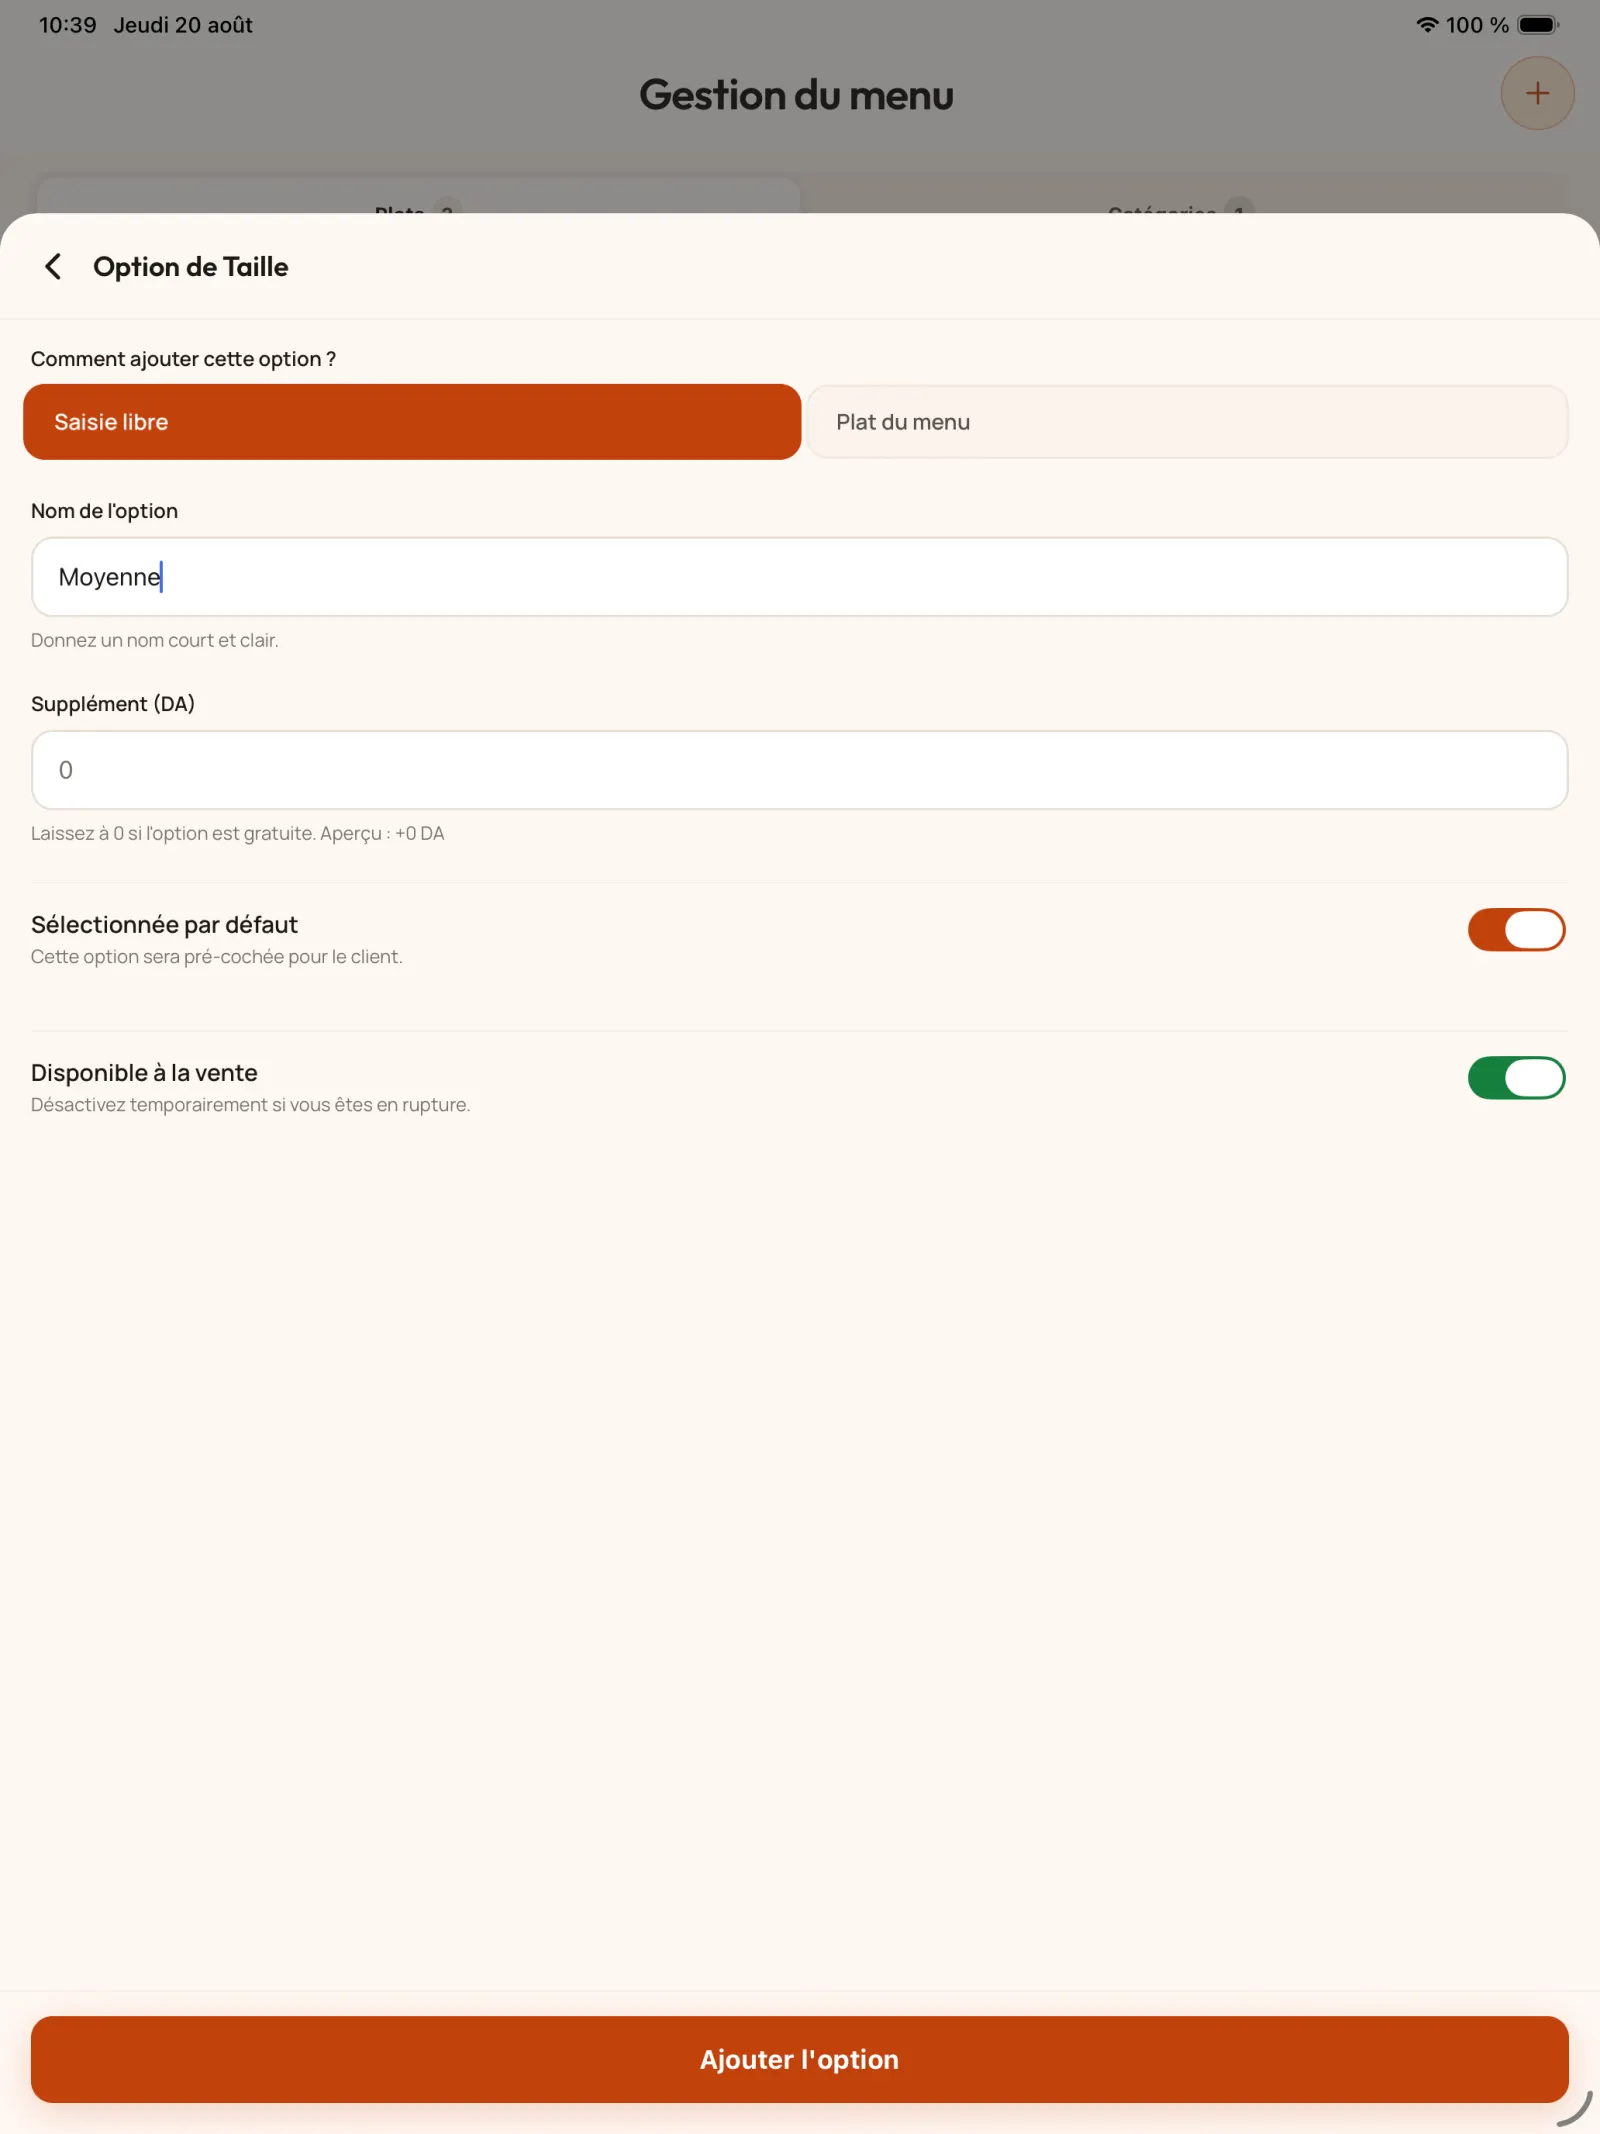
Step 9
Start an option group
Add a group that will bring together related choices, for example the different types of dough for a pizza.
Open full-size image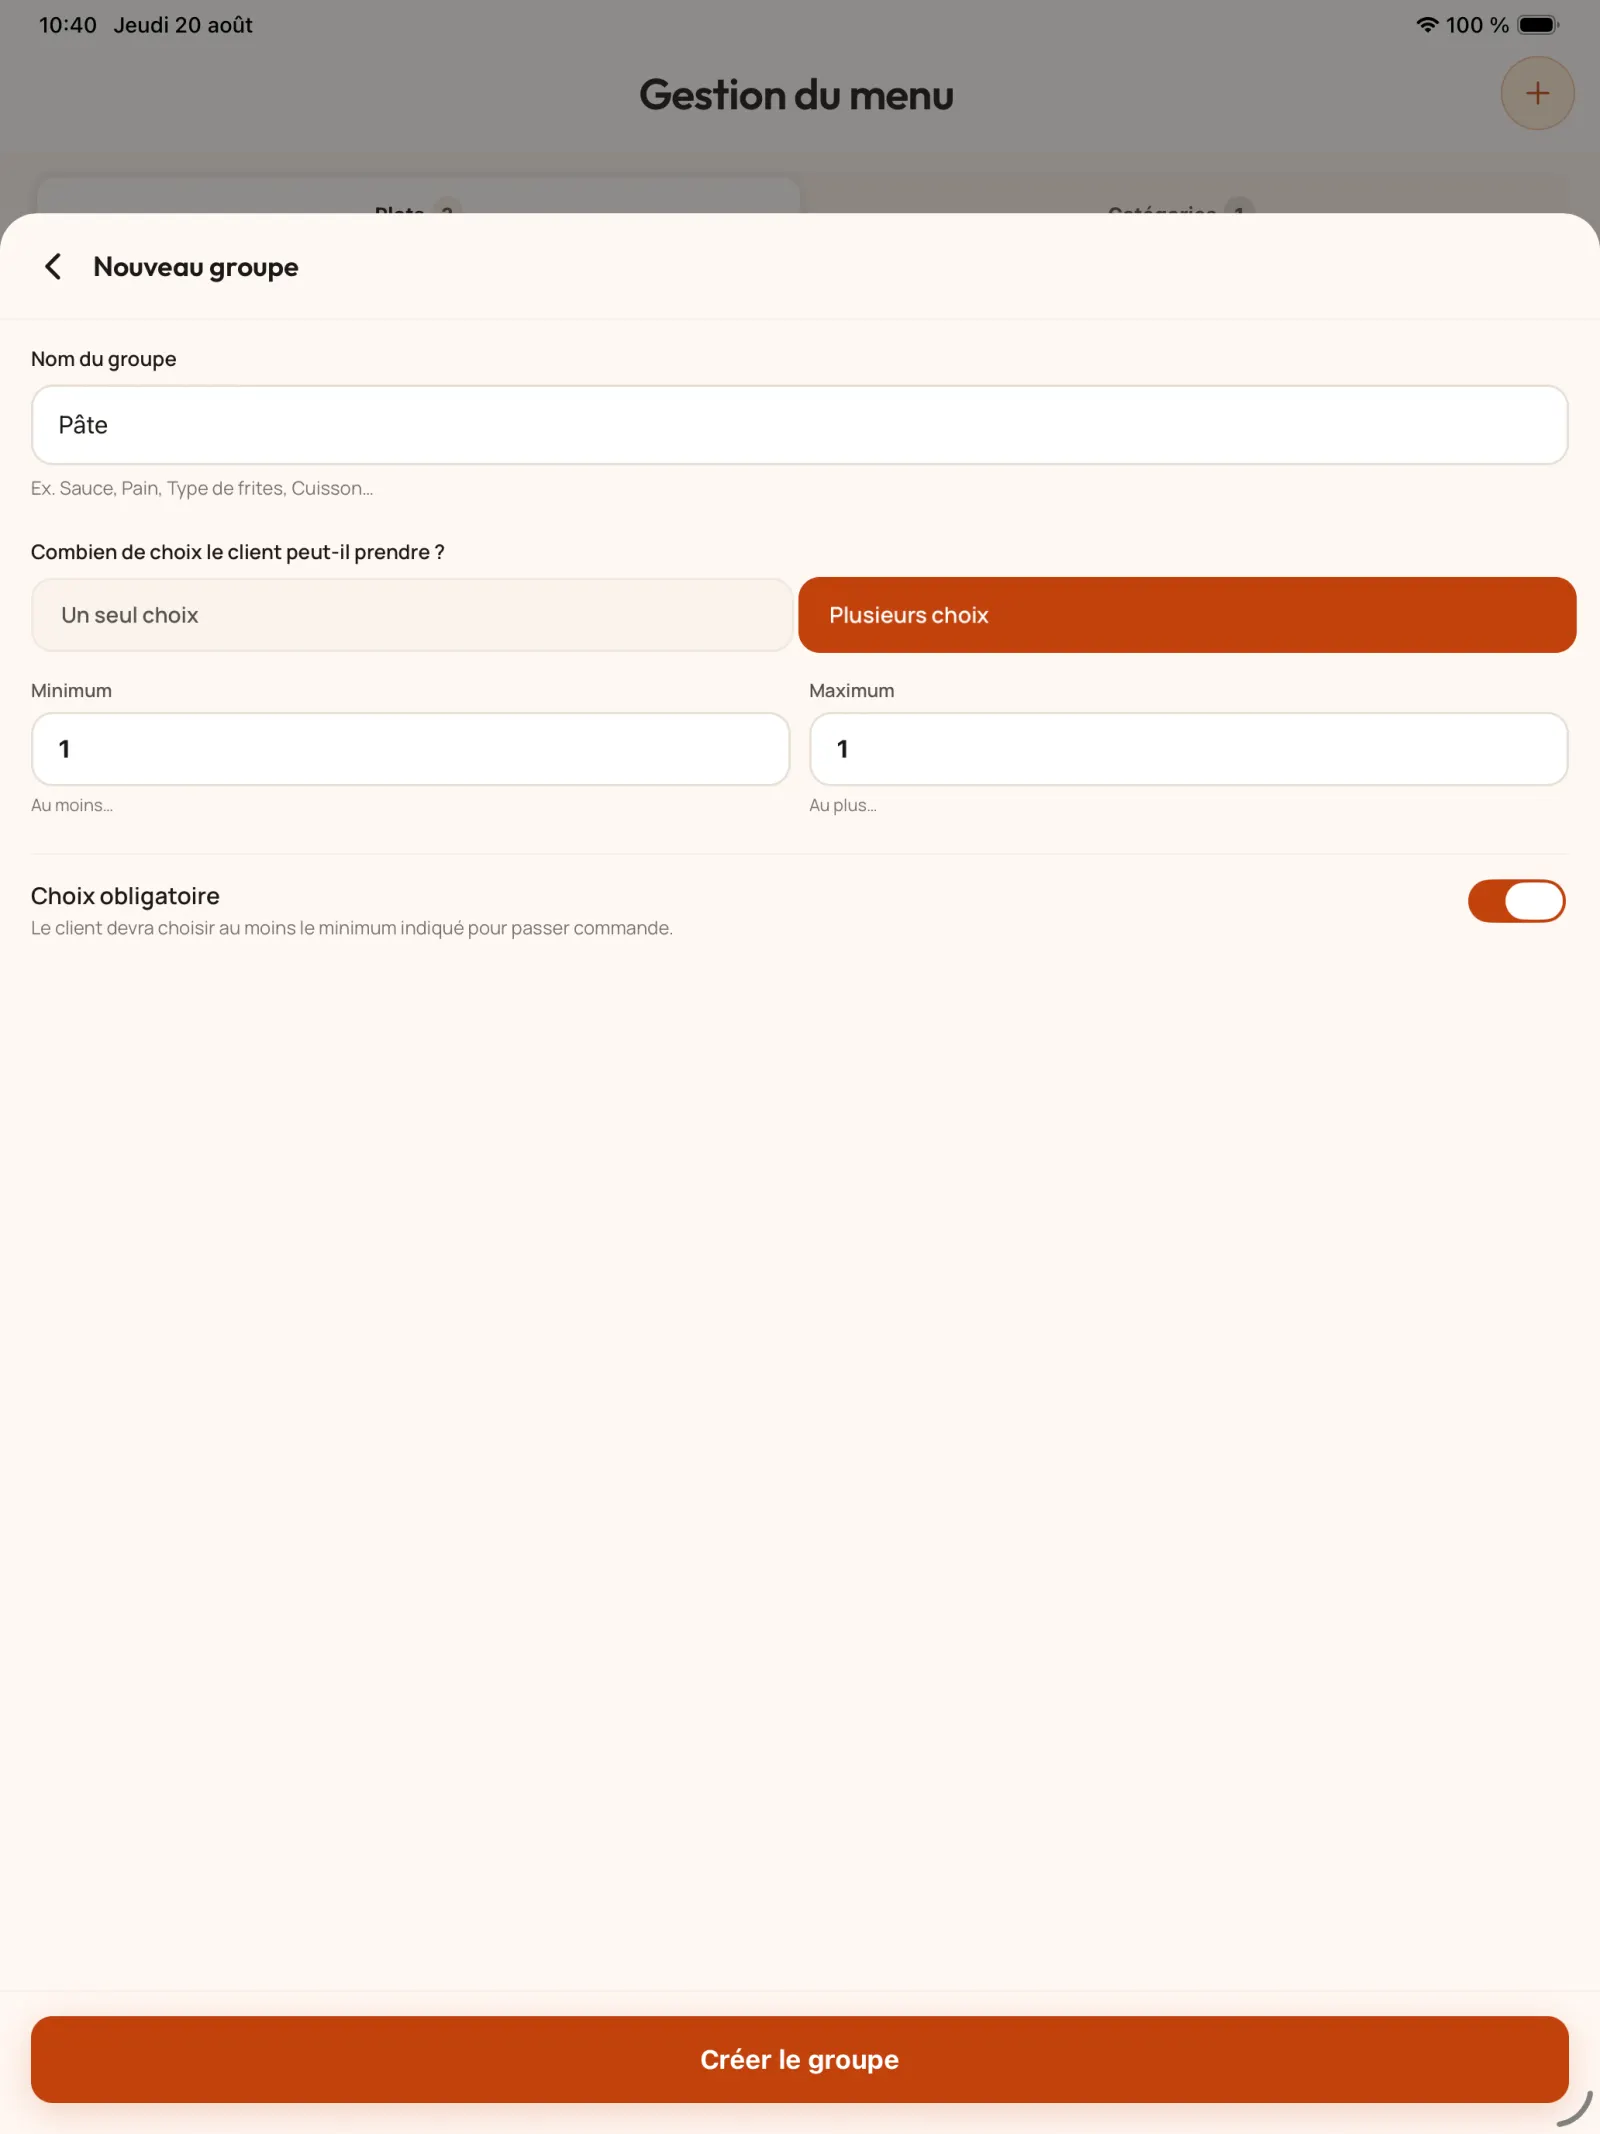
Step 10
Set group rules
Name the group, choose whether it allows one or more choices, then define whether it is mandatory as well as the minimum and maximum quantities.
In practice. Use a single choice when two answers are incompatible, for example "galette" or "round bread". Use multiple choices for sauces or add-ons, then set a minimum and maximum consistent with the preparation.
Open full-size image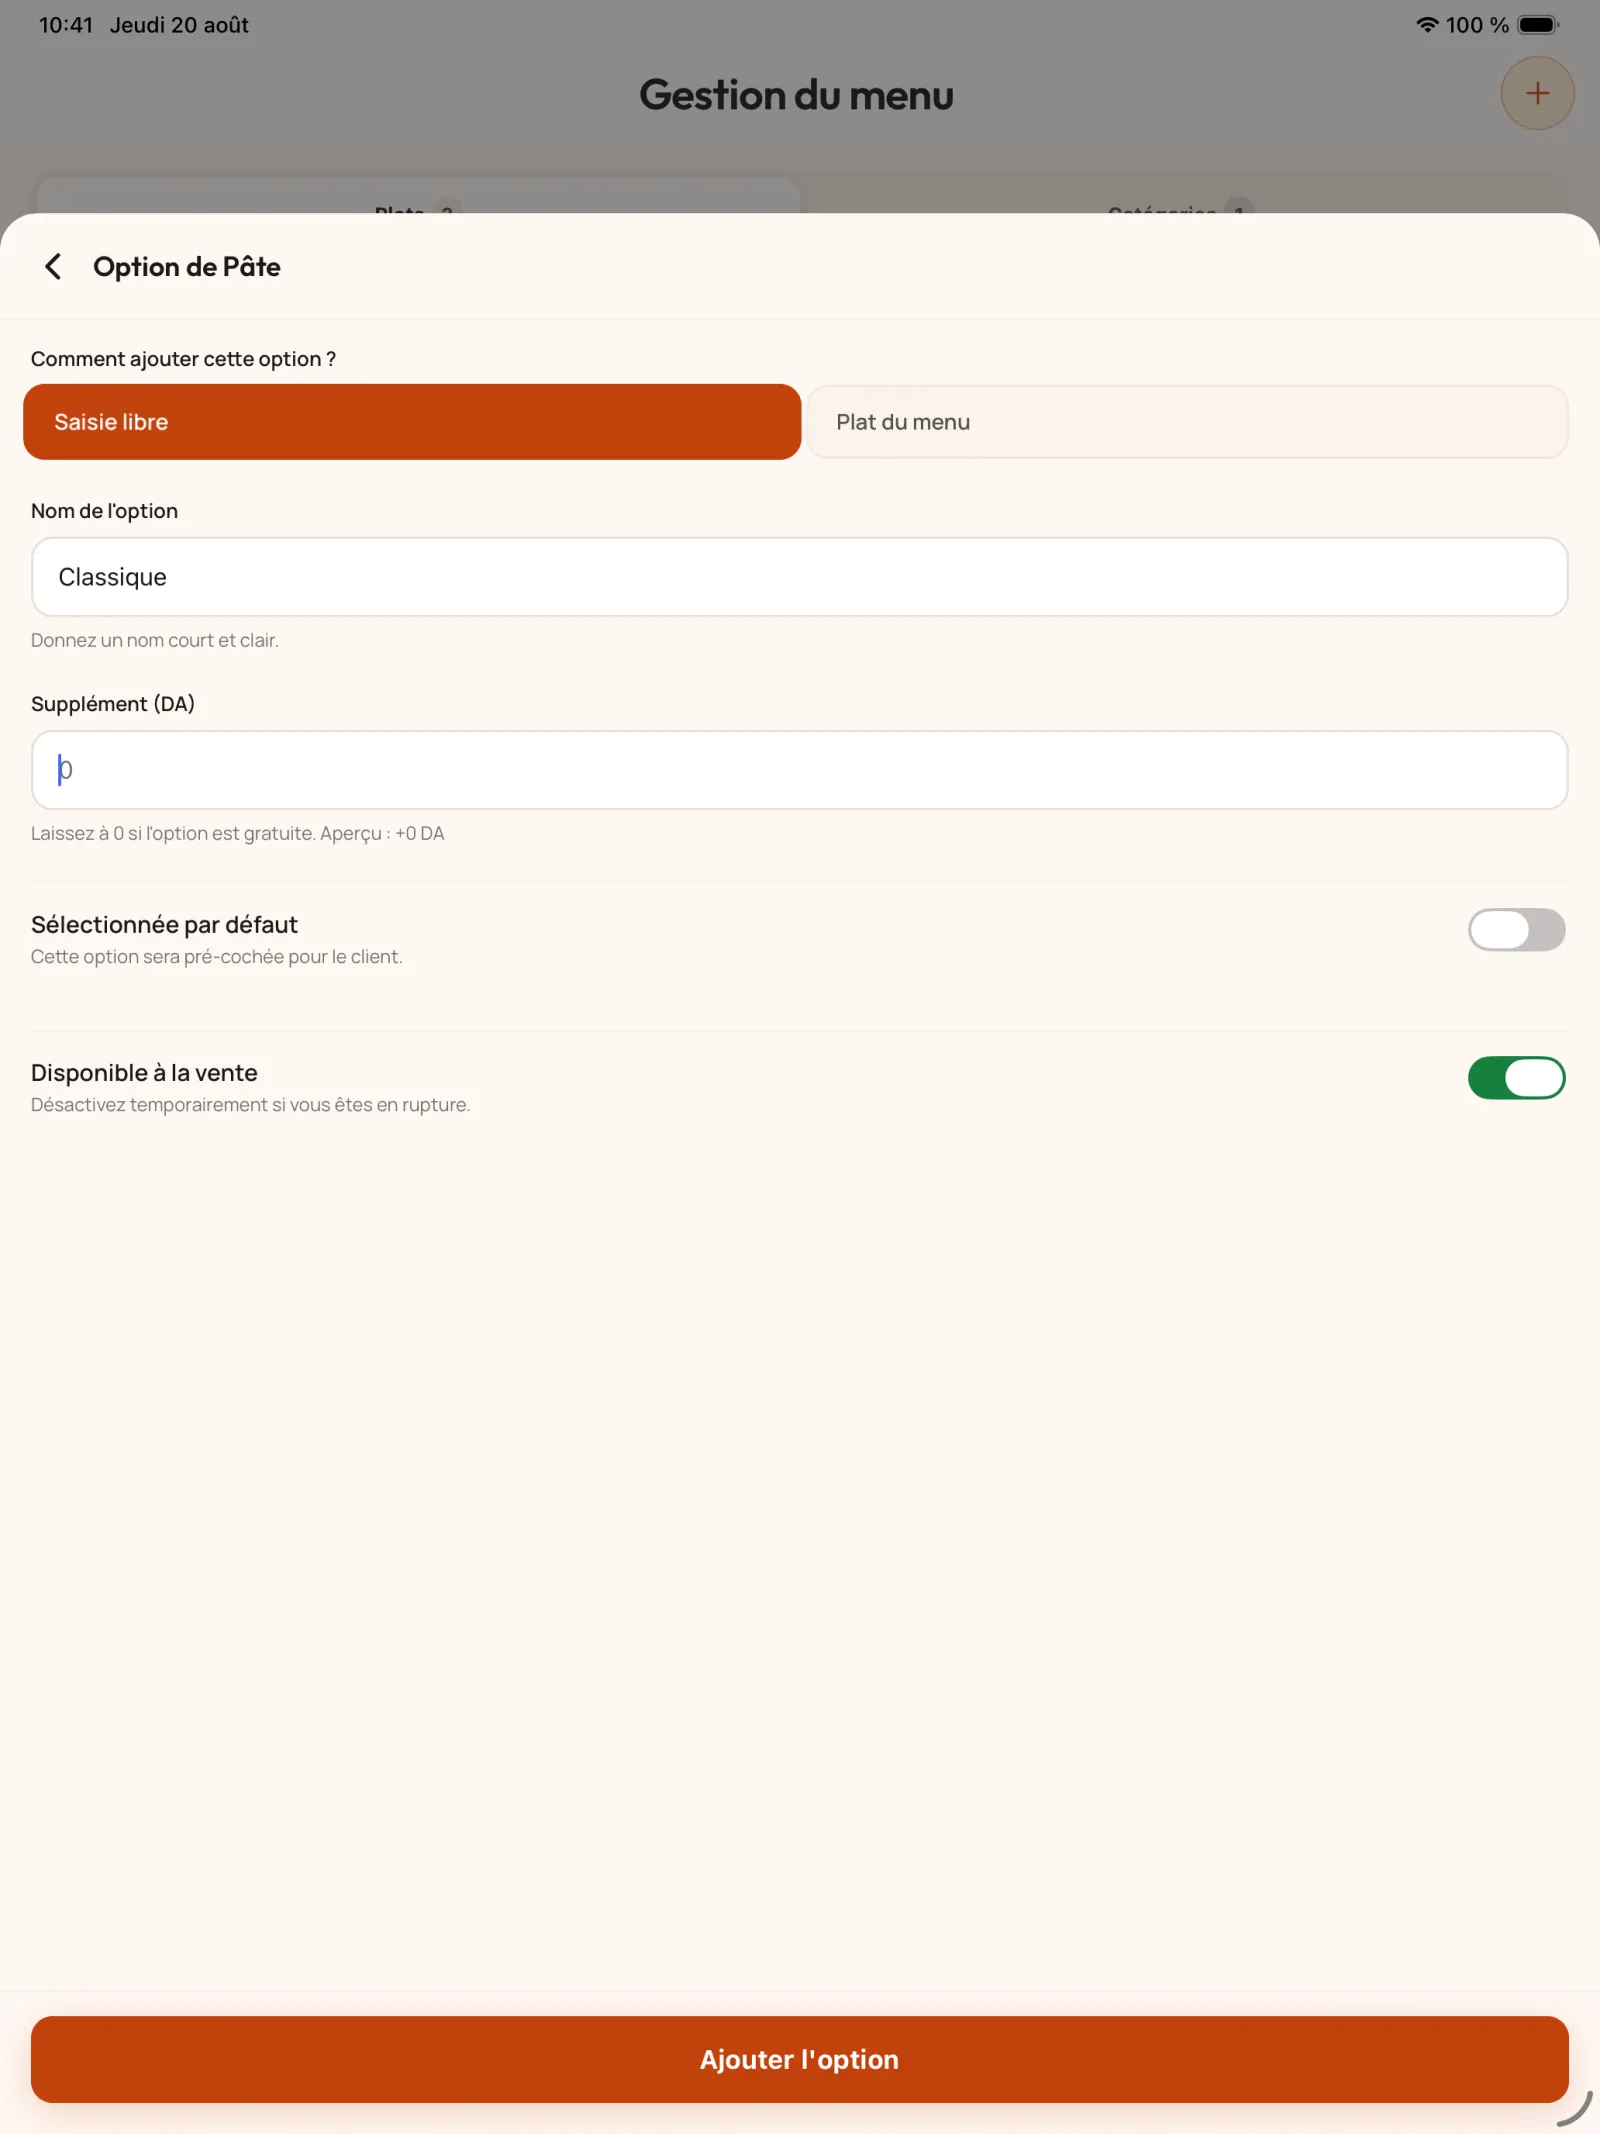
Step 11
Create a choice
Enter the name and any additional price. The choice can be selected by default and remain activated or deactivated depending on its availability.
In practice. Preselect the most common option to speed up the order. An option may also receive a price surcharge and be disabled during service if it becomes unavailable.
Open full-size image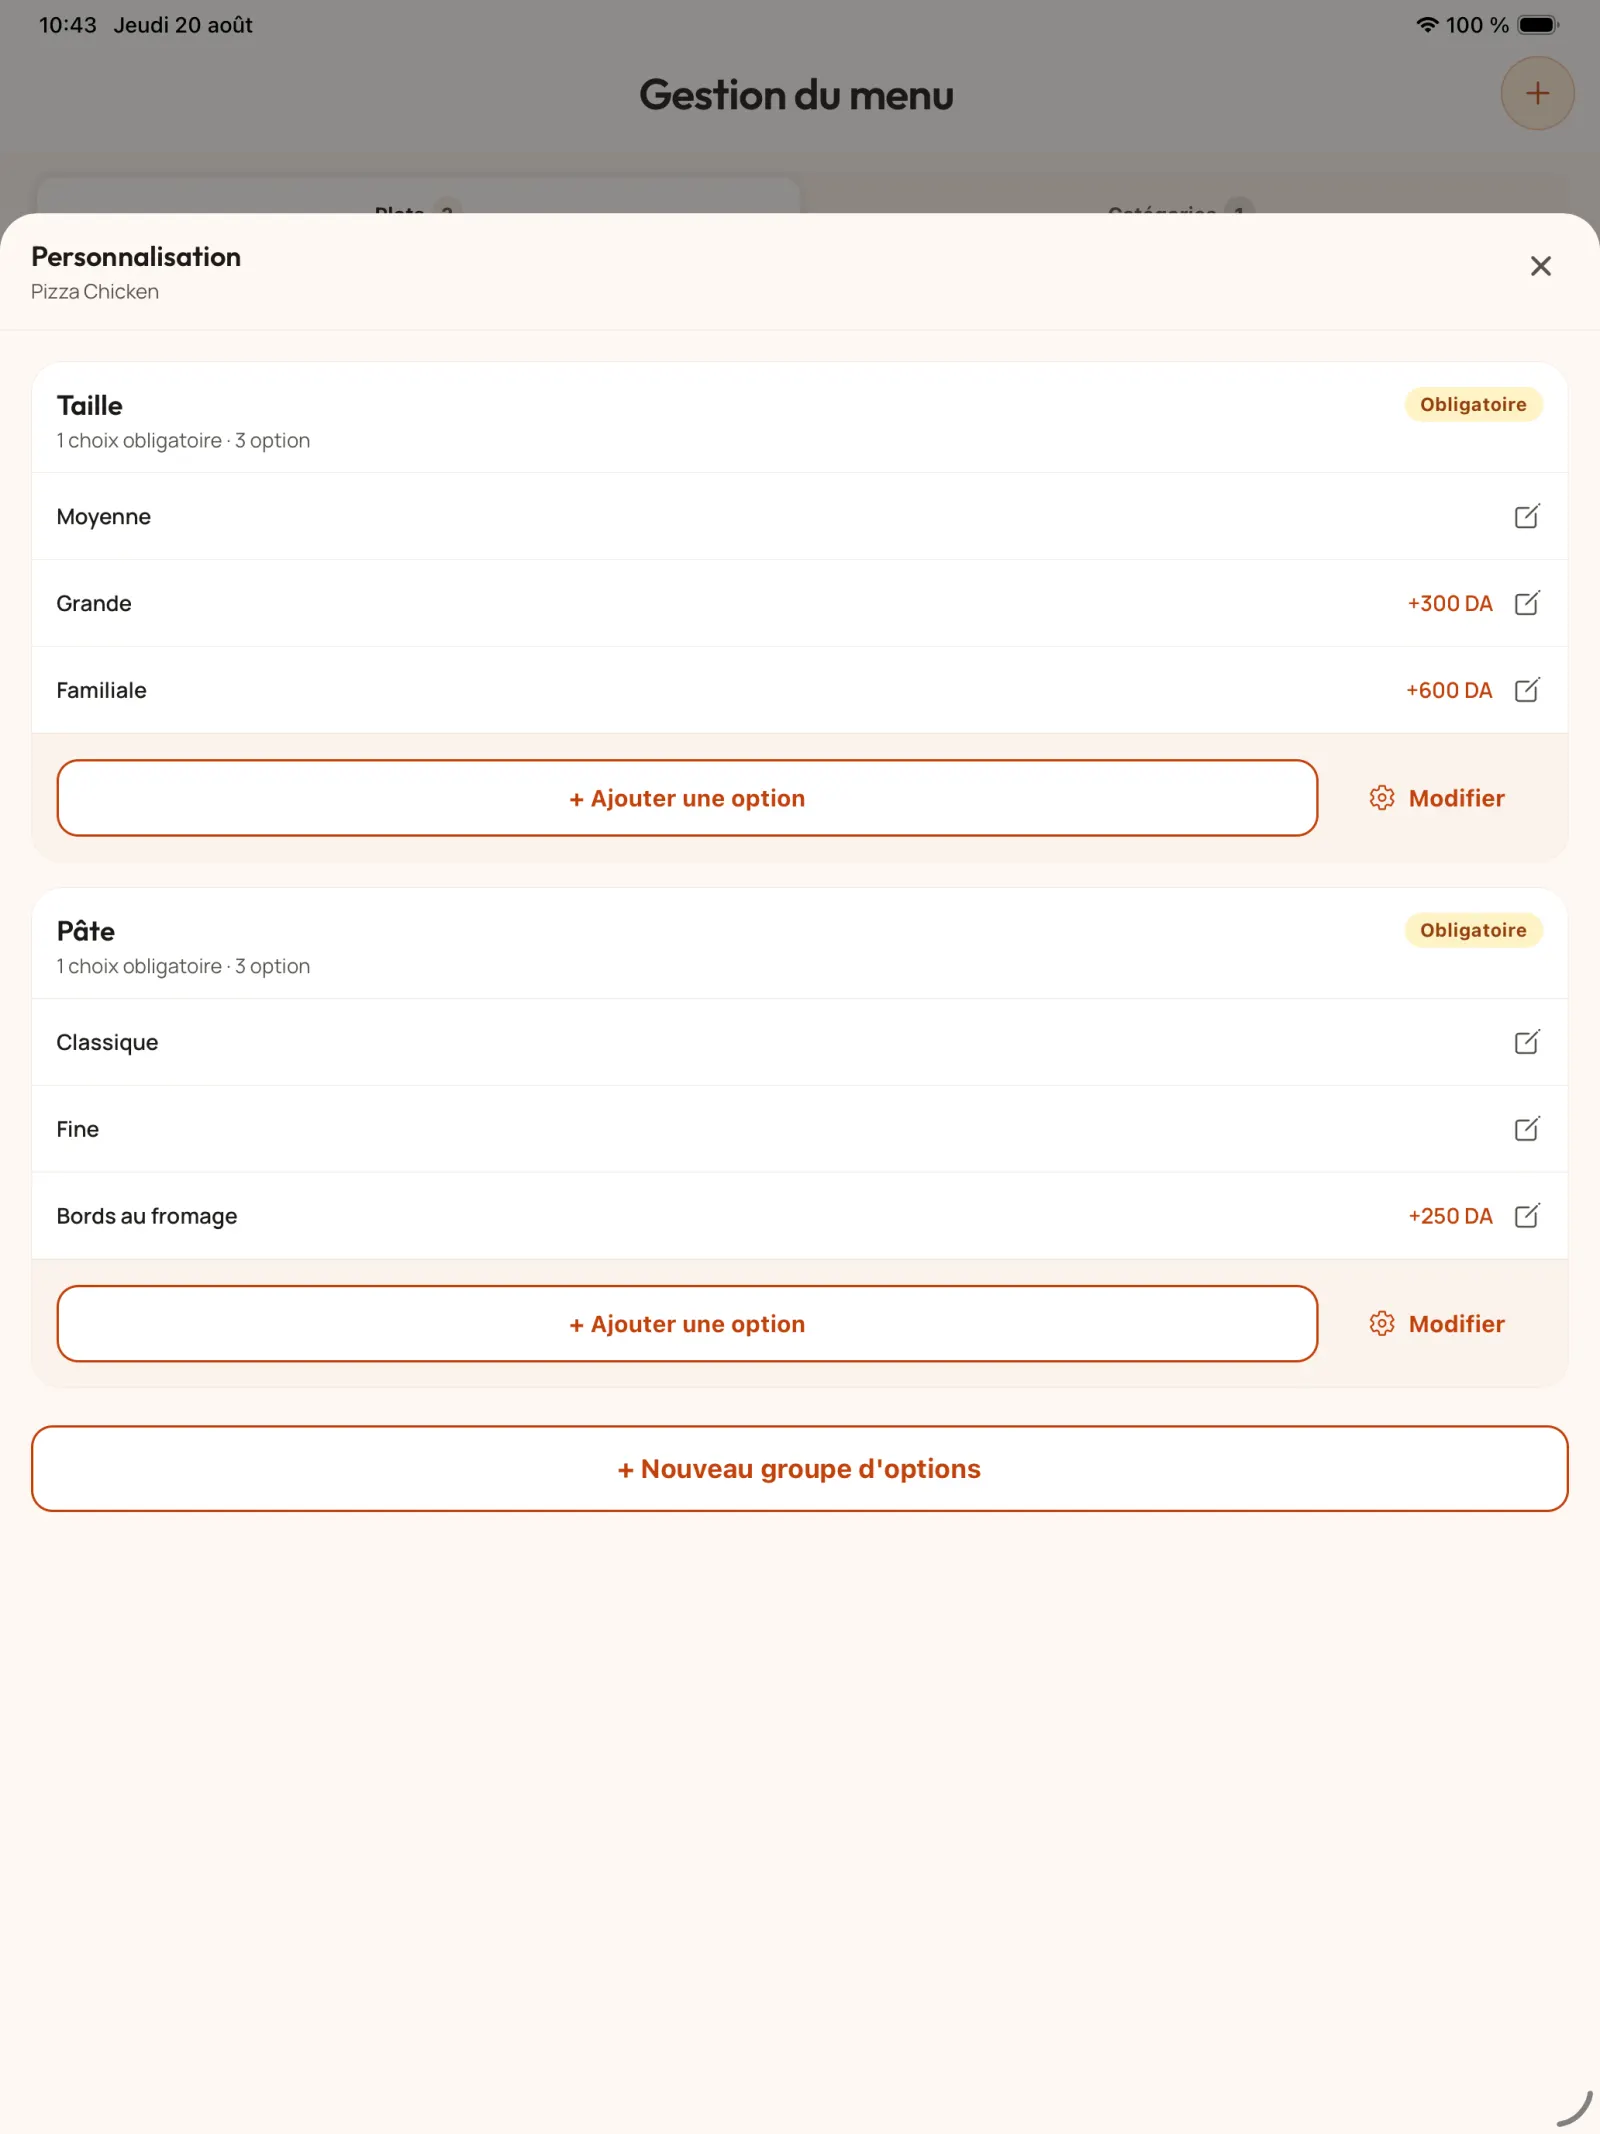
Step 12
Review the configuration
Review the groups and choices associated with the product before adding further customisations.
Open full-size image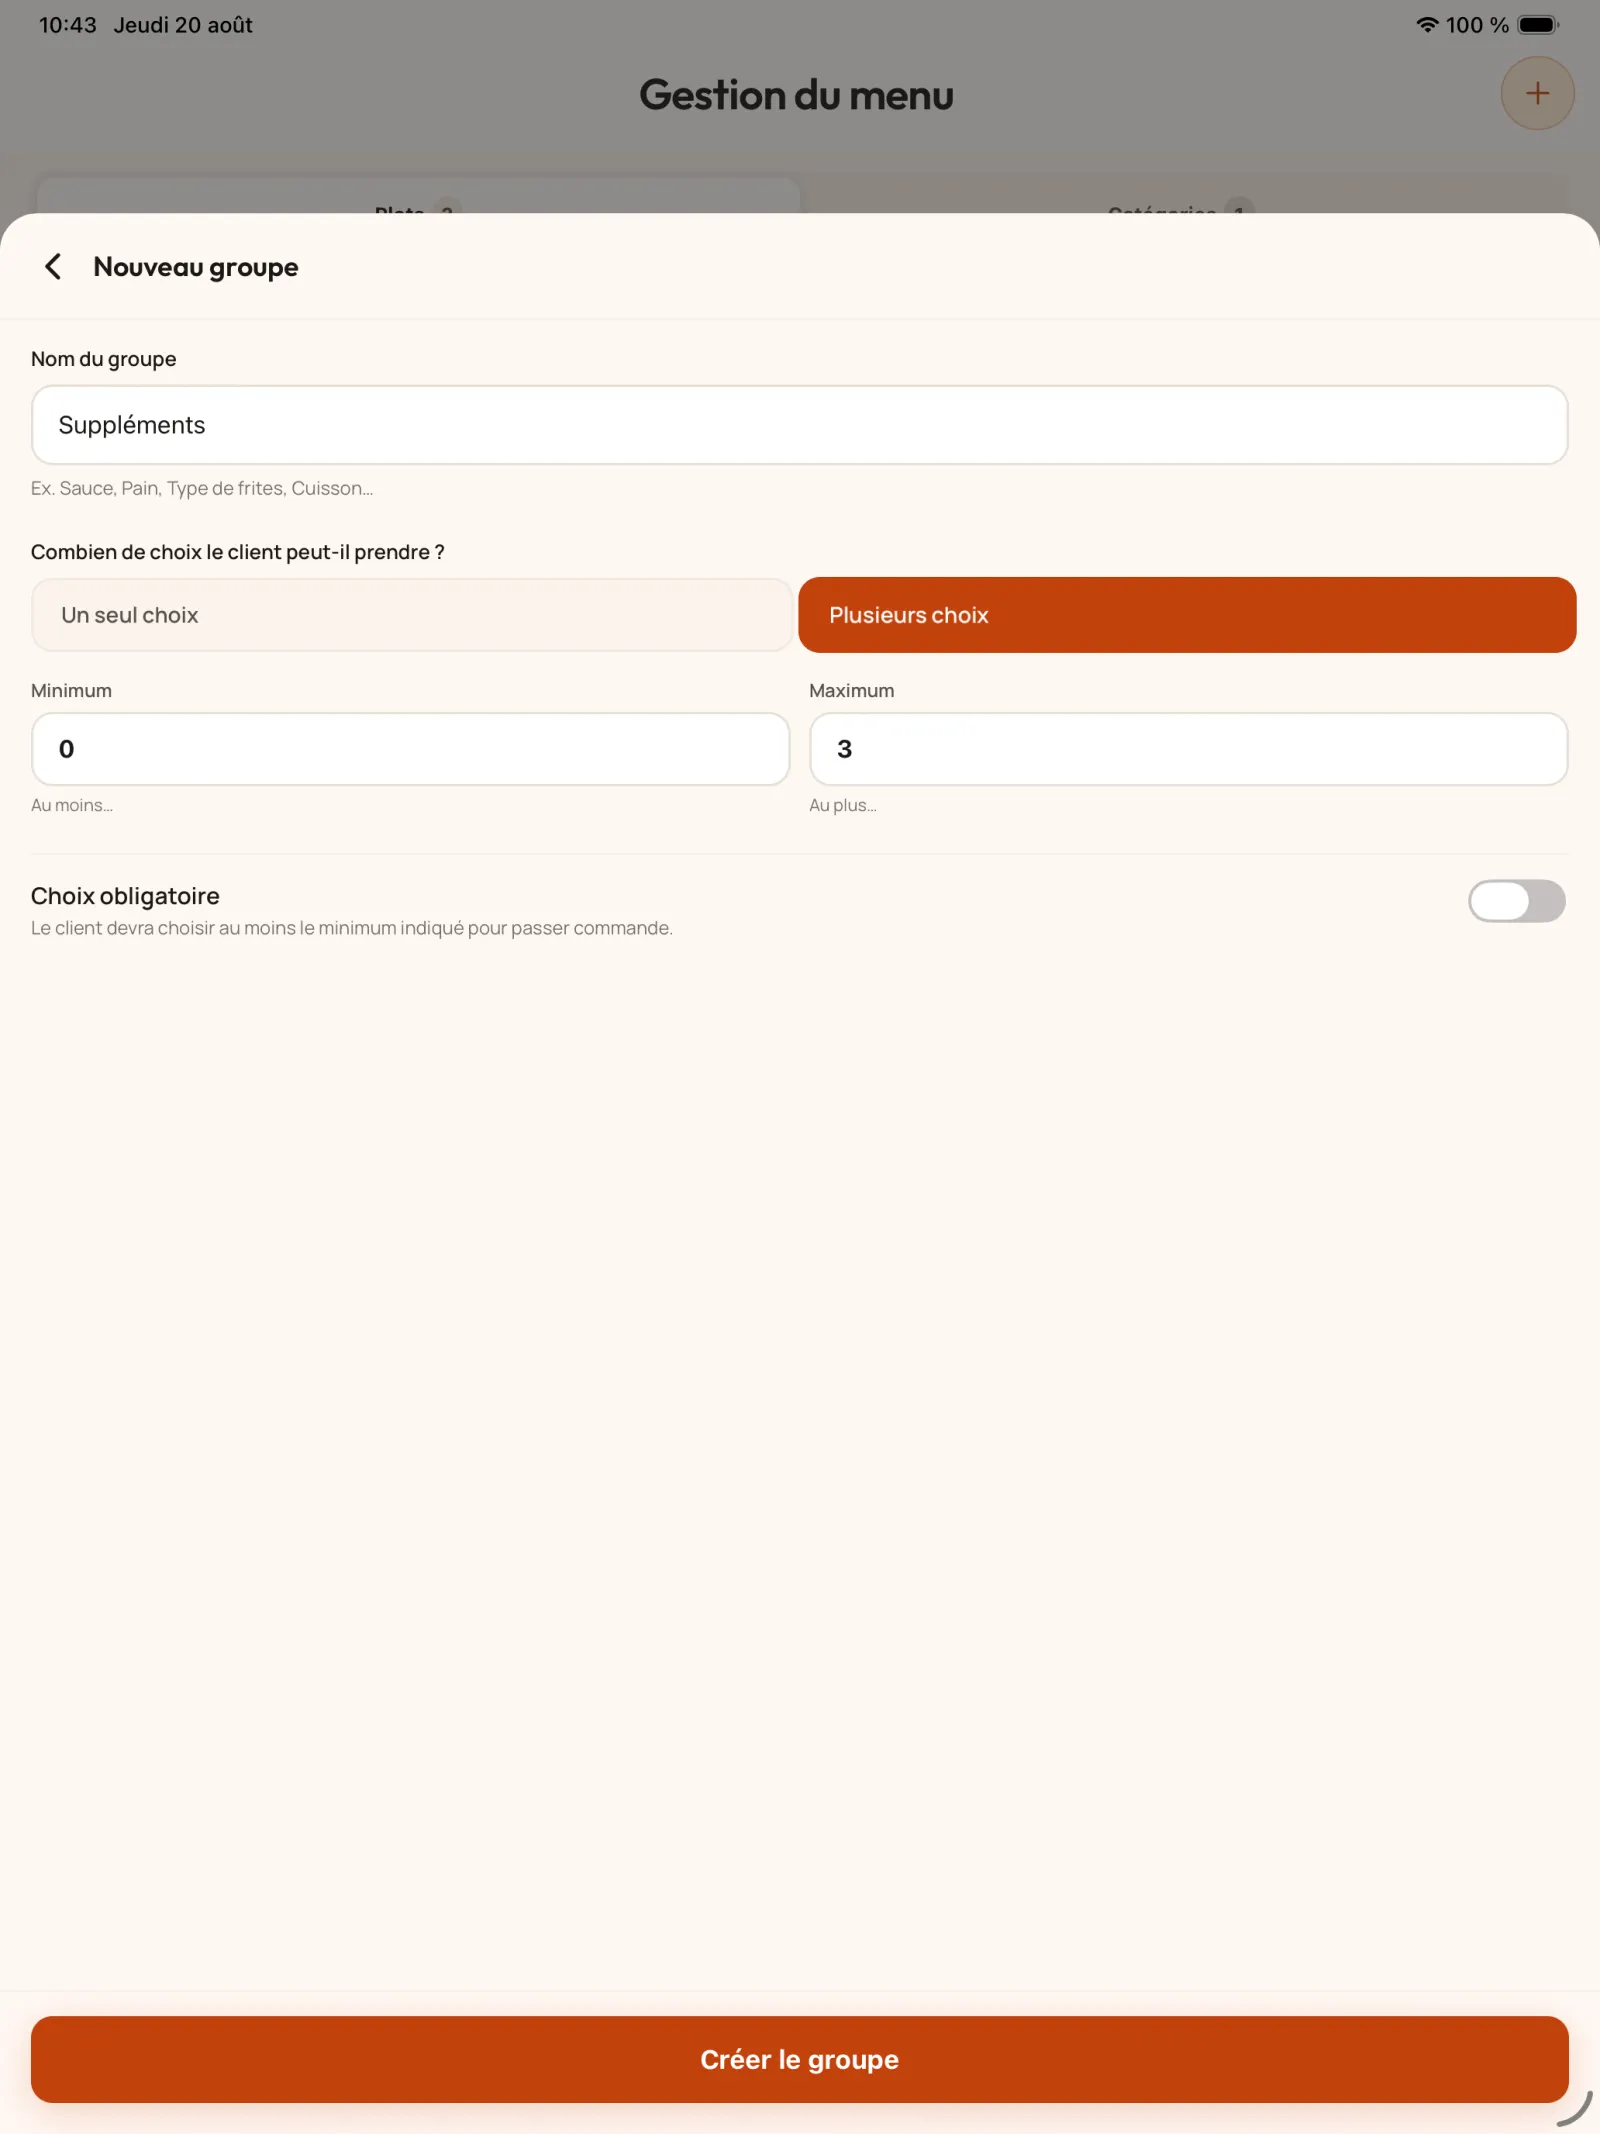
Step 13
Add optional extras
For a group of supplements, allow multiple choices, keep the minimum at zero, and set a maximum appropriate to the offer.
Open full-size image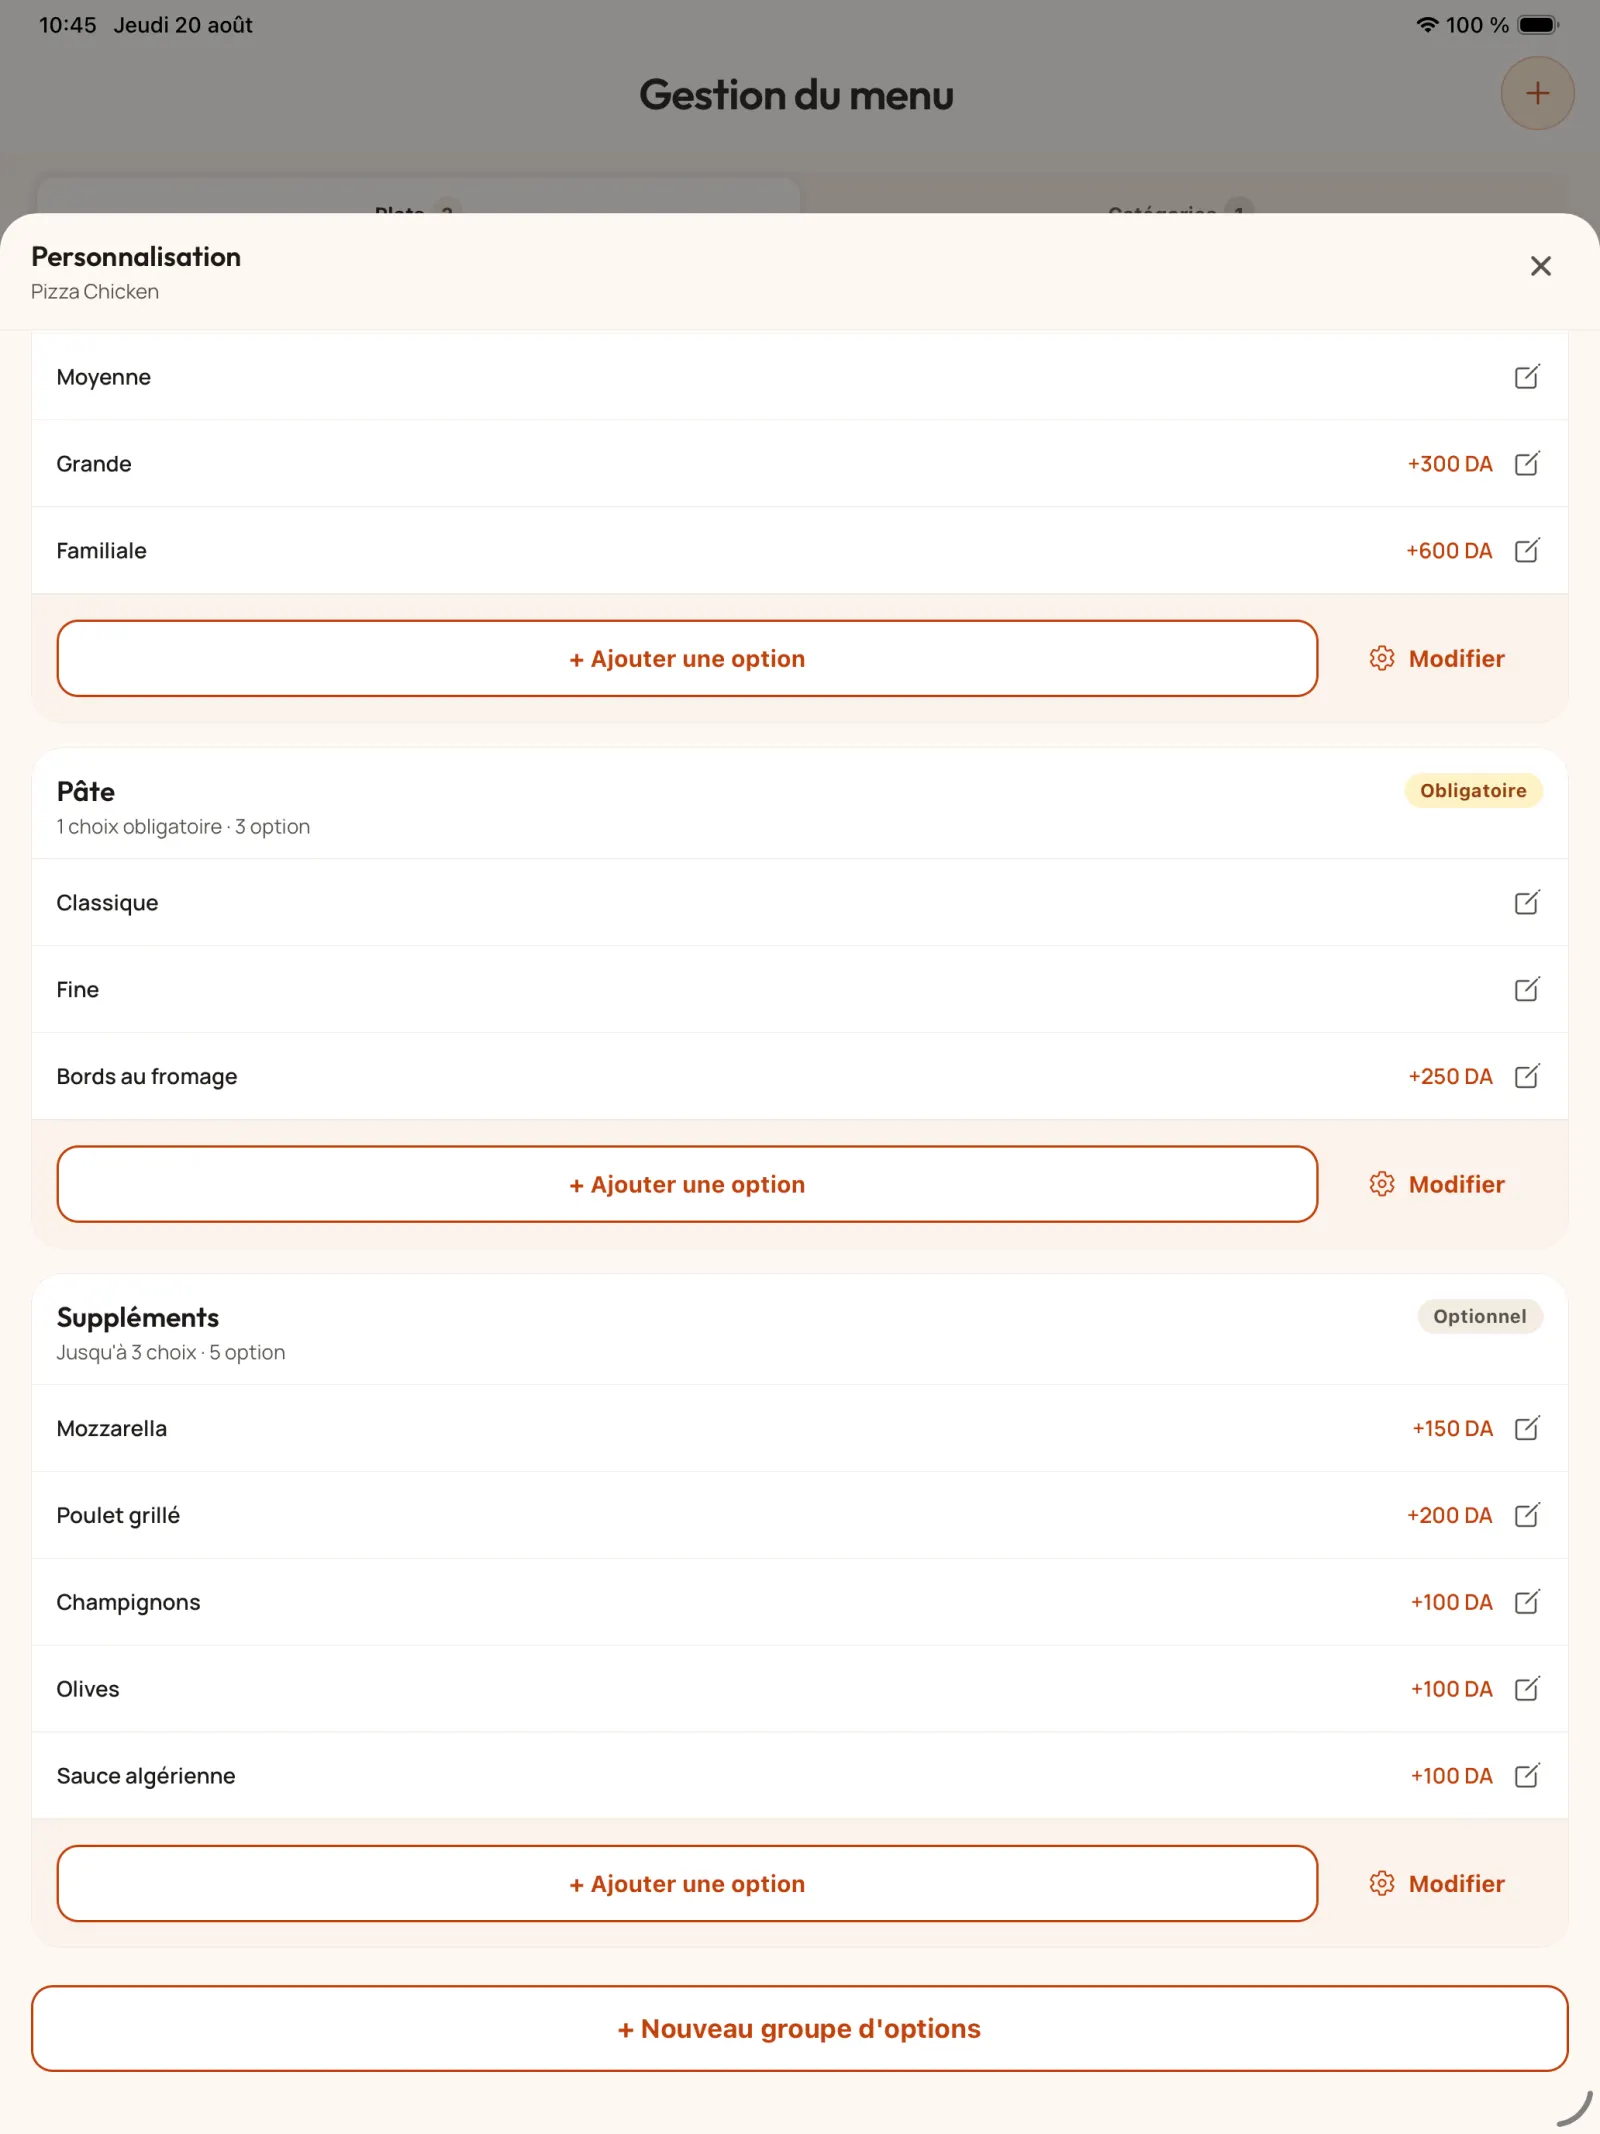
Step 14
Check all options
The configuration page displays the groups and their choices. The customer will find these rules when he adds the product to his order.
In practice. Well-structured groups allow you to show the full variety of the restaurant without requiring the customer to explain each customisation at the counter.
Open full-size image
Chapter 3
organise categories and suggestions
Categories speed up navigation. Payment suggestions highlight a complementary product or category before validating the basket.
Step 15
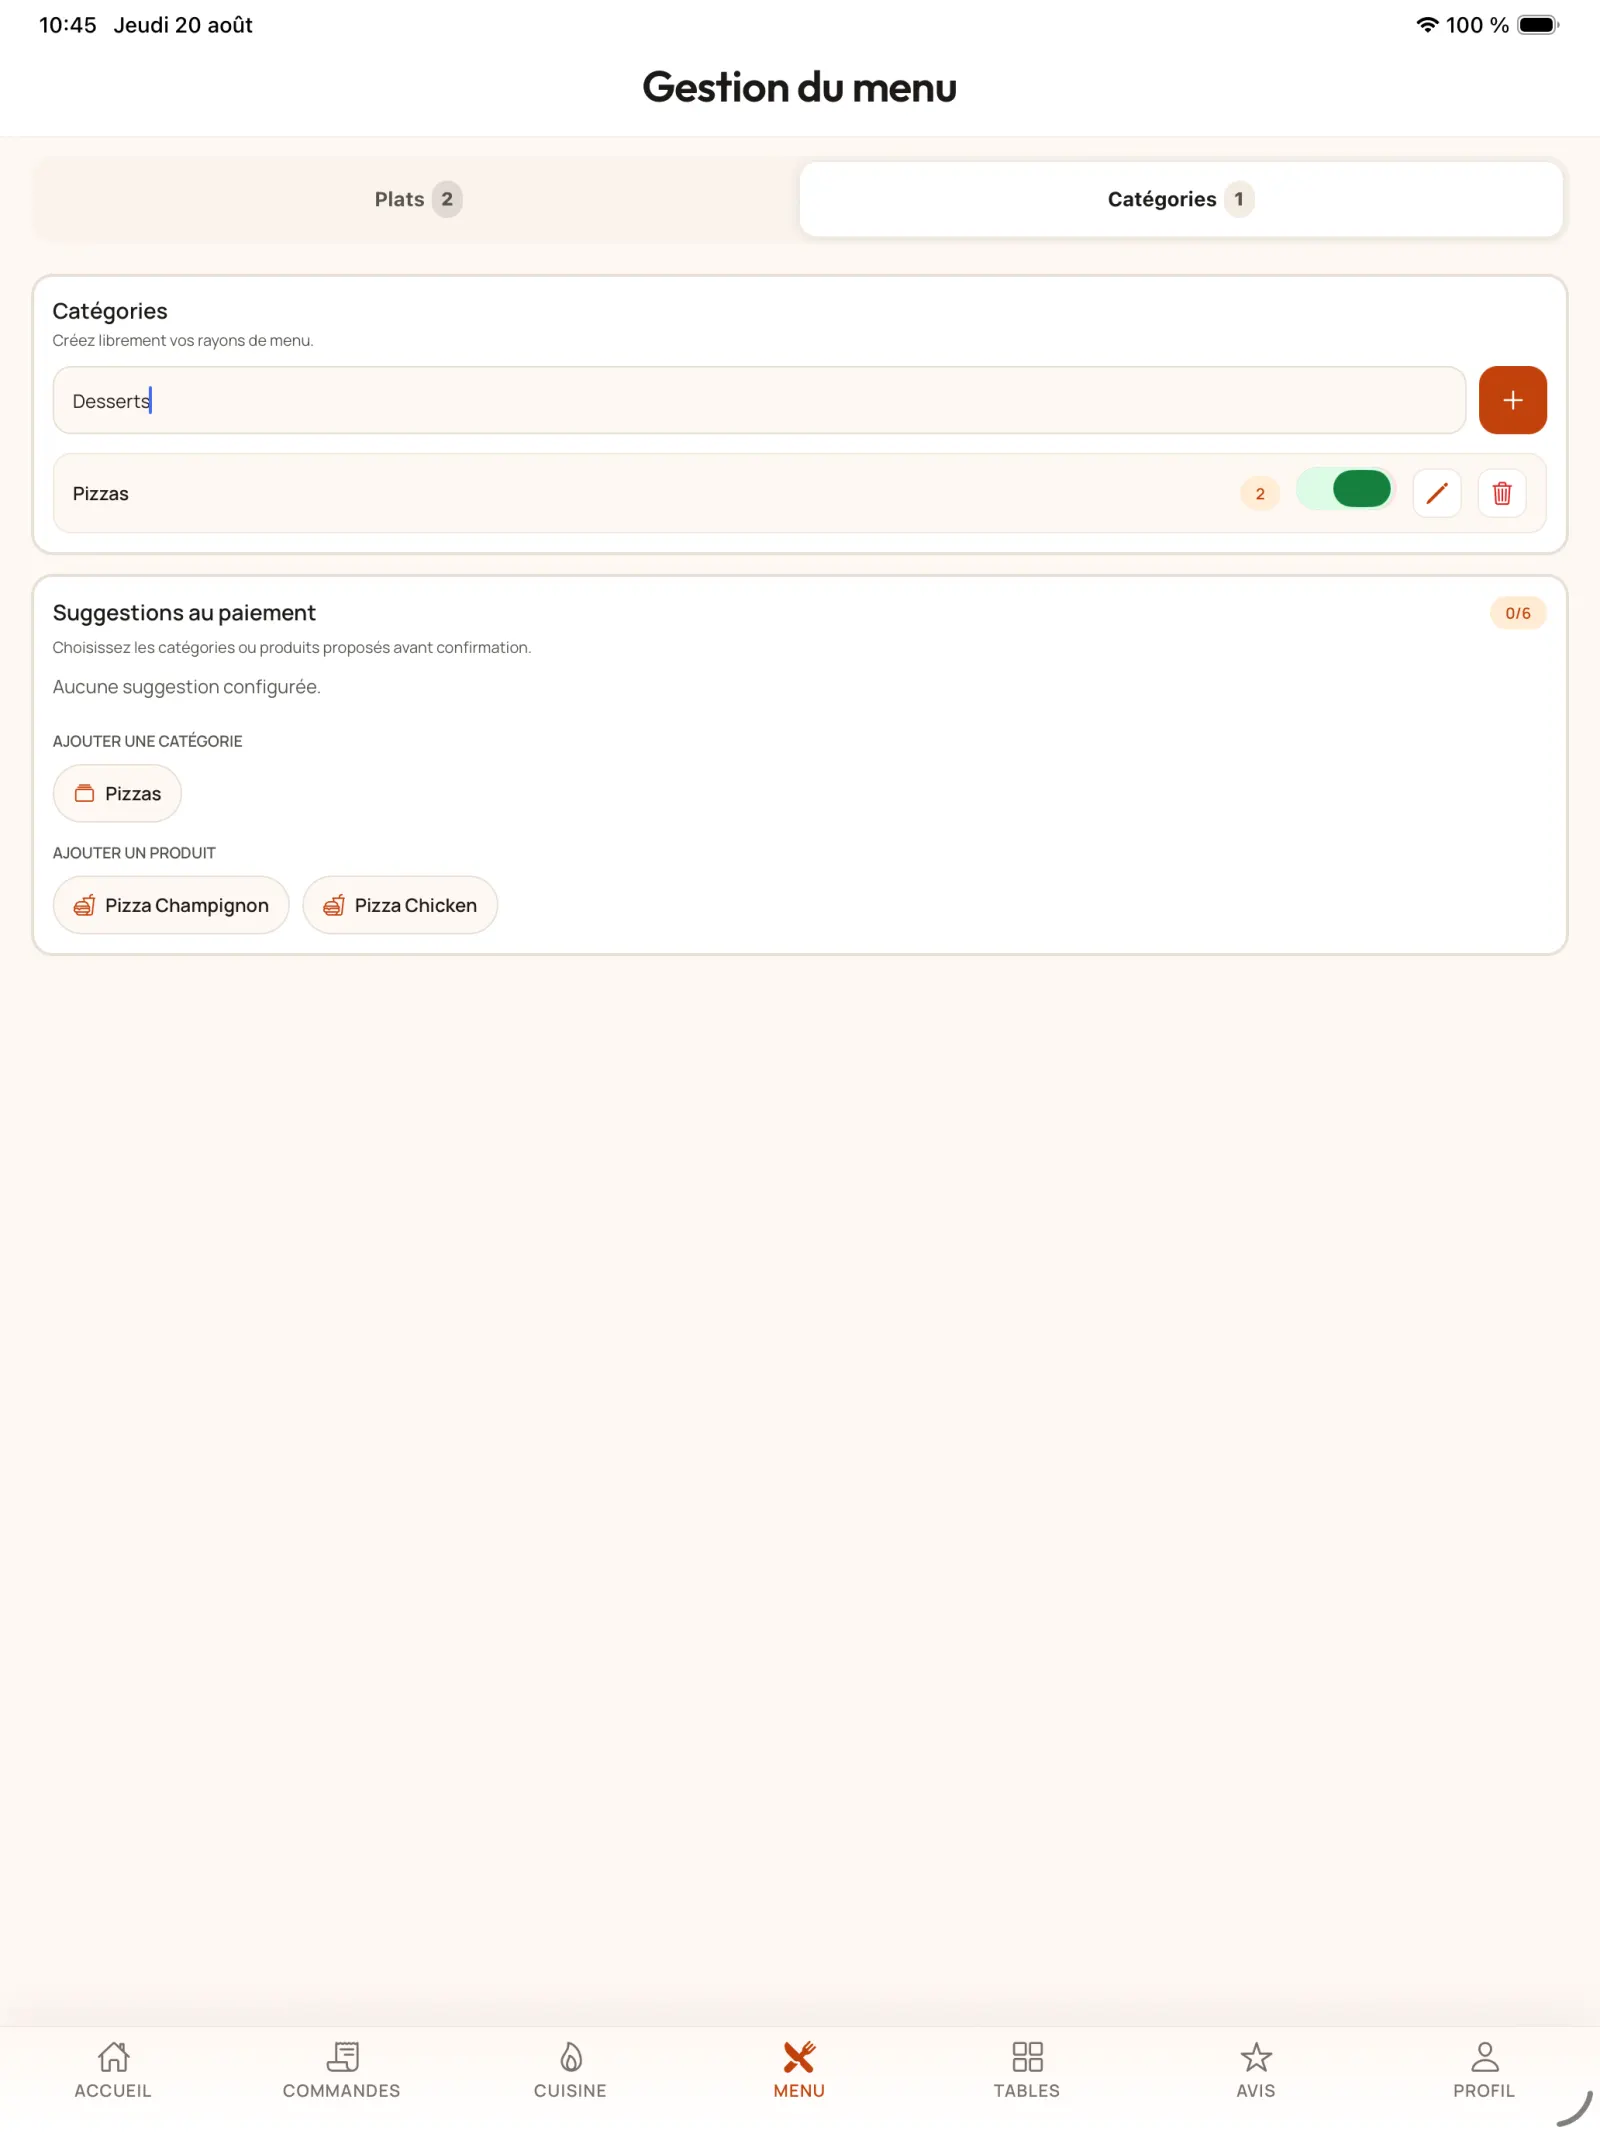
Add a category
Open “Categories” from the menu and create, for example, a category dedicated to desserts.
Open full-size image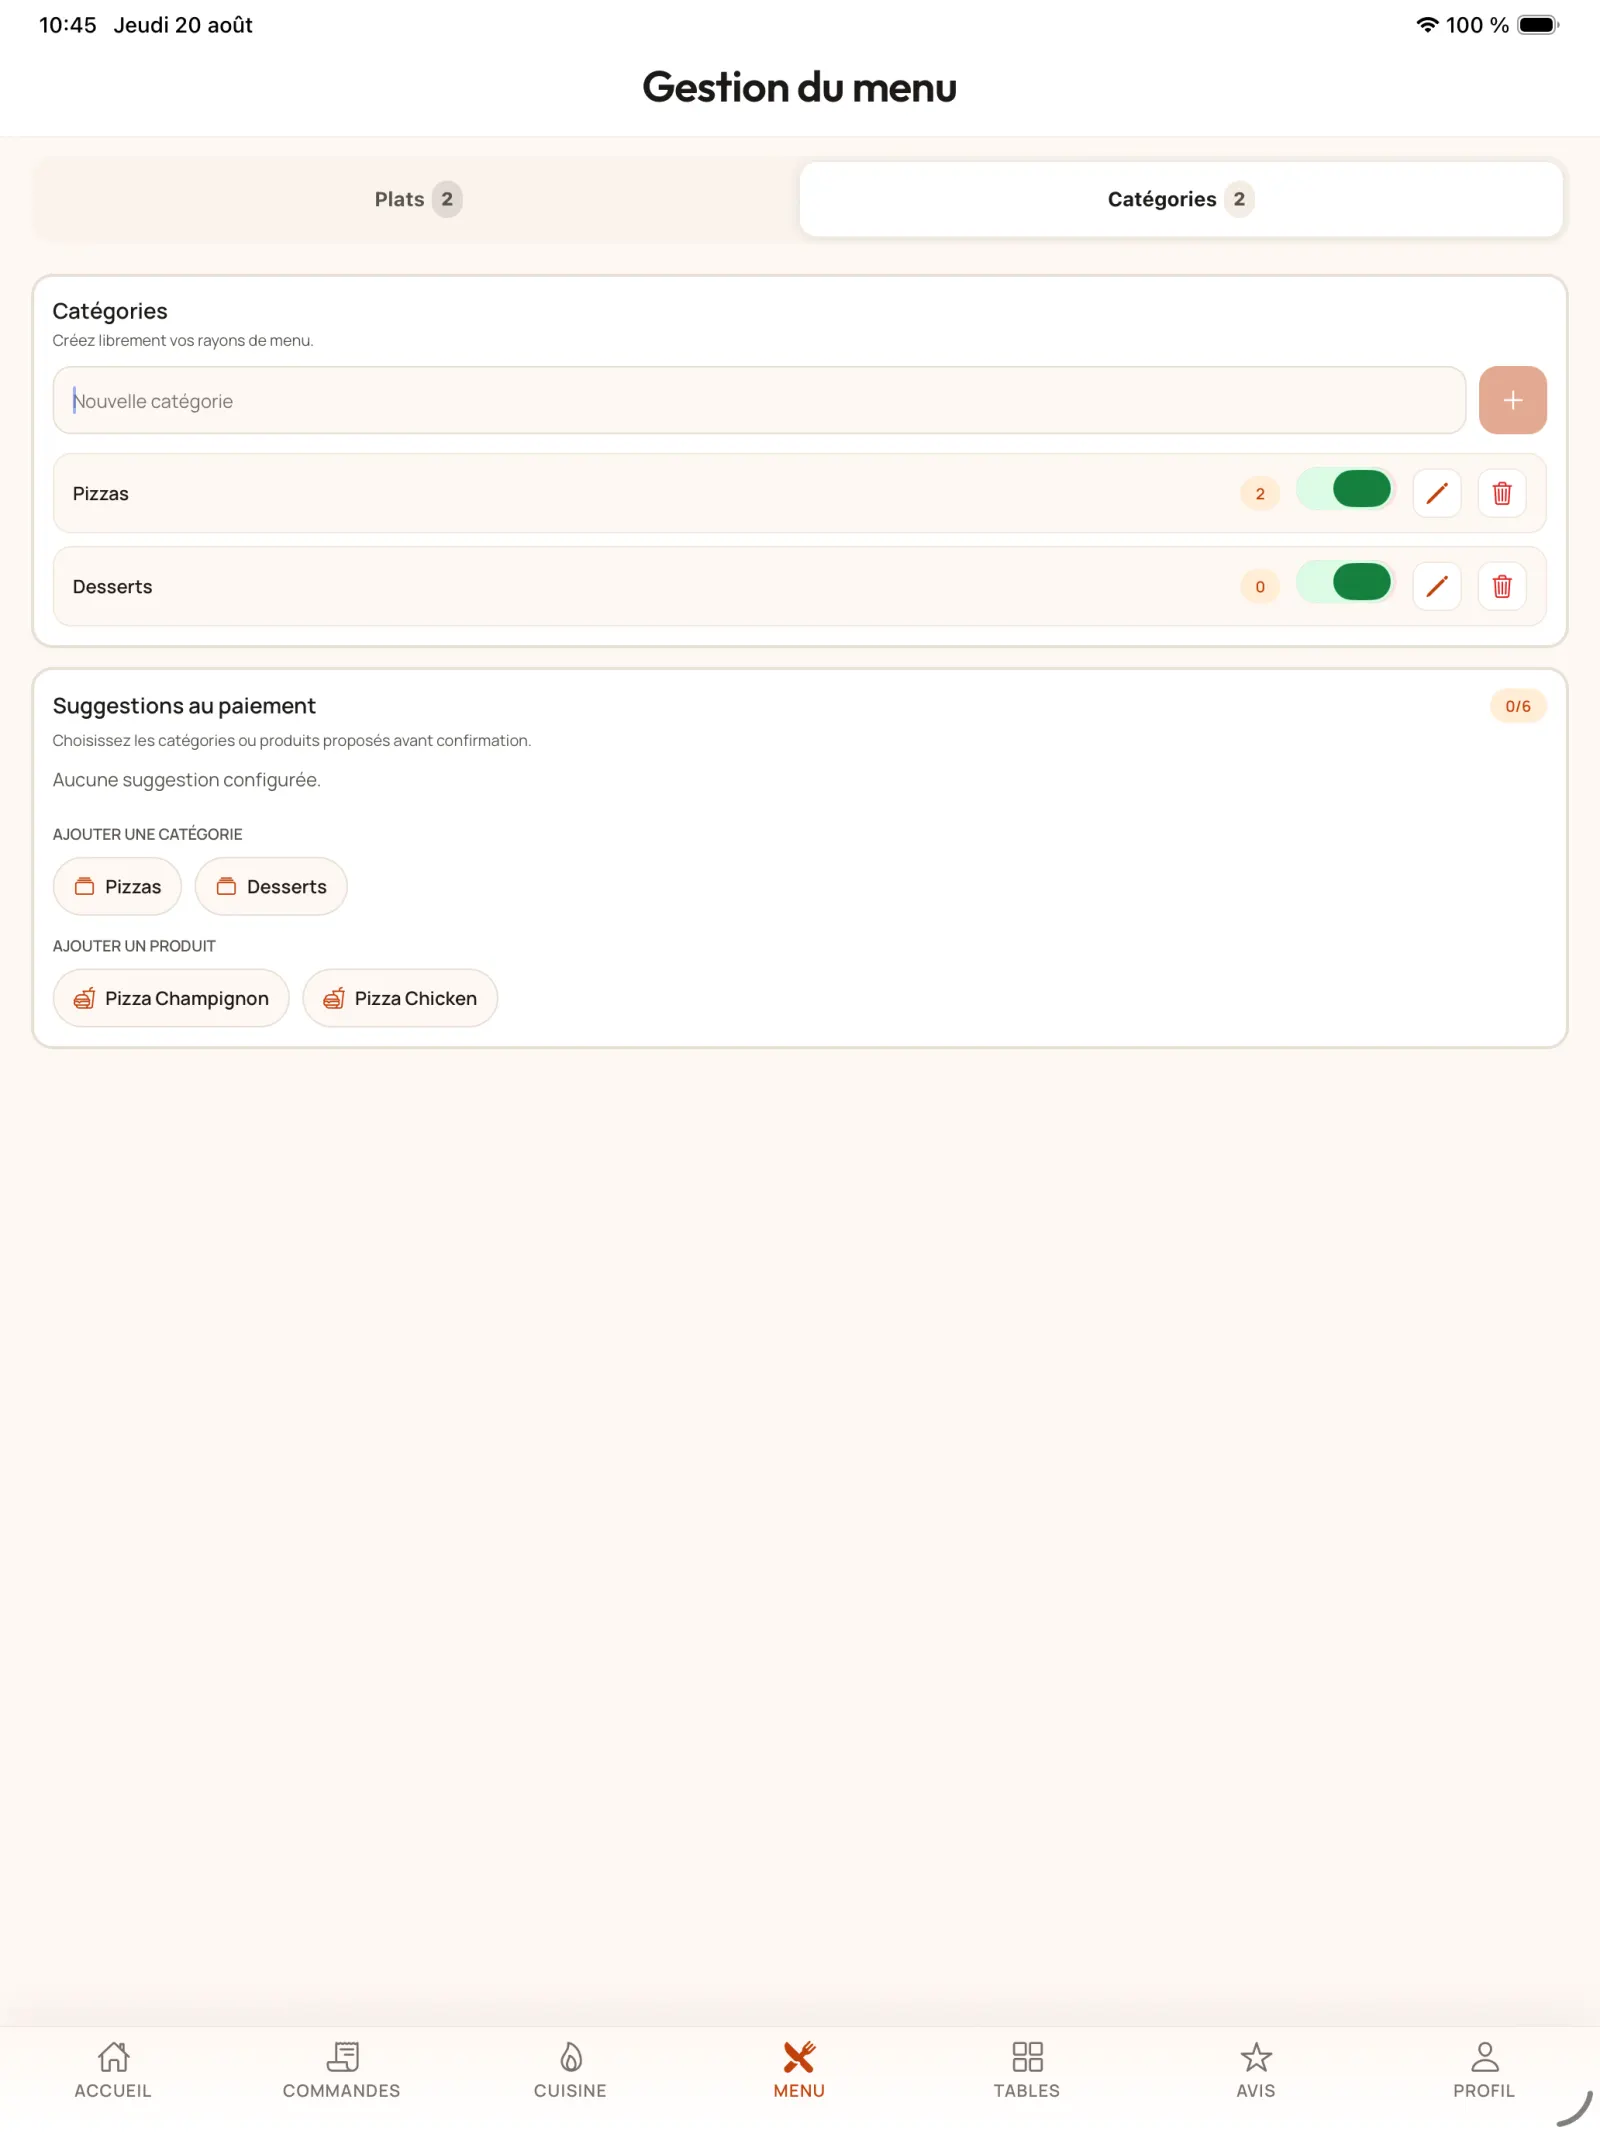
Step 16
Check new category
The saved category becomes available to classify existing and future products.
Open full-size image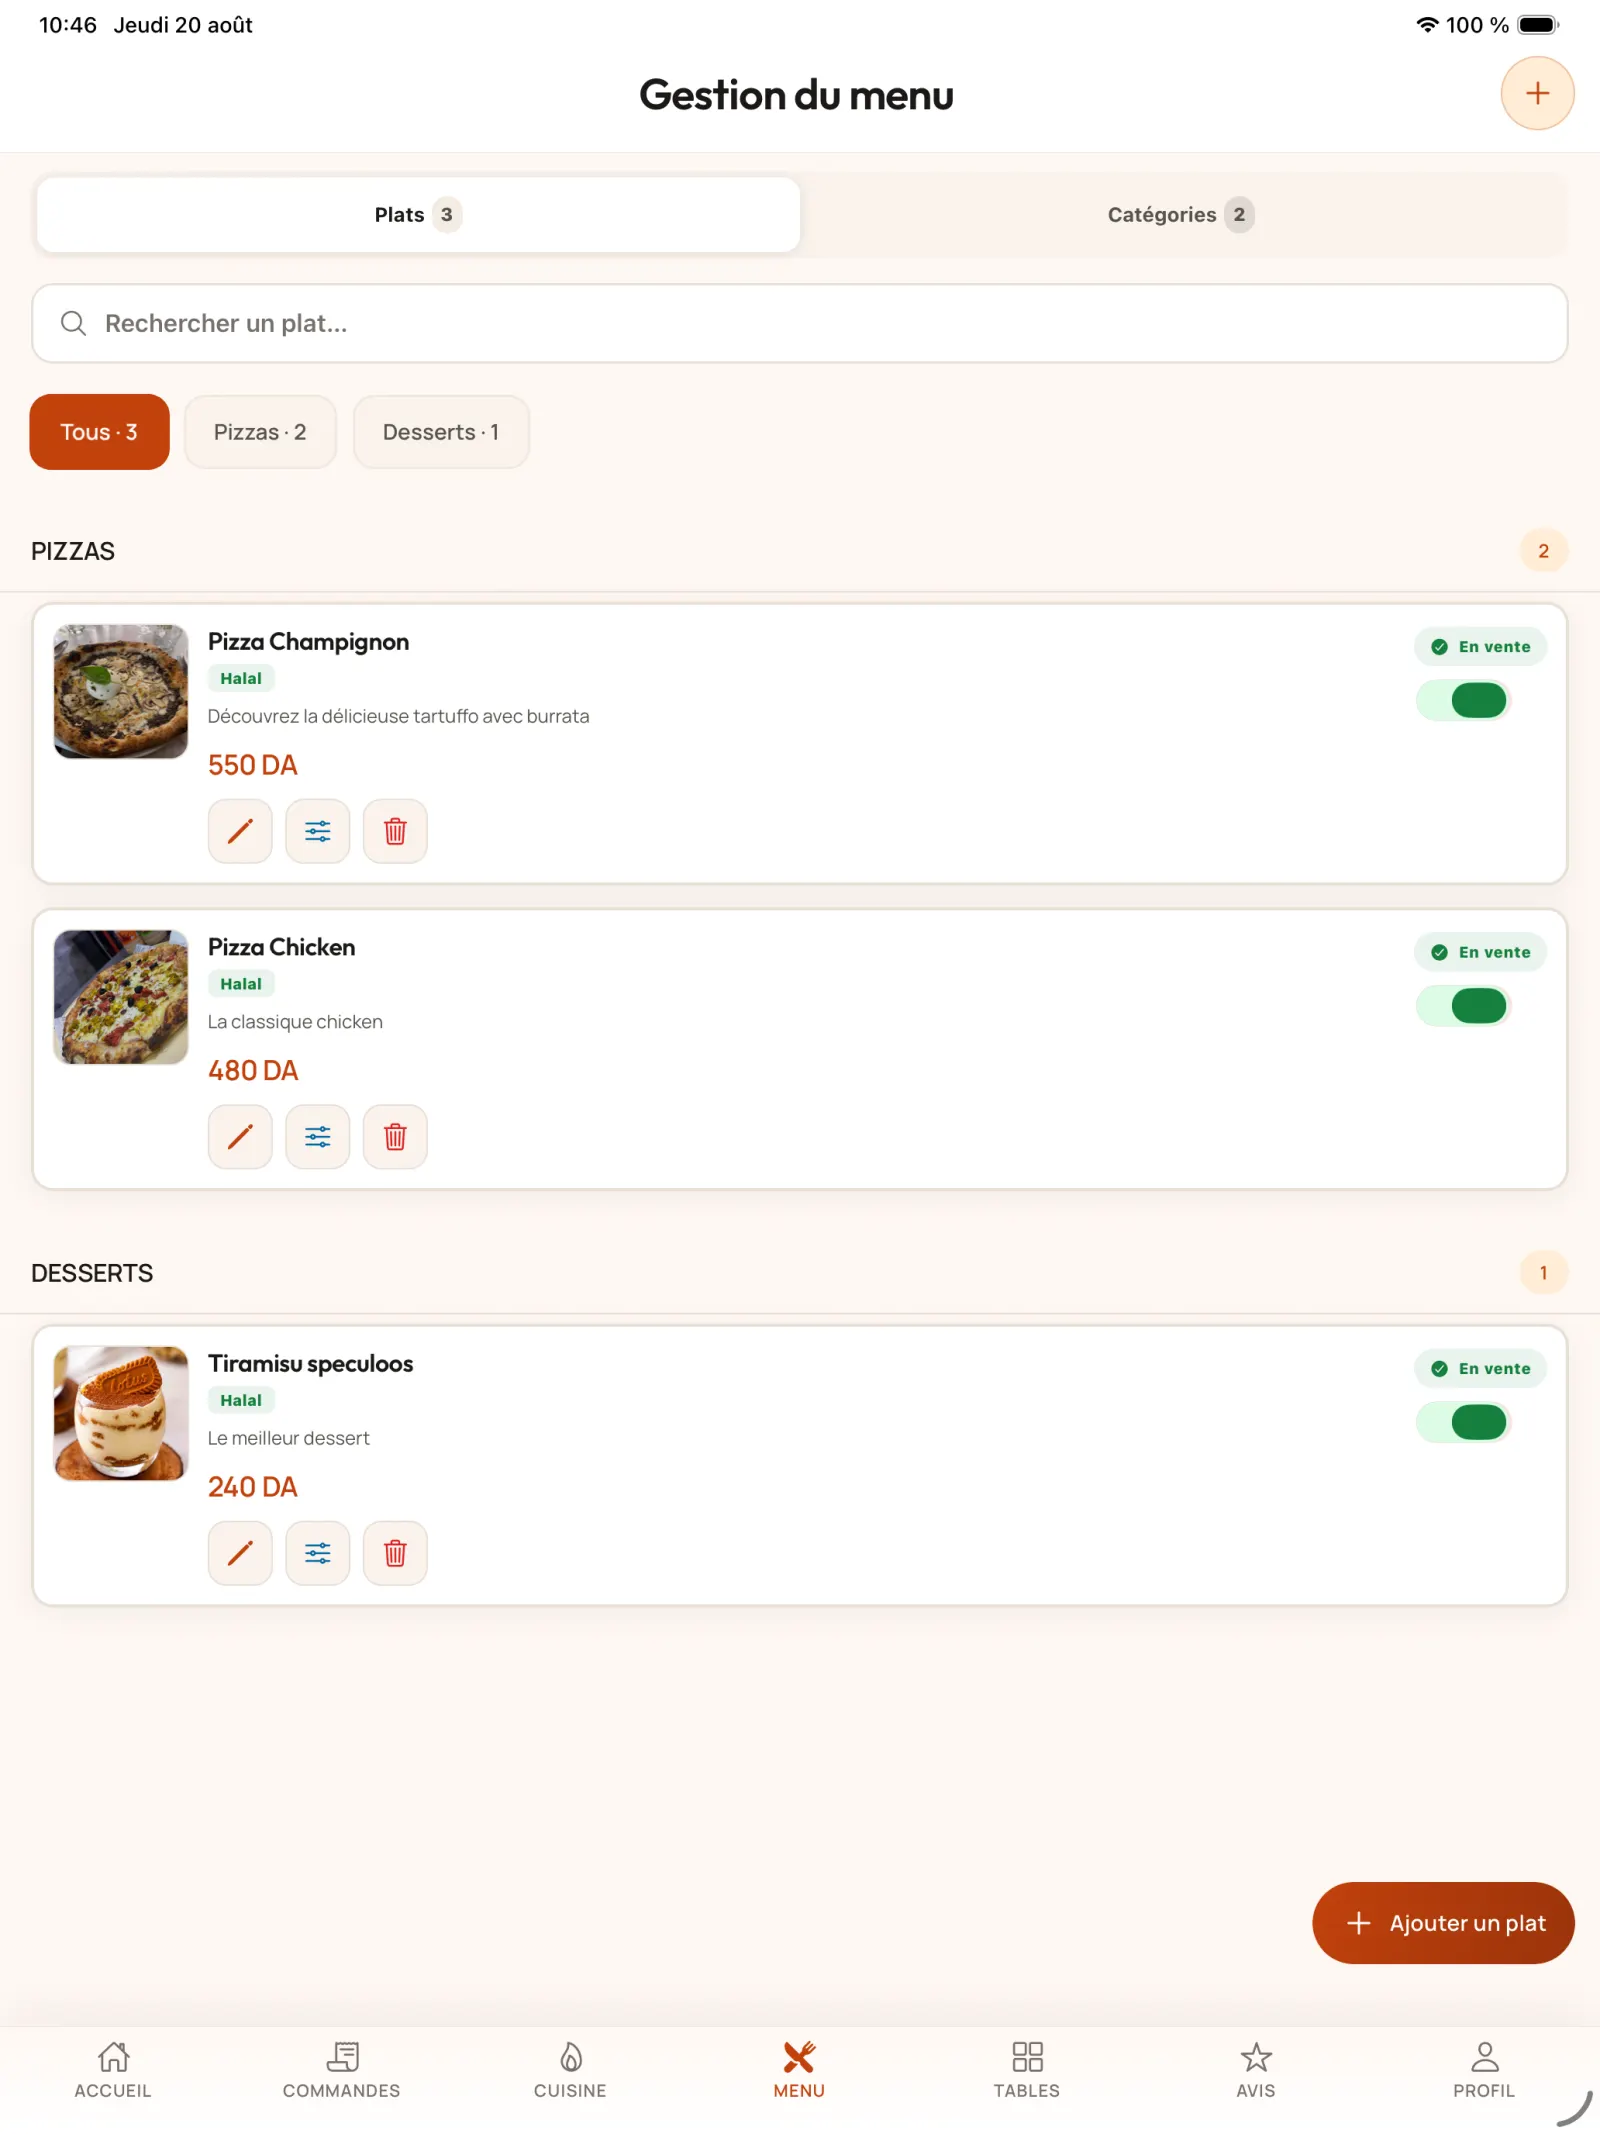
Step 17
Attach a product to the category
Create the product then select the corresponding category in its form.
Open full-size image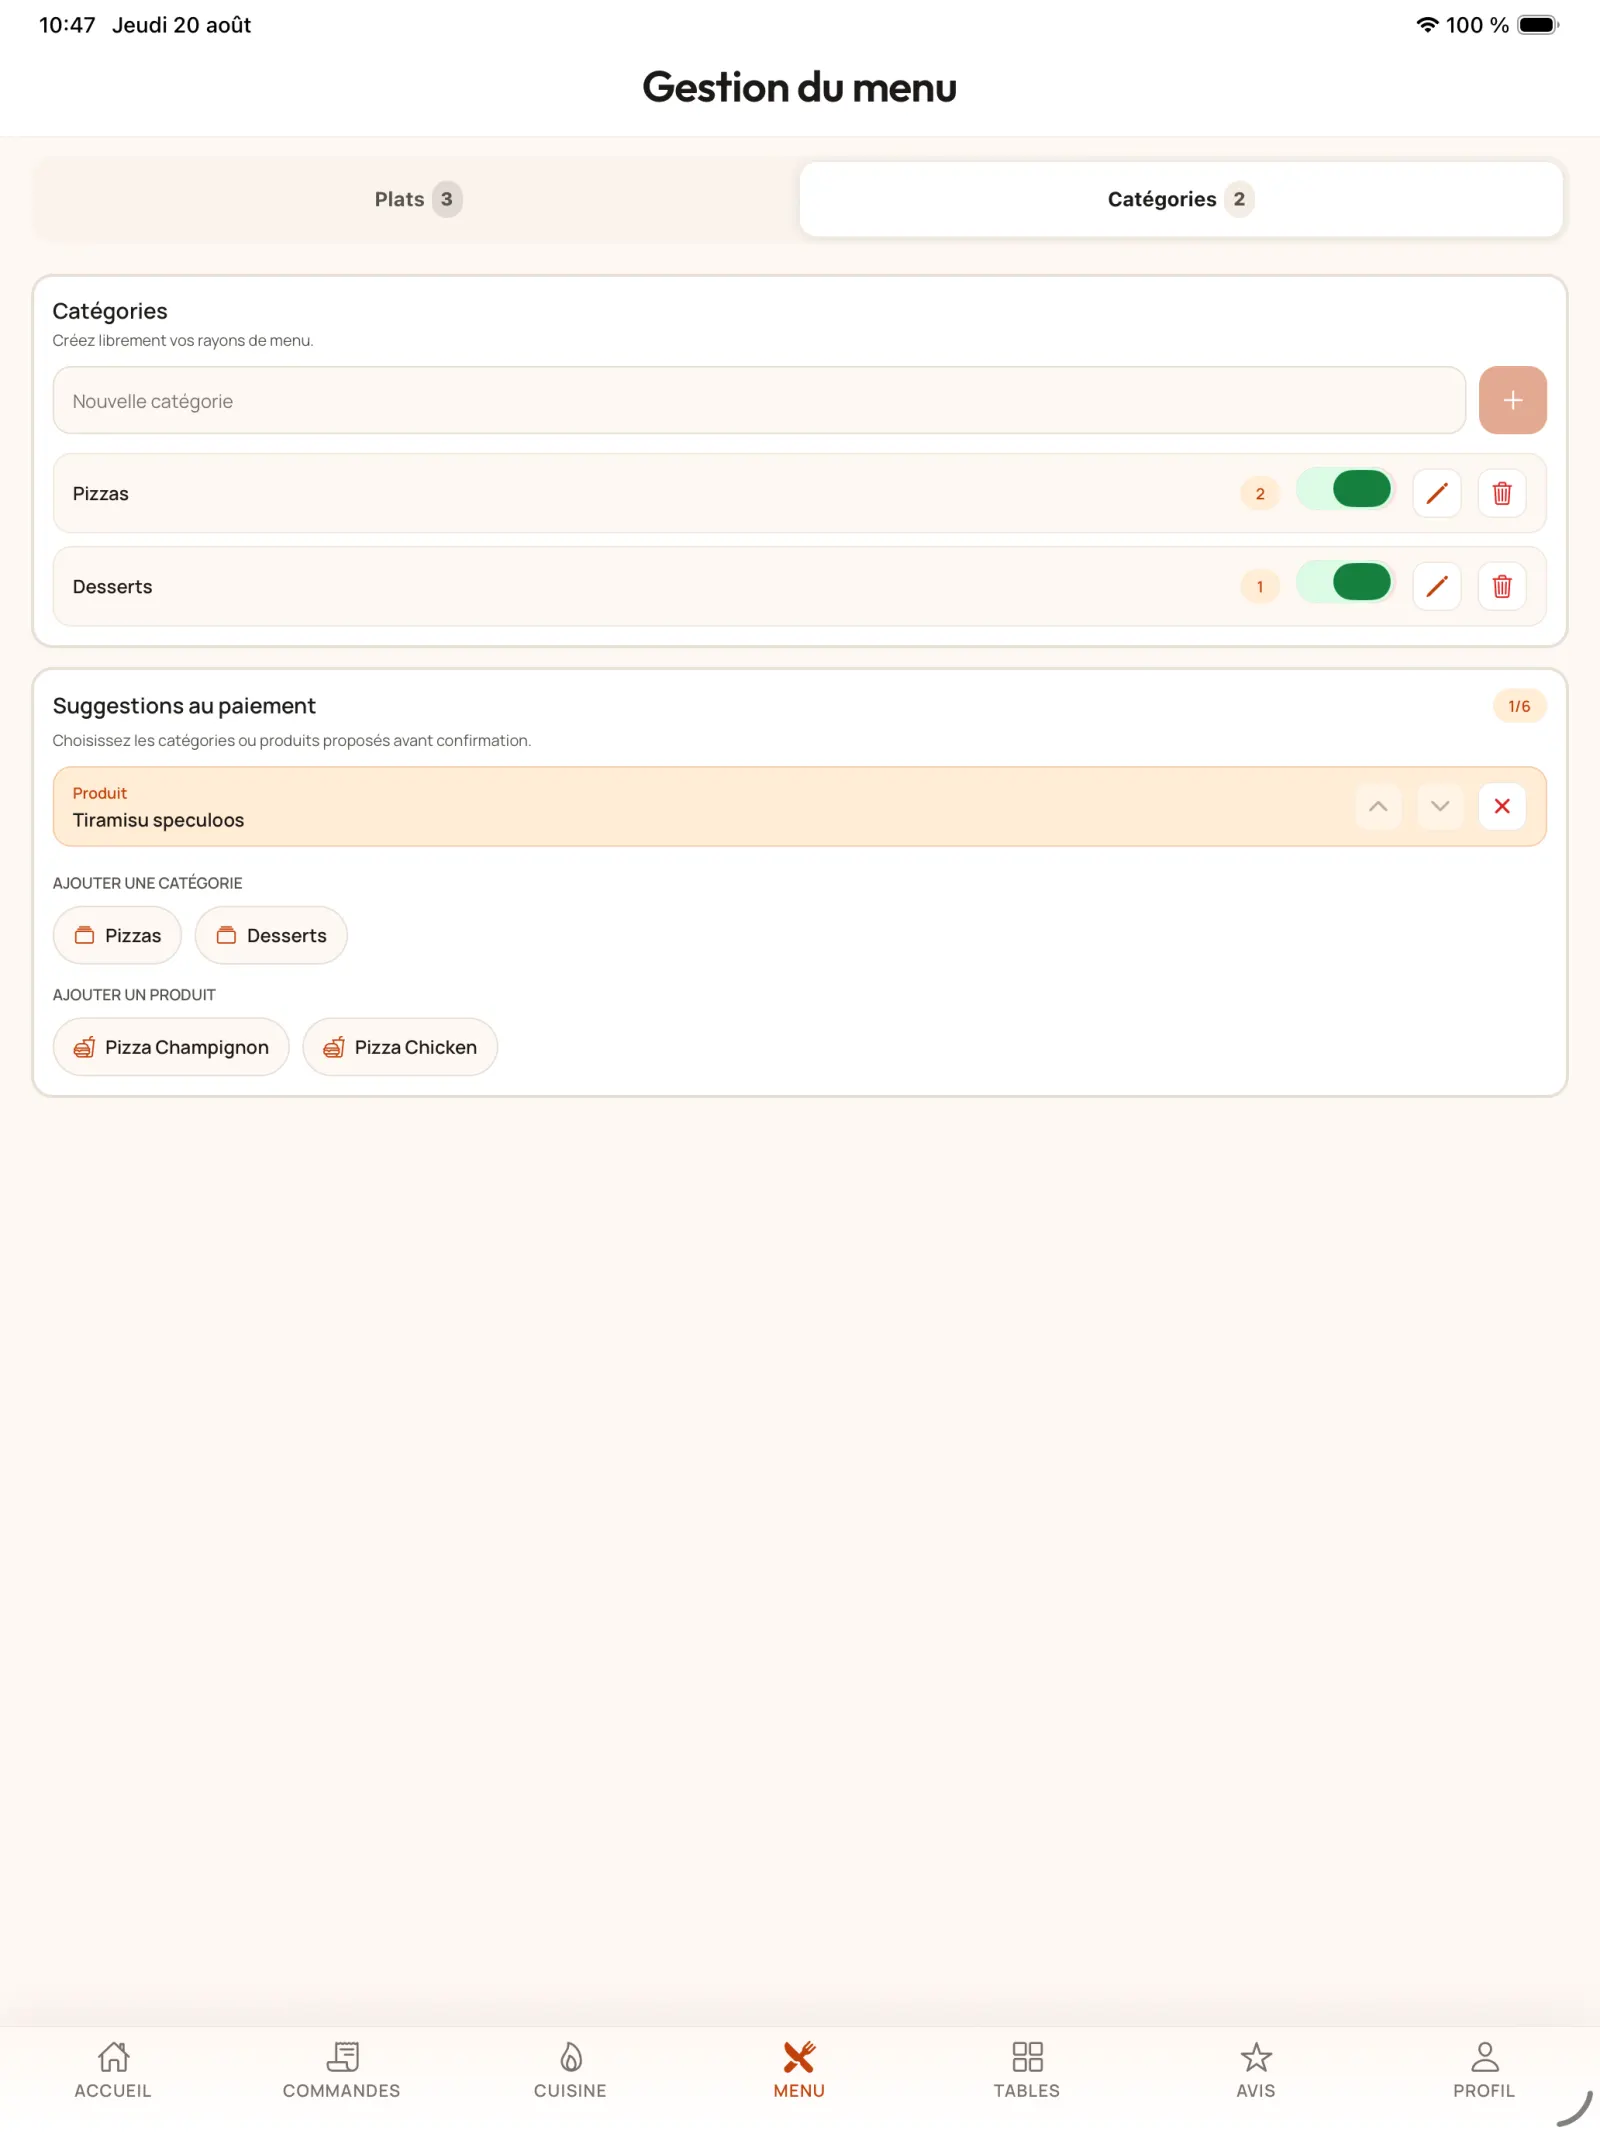
Step 18
Set up a checkout suggestion
In category management, choose a product or category to offer additionally when going to the shopping cart.
In practice. You can suggest an entire category — desserts, drinks or side dishes — or a specific product. In our example, tiramisu is offered after the pizzas: the customer immediately understands what addition to add to their meal.
Open full-size image